Miami cooking

What’s cooking in Miami – The Cuban Sandwich

blank

What’s cooking? World recipes

what is cooking - recipe Italy

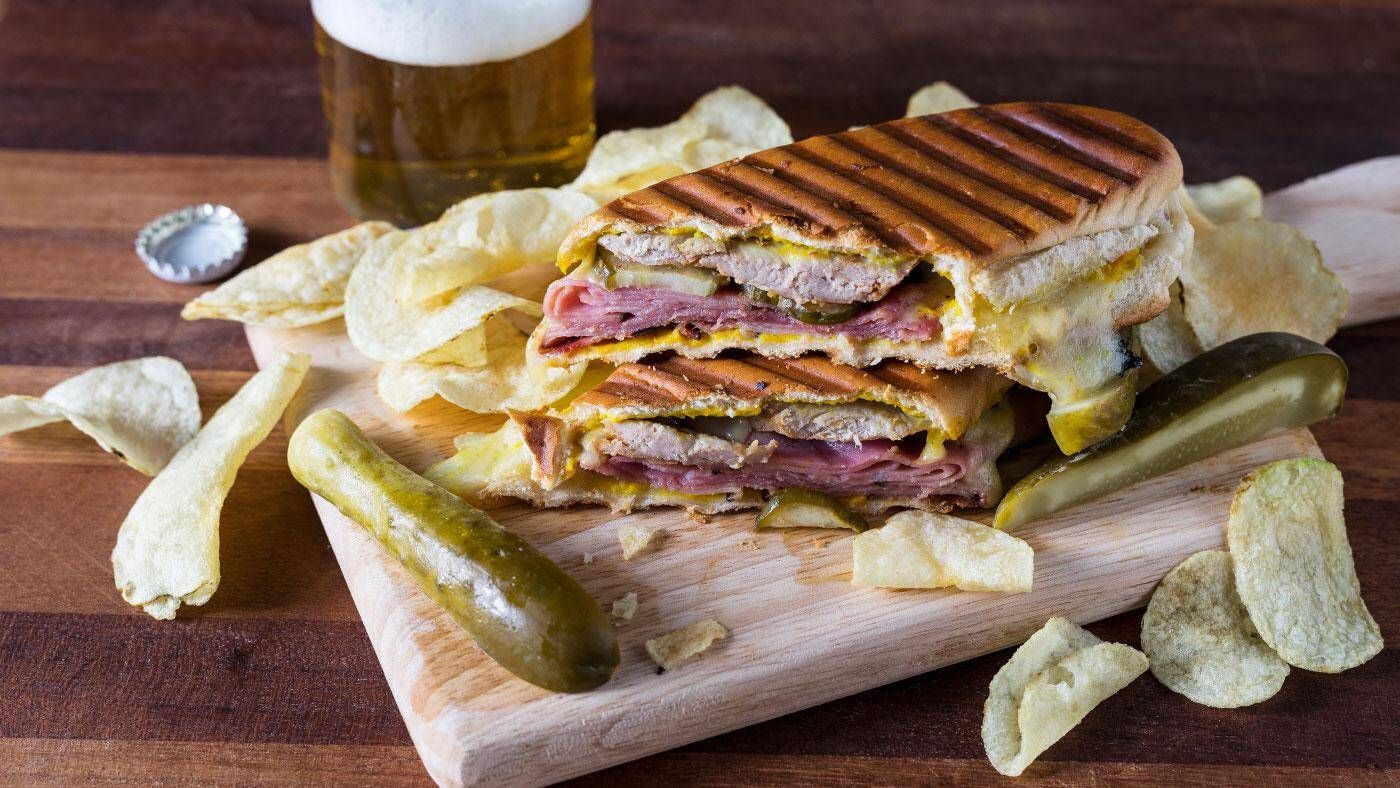
The best Cuban sandwich makers in Miami have elevated sandwich making to an art form. The larger restaurants station the sandwich maker in a prominent spot where everyone can enjoy the show. Armed with a long, thin, serrated knife, the sandwich maker expertly cuts the ham and pork, usually from a whole pork leg. Using the flat surface of the broad knife, he artfully arranges the layers of meat onto the sandwich.
The Cuban Sandwich
Glenn Lindgren: No one is certain exactly where and when the Cuban sandwich was invented. We do know that Cuban sandwiches (called “a sandwich mixto”) were common on cafeteria and restaurant menus in Cuba by the 1930s, and there is some evidence of them as early as the turn of the century.

Raúl Musibay: They were very popular with workers in Cuba’s sugar mills. People set up restaurants inside the mills and sold the sandwiches to the workers on their lunch breaks.

Jorge Castillo: In the Province of Oriente, the eastern part of Cuba, they eat a different version of the Cuban sandwich. It is exactly like the traditional Cuban sandwich, but the bread is rubbed with garlic first.

Glenn Lindgren: The Cuban is a sandwich with universal appeal because it’s a combination of ingredients that are almost universally loved. The Cubano is basically a grilled ham and cheese sandwich — a type of sandwich you’ll find in many cuisines from the simple grilled American cheese and white bread sandwich many Americans grew up with to the French croque-monsieur.

Jorge Castillo: How does such a simple sandwich create so much passion? The Cuban sandwich is nothing more than a loaf of Cuban bread, cut in half, buttered on both sides, and stuffed with dill pickles, roast pork, ham, and Swiss cheese — not exactly rocket science.

Raúl Musibay: There are a couple of variations on the Cuban sandwich worth noting: “Sandwich Cubano Especial ” with thinly sliced Serrano ham that adds a salty tang. Or one of my favorites, the Cuban sandwich with olive salad. I had that one many times in Cuba.

Cuban Sandwich (Cubano) Recipe
By Three Guys From Miami

Prep time: 5 minutes
Cook time: 5 minutes
Total time: 10 minutes
Yield: 4 sandwiches
The Cuban Sandwich (Cubano) is basically a grilled ham and cheese sandwich — Cuban style!

INGREDIENTS:

1 loaf Cuban bread
3 tablespoons butter
1 pound ham
1 pound Cuban pork (lechón asado)
1/2 pound Swiss cheese
15 slices dill pickles
OPTIONAL INGREDIENTS:

8 slices Serrano Ham (Jamon Serrano)
OR

1 tablespoon olive salad (giardiniera)

If you’ve never tried it please make sure to ask for it when you  travel to Miami

spotted in icuban.com


Travel Talks Platform

More about our Facebook Group

Join our Facebook Group

Travel platform to expand your travel knowledge, follow the latest destination news and participate in daily questions, like “Travel Trivia”, “Where in the World” and “Amazing Travel Facts”.

California cooking

What’s cooking in Los Angeles – French Dip Sandwich

blank

What’s cooking? World recipes

what is cooking - recipe Italy


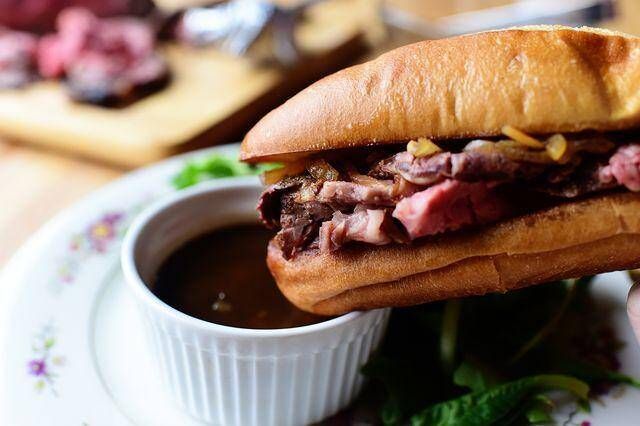
A French Dip Sandwich is a hot beef sandwich consisting of tender thin slices of beef layered a long white French roll that is dipped into a flavorful sauce made from the pan juices. American menus often describe the pan juice as “au jus (pronounced oh zhoo’).” Au jus is a French expression, which means “with broth” or “with juice.”

French Dip sandwiches have become a common menu item at a wide range of restaurants, sandwich shops, and fast food outlets.

History of French Dip Sandwich:

Phillippes Sign1918 – Although the French Dip Sandwich is not French, the inventor, Philippe Mathieu was. In 1918, Philippe owned the still existing delicatessen and sandwich shop called Philippe the Original in Los Angeles. It is considered one of Los Angeles’ oldest restaurant still in business today.

According to the story at the restaurant, Philippe was preparing a sandwich for a policeman and accidentally dropped the sliced French roll into the drippings of a roasting pan. The policeman liked the sandwich and came back the next day with some friends to order the sandwich dipped in the meat pan. From that day on, a new sandwich was born.


1951 – Because of the 101 Freeway construction in 1951, Philippe’s moved to its current location on Alameda across from Union Station. Not much has changed since – the saw dust on the floors, cafeteria style dining and the hot mustard are still the same.

Matt Weinstock, then a reporter for the Los Angeles Daily News wrote:

“. . . Philippe’s was something special. It had sawdust on the floor and cracks in the wall but you didn’t care. Y ou went there for the luscious French-dipped sandwich, the boiled eggs, the hot mustard, the potato salad, the cole slaw, the immense hunks of pie, the always hot mugs of coffee. You also woke up at night, maybe thousands of miles away, yearning for one of those sandwiches.”


Philippe’s is still in the location they were in 1951, at a machine shop with a hotel on the second floor. Today, Philippe’s “French Dipped Sandwich” is the specialty of the house and consists of either roast beef, roast pork, leg of lamb, turkey or ham served on a lightly textured, freshly baked French roll which has been dipped in he natural gravy of the roasts. Swiss, American, Monterey Jack or Blue cheese may be added.

Ingredients
French Dip Sandwich:
1 (4-pound) beef rib eye, sirloin, or tenderloin roast
1/2 cup black pepper, coarsely-ground
8 French rolls*

Dipping Sauce Ingredients
Beef juices from cooking pan
1 (10.5 ounce) can beef stock of beef broth
1/2 cup water
Salt and pepper to taste
Instructions
French Dip Sandwich Instructions:
Preheat oven to 425 degrees F.

Place beef roast onto a rack in a shallow baking pan; firmly press pepper onto roast. Bake, uncovered, 30 to 45 minutes or until a cooking thermometer, in the thickest part of roast, registers 135 degrees F. Remove from oven and transfer onto a cutting board; let stand 15 minute before carving; slice beef thinly.

Reserve the beef juices and pour into a medium saucepan. Prepare Dipping Sauce.

For each sandwich: Cut French rolls in half. Toast and butter each French roll. Layer about 1/2 pound of sliced beef on bottom slice of each roll; place remaining tops of rolls on top of the beef.

Slice sandwiches in half and serve on individual plates with a small bowl (1/4 cup) of hot Dipping Sauce.

Makes 8 sandwiches.

Dipping Sauce Instructions:
In a medium saucepan, add beef juices, beef broth, water, salt, and pepper; bring just to a boil. Turn off the heat, cover saucepan, and let site 10 minutes before serving.

If you’ve never tried it please make sure to ask for it when you  travel to Los Angeles

spotted in /whatscookingamerica.net


Travel Talks Platform

More about our Facebook Group

Join our Facebook Group

Travel platform to expand your travel knowledge, follow the latest destination news and participate in daily questions, like “Travel Trivia”, “Where in the World” and “Amazing Travel Facts”.

chicago cooking

What’s cooking in Chicago- Chicago Style Deep Dish Pizza

blank

What’s cooking? World recipes

what is cooking - recipe Italy

Chicago-Style Deep Dish Pizza

Did you ever wonder about the “pie” in pizza pie? This dish will make that connection clear for you. With its 1 1/2″ tall crust cradling distinct layers of cheese, sausage, and tomatoes, this is definitely a knife-and-fork pizza PIE. We like to bake this in a big, 14″ deep-dish pizza pan; it makes a spectacular presentation, right out of the oven. But if you don’t have a big pan, feel free to use two 9″ round cake pans.

Ingredients
Crust

4 cups (482g) King Arthur Unbleached All-Purpose Flour
3 tablespoons (35g) yellow cornmeal
1 3/4 teaspoons (11g) salt
2 3/4 teaspoons instant yeast
2 tablespoons (25g) olive oil
4 tablespoons (57g) butter, melted
2 tablespoons (25g) vegetable oil or salad oil
1 cup + 2 tablespoons (255g) lukewarm water
Filling

3/4 lb. mozzarella cheese, sliced
1 pound Italian sweet or hot sausage, cooked and sliced; or about 3 cups of the sautéed vegetables of your choice
28-ounce can plum tomatoes, lightly crushed; or 28-ounce can diced or chopped tomatoes
2 to 4 garlic cloves, peeled and minced, optional
1 tablespoon sugar, optional
1 to 2 teaspoons Pizza Seasoning or mixed dried Italian herbs (oregano, basil, rosemary), to taste
1 cup (113g) freshly grated Parmesan or Asiago cheese
2 tablespoons (25g) olive oil, to drizzle on top
Instructions
To make the crust: Weigh your flour; or measure it by gently spooning it into a cup, then sweeping off any excess. Mix flour with the rest of the dough ingredients, and knead — by hand, mixer, or bread machine — to make a smooth crust. This will take about 7 minutes at medium-low speed in a stand mixer.

Place the dough in a lightly oiled bowl or 8-cup measure (which makes it easy to track its rise), cover, and let rise till very puffy, about 60 minutes.

While the dough is rising, ready your 14″ deep-dish pizza pan. Grease it with non-stick vegetable oil spray, then pour in 3 to 4 tablespoons olive oil, tilting it to cover the bottom of the pan, and partway up the sides.

Stretch the dough to make as large a circle as you can. You can do this on a lightly oiled baking mat, if you choose; or simply stretch the dough in your hands.

Lay the dough in the pan, and stretch it towards the edges until it starts to shrink back. Cover, and let it rest for 15 minutes. Preheat the oven to 425°F while the dough rests.

Continue to stretch the dough to cover the bottom of the pan, then gently push it up the sides of the pan. The olive oil may ooze over the edge of the crust; that’s OK. Let the crust rest for another 15 minutes.

Bake the crust for 10 minutes, until it’s set and barely beginning to brown. While it’s baking, prepare the filling.

Drain the tomatoes thoroughly. Combine them with the Pizza Seasoning or herbs, and the garlic and sugar (if you’re using them). Add salt to taste; you probably won’t need any additional salt if you’ve used the Pizza Seasoning.

Cover the bottom of the crust with the sliced mozzarella, fanning it into the crust. Add the sausage (or sautéed vegetables), then the tomato mixture.

Sprinkle with the grated Parmesan, and drizzle with the olive oil.

Bake the pizza for about 25 minutes, or until the filling is bubbly and the topping is golden brown. Remove it from the oven, and carefully lift it out of the pan onto a rack. A giant spatula is a help here. Allow the pizza to cool for about 15 minutes (or longer, for less oozing) before cutting and serving.

Tips from our Bakers
For individual deep-dish pizzas: Grease the wells of an individual hamburger bun pan. Divide the risen dough into 12 equal pieces; if you have a scale, each piece will weigh about 2 1/2 ounces. Roll each piece into a tight ball, then cover six of them and transfer to the refrigerator. Allow the remaining six balls of dough to rest, covered, at room temperature for 20 minutes. Stretch an unrefrigerated dough ball to cover the bottom of a well, then push it up the sides of the pan. Repeat with the remaining dough. After a 15-minute rest, bake the individual crusts for 10 minutes until they’re set and barely beginning to brown. Fill, then bake the pizzas for another 20 to 25 minutes, until the filling is bubbly and the topping is golden brown. Repeat with the remaining (refrigerated) dough.
Deep-dish pizza has a long history in the city of Chicago, where it’s revered as a delicious native invention. The crust, based on a recipe whose supposed provenance is Chicago’s Pizzeria Uno, has an unusual flaky/tender texture, and great taste — courtesy of three types of fat: vegetable oil, olive oil, and butter. Also, the tiny bit of cornmeal adds subtle but delightful crunch.

If you’ve never tried it please make sure to ask for it when you  travel to Chicago

spotted in www.kingarthurbaking.com


Travel Talks Platform

More about our Facebook Group

Join our Facebook Group

Travel platform to expand your travel knowledge, follow the latest destination news and participate in daily questions, like “Travel Trivia”, “Where in the World” and “Amazing Travel Facts”.

india cooking

What’s cooking in NYC – Manhattan Clam Chowder

blank

What’s cooking? World recipes

what is cooking - recipe Italy

Manhattan clam chowder is most often recognized by its red color, coming from the use of tomatoes and tomato paste. The broth is much thinner than the thick New England version and while it also includes potatoes, most Manhattan-style chowders boast a variety of vegetables like carrots, celery, onion, and garlic for added flavor. The first recipe for “Manhattan Clam Chowder” was published in 1934 in a cookbook called Soups and Sauces by Virginia Elliott and Robert Jones. While the name “Manhattan” stuck, the soup has little to do with New York City’s most popular borough.

While it had its supporters, not everyone was a fan of the tomato-based twist on the original. In New York Cookbook, Molly O’Neill explains, “Manhattan clam chowder reverberated like an act of sabotage against the New England clam chowder tradition.” She went on to detail the outrage associated with the soup’s creation:

Manhattan clam chowder remained “a notable heresy.” In 1939 a Maine legislator introduced a bill outlawing the use of tomatoes in chowder. In 1940, Eleanor Early, lambasted the “terrible pink mixture” in her book New England Sampler. Manhattan clam chowder, she wrote, “is only a vegetable soup and not to be confused with New England Clam Chowder, nor spoken of in the same breath. Tomatoes and clams,” she wrote, “have no more affinity than ice cream and horseradish.”

Not to be left out, New Jersey has also created its own version, which is more similar to Manhattan clam chowder. It’s made with tomatoes, creamed asparagus, light cream, and bacon. It’s also seasoned with Old Bay spice, parsley, and celery powder.

Going further south to Florida, St. Augustine calls Minorcan clam chowder one of its signature dishes. This one is similar to Manhattan-style in that it’s tomato-based. However, Florida’s version includes one very unique ingredient: datil pepper. The pepper — varying in color from green to a yellowish orange — is indigenous to Cuba and was brought to Florida hundreds of years ago. It’s described as sweet, tart, and spicy, giving the soup it’s one-of-a-kind flavor. The name Minorcan refers to Florida settlers from the island of Minorca, Spain who created the hearty soup with local ingredients in their Mediterranean style.

There is also Rhode Island clam chowder, known for its clear broth and its use of quahogs, a type of clam defined by its larger size (they may weigh up to 3 pounds). In fact, the small state also has a red version of the famous soup. Unlike the Manhattan-style chowder, this one is not made with any actual tomatoes — it’s made with tomato purée— or any added vegetables.

In the Outer Banks of North Carolina, there’s a version dubbed Hatteras Island-style clam chowder — a broth-based soup that skips the cream and tomatoes. It’s commonly made with littleneck clams due to their small size and sweet flavor. The ingredients are cooked in clam juice diluted with water and brought to a boil to infuse the flavor of the clams into every bite. Classically, the dish only calls for salt and pepper as a seasoning.

There is also Cabo Clam Chowder, a South of the Border-inspired dish boasting bold Mexican flavors like chipotle. The recipe includes vegetables like onions, corns, jalapeños, and peppers, plus black beans, garlic, cilantro, cumin, and lime. Spicy flavors come from chipotle hot sauce and the dish is garnished with tortilla strips.

Ingredients
2 tablespoons butter
1 cup chopped onion
2/3 cup chopped celery
2 teaspoons minced green pepper
1 garlic clove, minced
2 cups hot water
1 cup cubed peeled potatoes
1 can (28 ounces) diced tomatoes, undrained
2 cans (6-1/2 ounces each) minced clams, undrained
1 teaspoon salt
1/2 teaspoon dried thyme
1/4 teaspoon pepper
Dash cayenne pepper
2 teaspoons minced fresh parsley

Directions
In a large saucepan, heat butter over low heat. Add onion, celery, green pepper and garlic; cook, stirring frequently, for 20 minutes. Add water and potatoes; bring to a boil. Reduce heat; simmer, covered, until potatoes are tender, about 15 minutes.
Add tomatoes, clams, salt, thyme, pepper and cayenne; heat through. Stir in parsley. Serve immediately.

If you’ve never tried it please make sure to ask for it when you  travel to New York

spotted in www.eater.com


Travel Talks Platform

More about our Facebook Group

Join our Facebook Group

Travel platform to expand your travel knowledge, follow the latest destination news and participate in daily questions, like “Travel Trivia”, “Where in the World” and “Amazing Travel Facts”.

india cooking

What’s cooking in India- Tandoori Chicken

blank

What’s cooking? World recipes

what is cooking - recipe Italy

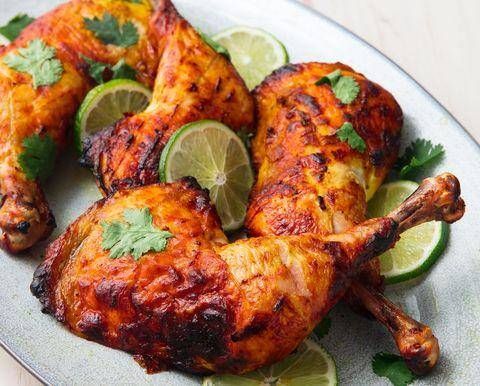
Tandoori chicken (तंदूरी चिकन) is a typical dish of traditional Indian cuisine, very popular in many parts of South Asia, based on chicken marinated in dahi (yoghurt), enriched with a typical blend of spices.

What is tandoori chicken?
As its name suggests, tandoori chicken is cooked in a tandoor after marinating for several hours.

The tandoor is a cylindrical clay oven with an underground base, where the coal that feeds it is placed, and at the top the opening where the food is lowered to be cooked. The oven reaches very high temperatures and was originally used in Mughal cuisine to bake bread, but its use has also been extended to cooking meat.

To bake breads, the bread is hung raw on the inner walls of the oven where it is baked in a few minutes, while the meat is threaded in pieces on vertical skewers and loses its juices which, dripping from top to bottom, leave the pieces from the bottom, in contact with the embers, so as not to dry out too much.

The tandoor oven is widespread throughout India but is typical of the Punjab region.

The tandoori cooking technique is widespread in India, the Middle East and Central Asia, while in the West it is easily savored in many restaurants around the world.

The meat, usually chicken, lamb or beef, is first marinated for a long time.

How to prepare tandoori chicken
The pieces of chicken, which can be either thighs, wings or sometimes cutlets, are previously marinated for several hours in dahi (yoghurt) and seasoned with tandoori masala, a popular spice blend.

The typical red color of tandoori chicken is obtained by using chili powder, Kashmir or cayenne pepper, while a large amount of turmeric can generate a red-orange color. Both colors can be found in many modern versions.

Tandoori chicken is traditionally cooked at high temperatures in a tandoor that can reach about 900 F (480°C), which is unthinkable for any domestic oven.

Since not everyone has a tandoor at home, there are at least two other alternatives: a traditional oven or a charcoal, electric or gas barbecue.

For cooking in a traditional standard oven, tandoori chicken can be cooked on the oven rack placed on a baking dish or using a spit or rotisserie. Skewers are also used for cooking on charcoal or other barbecues.

In a tandoor, the heat being very high, when the fat of the meat drips on the hot coals, it produces smoke.

The dahi marinade helps tenderize the meat. This marinade, combined with the high heat, is the soul of tandoori chicken. Like almost everything in Indian cuisine, it needs a bouquet of spices that give it very intense aromas.

In India and other countries in the region, such as Pakistan and Bangladesh, there are hundreds of such seasoning blends.

What many call curry is a generic name given by the colonizers both for these spice blends and for the dishes prepared with this immense variety of condiments.

Originally, the word referred to a plant native to India, curry, whose leaves frequently appear in these spices. The Indians often call these spice mixtures masala, garam masala being the best known type.

Ingredients
For the chicken marinade
750 g chicken (thighs, upper thighs, wings)
150 ml Greek yogurt (dahi)
1 teaspoon garlic paste
1 teaspoon ginger paste
1 teaspoon garam masala
1 teaspoon red chili powder (or red pepper flakes)
¼ teaspoon white pepper
1 teaspoon ground coriander
½ teaspoon mustard seeds
¼ teaspoon salt
½ teaspoon ground turmeric
1 teaspoon dried fenugreek leaves (kasuri methi)
2 tablespoons lemon juice
1½ tablespoon mustard oil (or vegetable oil)
To grill
1 tablespoon vegetable oil
For the color
1 teaspoon red chili powder
2 tablespoons melted ghee (or mustard oil)

Instructions

Marinade
In a large bowl, pour the dahi.
Then add the garlic and ginger pastes, garam masala, red chili powder, mustard seeds, salt, turmeric, kasuri methi, white pepper and ground coriander. Add the oil and lemon juice.
Mix the marinade, which should have a thick consistency.
Make deep slits on the chicken pieces and place them in the bowl.
Distribute the marinade over the chicken pieces, making sure to also soak the slits.
Cover and marinate in the refrigerator for at least 8 hours.
Cooking
Take the chicken out of the refrigerator 1 hour before cooking and leave it at room temperature.
Preheat the oven to 460 F (240˚C) for 25 minutes.
Line a baking sheet with aluminum foil to collect the drips.
Distribute 1 tablespoon of vegetable oil on a wire rack and place it on the baking sheet lined with aluminum foil.
Place the chicken pieces on the grill. Reserve the rest of the marinade.
Grill the chicken for 15 to 20 minutes.
Combine 1 teaspoon of chili powder and 2 tablespoons of ghee (or mustard oil) in a bowl.
After 15 minutes of broiling, drizzle the chicken with half of the reserved remaining marinade and brush the chicken with half the red chili ghee (or mustard oil).
Turn the chicken pieces over and brush them with the remaining marinade and the remaining red pepper ghee.
Grill another 6 to 10 minutes or until the chicken is cooked through. Adjust the cooking time according to the size of the chicken pieces.
For the last 5 minutes, move the aluminum foil lined baking sheet and wire rack to the highest rack to give the chicken a nicely roasted color.
Serve with onion rings, lemon and naan bread.

If you’ve never tried it please make sure to ask for it when you  travel to India

spotted in www.196flavors.com


Travel Talks Platform

More about our Facebook Group

Join our Facebook Group

Travel platform to expand your travel knowledge, follow the latest destination news and participate in daily questions, like “Travel Trivia”, “Where in the World” and “Amazing Travel Facts”.

vietnam cooking

What’s cooking in Vietnam – Pho

blank

What’s cooking? World recipes

what is cooking - recipe Italy

Pho soup is the essential Vietnamese soup that is now popular throughout the world.

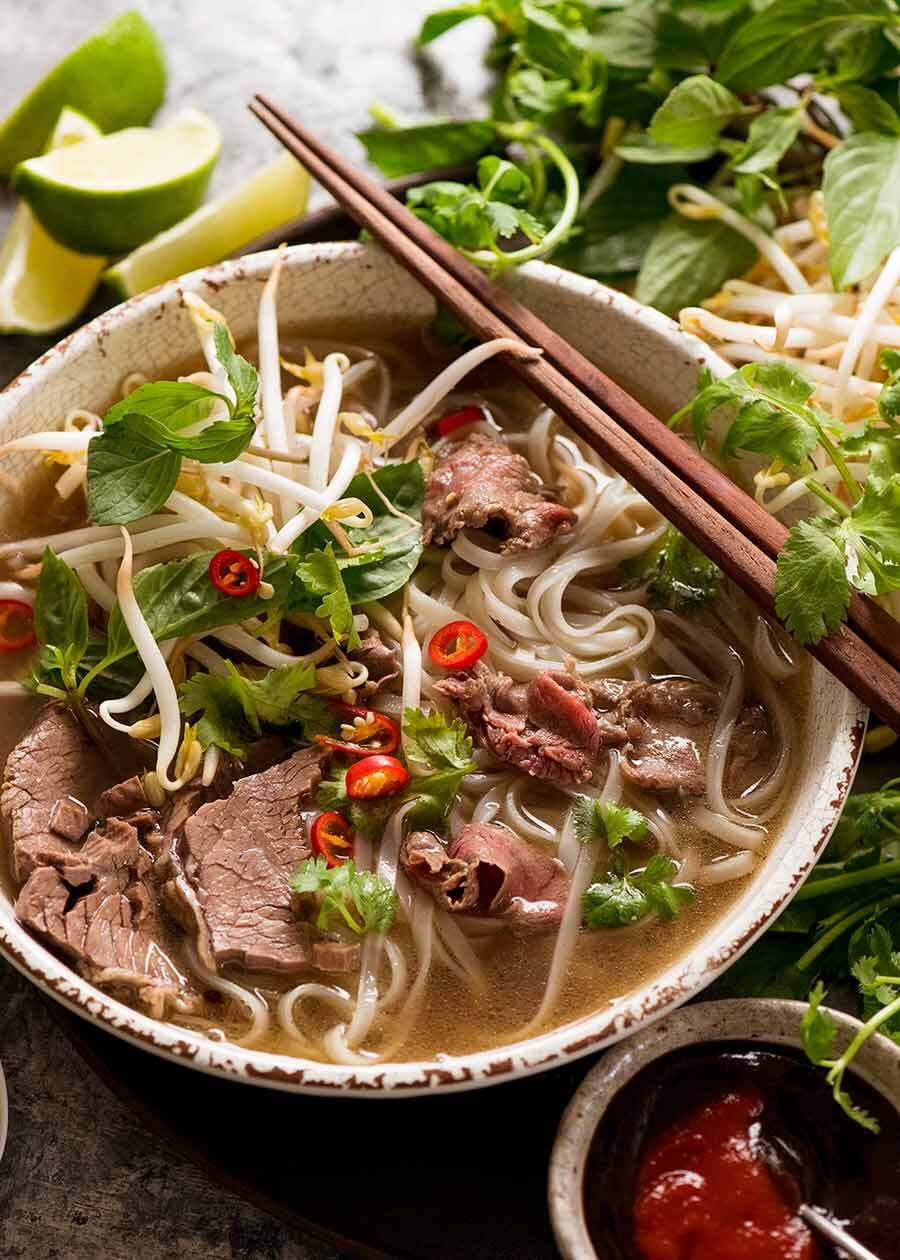
In simple terms, pho (pronounced “fuh”) is a beef noodle soup, but in reality it is much more exciting that that. Vietnamese Pho is packed full of delicious aromatics and the salty beef broth is to die for.

What is the origin of pho?
The popularity of pho has grown considerably over recent years in cities across the world. Pho is a relatively new dish as it was first documented around the early 1900s. There are several theories around how the soup originated, some experts believing that it is a French–Vietnamese fusion dish since beef was rarely eaten in Vietnam before the French colonized the country in the late 19th century. Other historians claim that it was Chinese immigrants that originally brought the dish to Hanoi to sell on the streets.

What are the variants?
There are differences between the Pho served up in the North and South of Vietnam. The traditional recipe featured here is typical of pho eaten in Hanoi, in the North of the country, where the beef bones are used to make the broth and more seasonings are used. In Ho Chi Minh City (formerly Saigon), in the South, the broth is often made with chicken and dry squid along with the beef bones and they often stir in hoisin to the finished dish.

How to make pho
The key to an authentic, flavorful pho is the beef broth. Left to simmer for three hours, the flavors and aromatics are allowed to develop to their fullest. The creation of the broth cannot be rushed.

The herbs and spices in Vietnamese pho soup are what really give this dish its fragrant identity. A collection of spices is used to flavor the beef broth and give it a subtle but complex depth of flavor. The herbs that the broth is poured over, lift the dish and give it that light freshness.

Traditional pho is made with a beef broth with thin slices of raw beef round (the beef slices are cooked when the hot broth is poured over them). Even until fairly recently, making pho using another type of meat was seen as sacrilege. Chicken pho has started to become more prevalent where a lighter chicken broth replaces the deeper beef flavors and strips of cooked chicken are added to the bowl.

Making a simpler vegetarian option is also possible, just be sure to pack flavor into the broth. Seafood variations are also popular. Vietnamese pho soup is not traditionally a spicy dish. Hot peppers can be used to garnish the dish, but these are of course optional for those who don’t like spicy food.

Ingredients
For the broth
500 g short ribs with bone
4 slices ox tail
2 marrow bones
3 scallions , cut in halves
1 whole star anise
1 whole nutmeg
1 stick cinnamon
5 whole cloves
5 pods cardamom
250 g daikon , julienned
For the toppings
200 g rice noodles (ideally bánh phở)
Soybean sprouts
10 scallions
½ bunch mint
½ bunch cilantro
½ bunch Thai basil
800 kg round (sirloin, or shank)
3 limes
2 hot peppers

Instructions
Heat a frying pan and roast the spices (star anise, nutmeg, cinnamon, clove, cardamom) for a few minutes to develop their aroma.
Place these spices in a tea ball or cheesecloth (tied with kitchen twine).
In a large pot, place the scallions, the ribs, the marrow bones, the ox tail slices and the spice tea ball.
Add the julienned daikon.
Cover with water and bring to a boil. Then, lower the heat. Cover to three quarters (do not close the lid completely) and simmer for 3 hours. If necessary, skim the fat as it is cooking.
At the end of cooking, filter the broth. Thinly slice the ribs and the ox tail and set aside.
Cook the rice vermicelli in a large volume of boiling salted water for 4 minutes. Drain and rinse with cold water and set aside.
Thinly slice the round (sirloin or beef shank) and set aside.
Rinse and drain the soybean sprouts. Rinse, dry and then roughly chop the herbs (mint, cilantro, Thai basil).
In individual bowls, place the ingredients in this order:
– rice noodles
– daikon
– slices of round (sirloin or shank)
– slices of short ribs
– slices of ox tail
– soybean sprouts
– herbs and thinly sliced scallions
Pour the hot broth into each bowl and serve immediately after adding the juice of half a lime and thinly sliced hot pepper (optional) in each bowl.
Mix the food for about thirty seconds using chopsticks and enjoy.
Notes
Tip: place the meat in the freezer for 30 minutes before slicing it. The meat is firmer, and it becomes easier to thinly slice.

If you’ve never tried it please make sure to ask for it when you  travel to Vietnam

spotted in www.196flavors.com


Travel Talks Platform

More about our Facebook Group

Join our Facebook Group

Travel platform to expand your travel knowledge, follow the latest destination news and participate in daily questions, like “Travel Trivia”, “Where in the World” and “Amazing Travel Facts”.

thailand cooking

What’s cooking in Thailand – Pad Thai

blank

What’s cooking? World recipes

what is cooking - recipe Italy


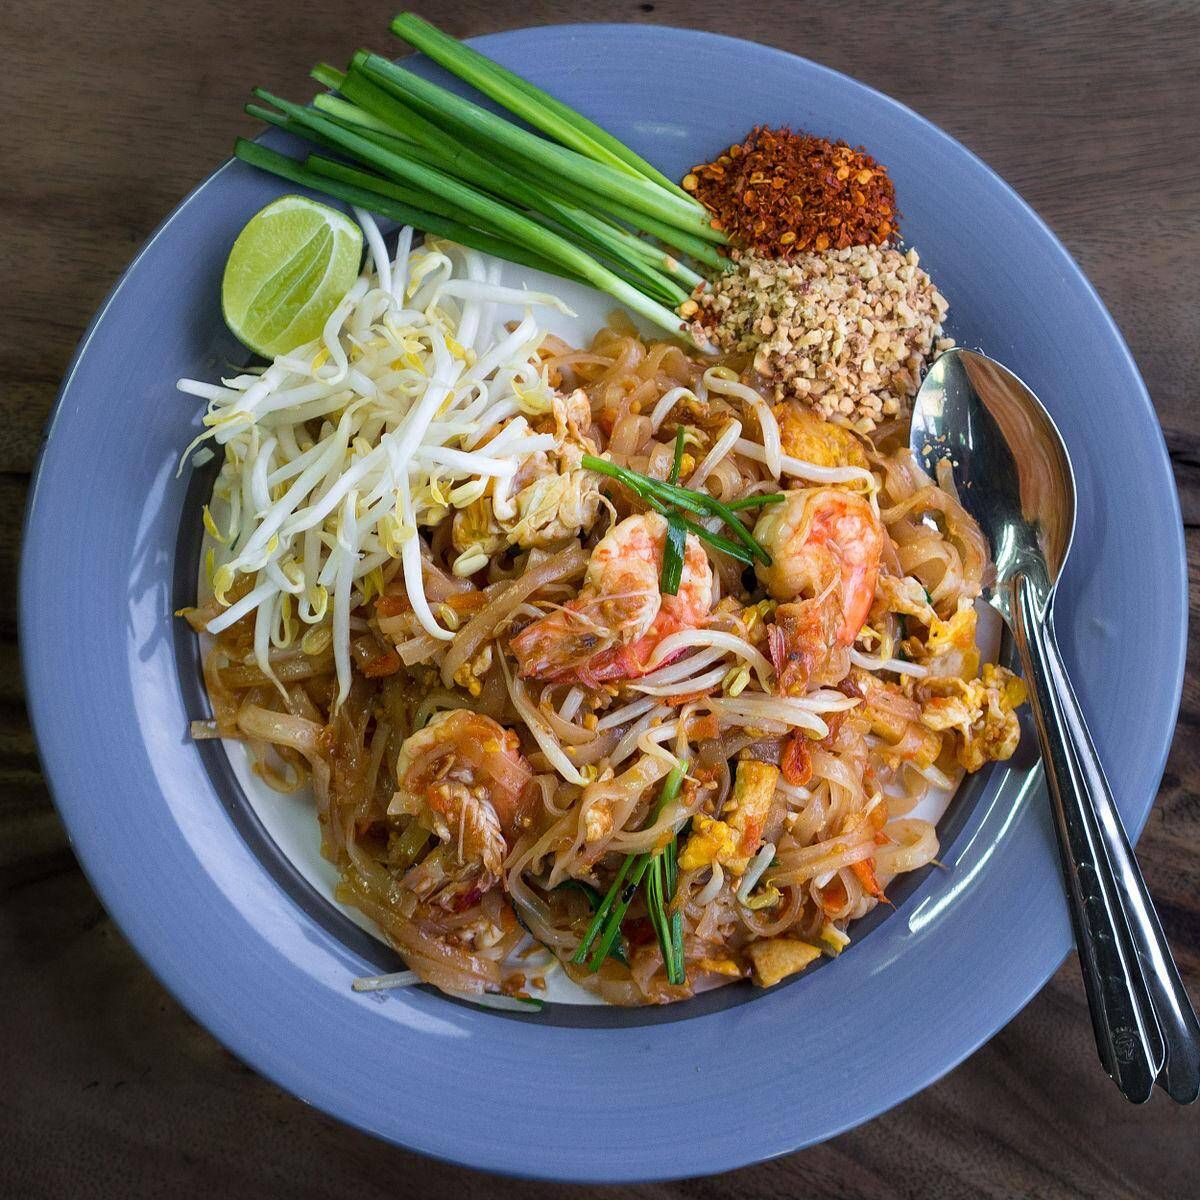
Pad Thai is Thailand’s national dish, a flavorful stir-fry (pad in Thai) dish consisting of rice noodles, tofu, dried shrimp, bean sprouts, and eggs. If it’s made with meat, chicken and pork are some of the most popular choices. The flavors are an intricate combination of sweet, sour, and salty, with a well-balanced contrast of textures.

Pad Thai is probably one of the most popular Thai dishes abroad. Its origins can be traced to a period of nationalism in the country, after the 1932 revolution that ended the absolute monarchy. There was a public contest to find a new national noodle dish, and the winner was a Pad Thai consisting of noodles, radish, sprouts, peanuts, and eggs.

Tender rice noodles are additionally flavored with sugar, tamarind, lime juice, vinegar, and fish sauce, and the dish is traditionally served with ground red chilis, white vinegar, sugar, fresh lime wedges, and fish sauce on the side, so each consumer can garnish the meal to their preference.

When making pad Thai, one thing to keep in mind is the careful balance of textures and flavors which are synonymous with the dish itself — the chewy and crunchy ingredients for texture, and the balance of sweet, sour, and salty, the three primary flavors of Thai cuisine. First, garlic, tofu, turnip, shallots, and radish are quickly stir-fried in a wok, after which pre-soaked rice noodles are to be incorporated. To make sure the noodle strands separate, they must be vigorously stirred, making sure they are cooked quickly and evenly. If the noodles are still hard, gradually add more water tablespoon by tablespoon. As soon as the noodles are soft and chewy, the sauce ingredients should be added — fish sauce, palm sugar, tamarind, and ground pepper. While stirring continuously, the next ingredient to be added is dried shrimp. Once all the ingredients have been well combined, check and adjust the seasoning. The noodles are then pushed aside to make room for the egg, which must be quickly scrambled into the noodles as soon as it is added. Bean sprouts and chopped chives are added at the end and stir-fried briefly so they preserve their color and crunchy texture. The finished meal is plated and sprinkled with crushed peanuts and cracked pepper. Chives, a wedge of lime or lemon, and the remaining bean sprouts are placed on top as a garnish, and additional condiments — fish sauce, sugar, chili pepper, and salt — should always be on hand.

In an attempt to promote and establish nationalism in Thailand after the revolution in 1932, the newly founded government held a public contest for a new national dish, and the winner of the contest was pad Thai. The government provided a basic recipe for the dish and encouraged vendors to sell the dish on the streets. Its popularity was aided by incessant government claims of its numerous hygienic and nutritious benefits. Early versions of pad thai originated in southern China, and the rice noodles and the cooking style certainly reflect this. Still, the signature flavors and the texture of the dish are definitely Thai. Moreover, the simplicity of the dish has made it Thailand’s signature street food and a lunchtime favorite worldwide.

Ingredients
2 servings
1/2 quartered banana flower, lengthwise
2 cups (200g) bean sprouts
5-6 cut Chinese chives – green parts
1/3 cup (25g) dried shrimp
1 egg
1 tbsp fish sauce
3 cloves chopped garlic
1/2 tsp ground dried chili pepper
ground pepper
1 lime
2 tbsp toasted and crushed peanuts
2 tbsp chopped preserved turnip
1 chopped shallots
2 tbsp sugar
1/2 packet Thai rice noodles
3 tbsp cooking oil
1/3 cup (65g) julienne pressed tofu

Preparation

Step 1/10Start by preparing the ingredients. Soak the noodles in lukewarm water for 15 minutes, making them flexible and not soft.

Step 2/10Toast and coarsely ground the peanuts. Chop up garlic, shallots, and preserved turnip. Remove the tips from the Chinese chives. From each cut off 6-inch (15 cm) pieces; the rest chop up into 1-inch (2.5 cm) pieces. Cut the banana flower into quarters lengthwise and rub the cuts with lime juice to prevent them from going dark.

Step 3/10You will need a wok or a large pan that will allow you to stir the ingredients easily. First, heat up the wok, but not extremely, and add the oil in.

Step 4/10Place the chopped shallots and garlic in, stir for half of a minute, and then add in the preserved turnip and tofu. Stir for a minute till the tofu has browned.

Step 5/10Next, add drained noodles and ground dried chili pepper. You will need to stir the ingredients to separate the strands so they cook quickly and easily. If you’ve soaked your noodles enough, you will see the noodles become soft and chewy. If the noodles are still hard and stiff, add some water tablespoon by tablespoon at a time.

Step 6/10When you see that the noodles are ready, add the ground chili pepper, fish sauce, sugar, and tamarind and stir them together, so they mix well.

Step 7/10Next, add in the dried shrimp while all the time you’re stirring the ingredients, so the flavors combine well together with the noodles. Taste to see if more seasoning is needed and if so, add them now. At this point, noodles should have a stronger flavor since they will later be diluted with more ingredients.

Step 8/10After this stage, when the noodles are chewy and cooked, make room for the egg by pushing the noodles to the side, then drop the egg in and scramble it into the noodles till the egg has cooked.

Step 9/10Next, add half of the bean sprouts and Chinese chives while at the same time quickly stirring everything so that the crunchiness of the bean sprouts and the green color of the Chinese chives is preserved.

Step 10/10Place on a plate and sprinkle with ground pepper and chopped peanuts. Decorate with the remaining bean sprouts, Chinese chives, and a wedge of lime and serve with condiments on the side; sugar, fish sauce, and dried ground pepper.

Cooking Tips
NOODLES
The main ingredient of the dish, and one which is always constant, the rice noodles, comes in two varieties: sen lek and sen chan. Because of their sturdier consistency, most cooks choose sen chan rice noodles. However, don’t be tempted to substitute those with fettuccini, rice vermicelli, or Chinese egg noodles.

MEAT
For the longest time, dried shrimp has been the main meat ingredient in the dish, but, with the rise of competitiveness between the vendors, fresh shrimp is nowadays most commonly used. Pork and chicken are also frequent in recipes today.

PEANUTS
Toast the peanuts before you add them to the dish to enhance the flavor and the texture.

SAUCE
There are two ways to incorporate the sauce into the dish. One way is to directly add the ingredients needed to make the sauce to the wok, and the other is to make the sauce on the side separately and then, once it’s time, add it to the other ingredients.

TECHNIQUE
If you’re new to pad Thai, when making the dish it’s good to have the rice noodles under soaked, as that way you have enough time to adjust the flavors of the dish.

VEGETARIAN OPTION
Using soy sauce instead of the fish sauce and leaving out the shrimp can turn pad Thai into a perfectly satisfying vegetarian meal.


If you’ve never tried it please make sure to ask for it when you  travel to Thailand

spotted in www.tasteatlas.com


Travel Talks Platform

More about our Facebook Group

Join our Facebook Group

Travel platform to expand your travel knowledge, follow the latest destination news and participate in daily questions, like “Travel Trivia”, “Where in the World” and “Amazing Travel Facts”.

south korea cooking

What’s cooking in South Korea – Classic Korean Bibimbap

blank

What’s cooking? World recipes

what is cooking - recipe Italy

Use this recipe to make arguably the best known Korean dish around the world: bibimbap. What makes this meal stand out? Not only is it a Korean classic, but it’s also delicious, gorgeous on the plate, and easily tweaked for different palates and spice levels. That means if you’re a typical American or Westerner who can’t handle foods that are extremely spicy, homemade bibimbap is the dish for you since you can easily lower the spice load.

The bottom line is that if you’re a true fan of Korean cuisine, you should know how to make this dish, or at least try it. Bibimbap is to Korean cuisine what apple pie is to American cuisine. To eat, add a small amount of oil and desired amount of gochujang to your finished bowl and mix everything together with a spoon.

Ingredients
2 cups medium-grain Korean rice (or Japanese rice)
1 large cucumber (sliced into thin strips)
1 1/2 cups spinach (parboiled and squeezed of excess water)
2 tablespoons sesame oil (divided)
2 teaspoons salt (divided)
Dash of sesame seeds
1 1/2 cups bean sprouts (parboiled and squeezed of excess water)
2 carrots (julienned)
4 shiitake mushrooms (rehydrated if dried and then sliced)
1 zucchini (sliced into thin strips)
1/2 pound meat, optional (both raw and cooked ground meat work well)
Optional: Fried egg
Serving suggestion: Gochujang (red pepper paste)

Gather the ingredients.

To begin, you’ll need to cook the rice in a rice cooker or on the stove. If you don’t want to use Korean or Japanese rice or are being health conscious, you can try brown rice instead. This will affect the flavor, of course.

Next, give the cucumber strips a saltwater bath for 20 minutes.

Drain the cucumber strips using a sieve.

Then, season spinach with 2 teaspoons sesame oil, 1 teaspoon salt, and a dash of sesame seeds.

Season bean sprouts with 2 teaspoons sesame oil, 1 teaspoon salt, and a dash of sesame seeds.

You’ll then need to sauté the carrots with a dash of salt.

Next, sauté the mushrooms with a dash of salt.

After that, sauté the zucchini with a dash of salt.

Then, place the cooked rice in a large bowl and arrange vegetables on top.

If desired, beef, egg, or both can be placed in the center.

Serve each helping with small bowls of gochugang and sesame oil.

If you’ve never tried it please make sure to ask for it when you  travel to South Korea

spotted in www.thespruceeats.com


Travel Talks Platform

More about our Facebook Group

Join our Facebook Group

Travel platform to expand your travel knowledge, follow the latest destination news and participate in daily questions, like “Travel Trivia”, “Where in the World” and “Amazing Travel Facts”.

singapore cooking

What’s cooking in Singapore – Chili Crab Recipe

blank

What’s cooking? World recipes

what is cooking - recipe Italy

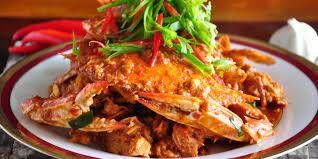
You can’t visit Singapore without rolling up your sleeves and diving into a plate of iconic chili crab, Singapore’s unofficial national dish. Crabs are served in a huge puddle of tomato sauce that’s sweet, spicy, tangy, and often thickened with egg. Though the shells have been pre-smashed, you’ve got to dig in and use whatever tool you can find, like chopsticks or fingers (tiny forks are not handed out here) to suck out every morsel of succulent, sweet crab. Bibs? I’ve never seen one. This is not a first date kind of a dish.

Chili crab was created in Singapore in the 1950s by Cher Yam Tian. After experimenting in her kitchen for family and friends, her crabs became a hit, and her family opened their first restaurant, Palm Beach Seafood. Since then, the dish has become a staple on menus across Singapore, from hawker centers to fancy restaurants.

In Singapore, dining out on chili crab can be expensive, and we all know you’re never going to get your fill on a meal of crab (except at the awesome Chinese buffets I’d frequent back in upstate New York where I’d stuff my face with snow crab legs). Cooking crab at home is totally the way to go. In Singapore, we use mud crabs from Sri Lanka, but any other crab should work, even soft-shell. Making this dish at home allows you to adjust the sweetness/heat level, and the rich seafood flavor that comes from cooking the crab right in the sauce is unparalleled to any.

Ingredients

1 tablespoon (8g) cornstarch
2 tablespoons (30g) water
7 tablespoons (104ml) peanut oil
2 to 3 shallots, minced (about 1/2 cup)
1 1/2-inch knob ginger, grated (about 2 tablespoons)
6 medium garlic cloves, minced (about 2 tablespoons)
4 Thai chiles, minced
2 whole Mud or Dungeness crabs (about 1 pound each), prepared (see note)
2 cups (500ml) homemade or store-bought low sodium chicken broth
1/4 cup (66g) tomato paste
1/2 cup (125ml) hot-sweet chili sauce (see note)
Salt, to taste
Sugar, to taste
1 large egg, beaten
1/2 cup thinly sliced green onions
1 cup fresh cilantro leaves
Rice or steamed buns to serve on side

Directions
In small bowl, whisk cornstarch with 2 tablespoons water; set aside. In large wok with lid (or Dutch oven), heat oil over medium heat until shimmering. Stir in shallots, ginger, garlic, and chiles. Cook and stir until fragrant, about 1 minute.

Add crab pieces and broth. Increase heat to medium high and bring to a boil. Cover loosely and gently boil (decrease heat if necessary), until crab has turned red and is nearly cooked through, about 6 minutes.

Remove cover and stir in tomato paste and chili sauce. Simmer 1 minute and season to taste with salt, sugar, or chili sauce. Stir in cornstarch mixture and bring to a boil to thicken.

Remove from heat and whisk in egg. Stir in green onions. Ladle into serving dish, sprinkle with cilantro and serve.

Special equipment
Large wok with lid or Dutch oven

Notes
Notes: Crabs need to be rinsed well, cleaned, and cut into pieces. Check out this video by Sydney Fish Market on how to do it, or get your fishmonger to do it for you. I keep the creamy part inside the top shell for the extra crab flavor it lends to the dish. If using a wok with a lid, make sure it’s supported well on the stove.

I used ABC brand hot chili sauce. I found that I didn’t need to adjust my seasoning, but you may want to adjust so it has a balance of sweet, salty, and heat from the chiles.

Take care when eating the sauce—it may have bits of shell!

If you’ve never tried it please make sure to ask for it when you  travel to Singapore

spotted in www.seriouseats.com


Travel Talks Platform

More about our Facebook Group

Join our Facebook Group

Travel platform to expand your travel knowledge, follow the latest destination news and participate in daily questions, like “Travel Trivia”, “Where in the World” and “Amazing Travel Facts”.

new zealand cooking

What’s cooking in New Zealand – Pie

blank

What’s cooking? World recipes

what is cooking - recipe Italy

ARE PIES THE NATIONAL DISH OF NEW ZEALAND?
Some would say it’s fush and chups. But we beg to differ. The tasty pie is widely regarded as a New Zealand culinary icon and staple. It comes pipin’ hot with crispy pastry and chock full of a glorious savoury filling. What’s not to love?

Well, what is it?
When New Zealanders talk about pies, a tantalising pastry delight, they’re not talking about the sweet ones in America like apple pies, pumpkin pies or pecan pies. They’re also not talking about their distant relatives, the Cornish pasties, which can be found in the UK. They’re talking about the humble meat pie, which has been part of New Zealand’s cuisine since the early British settlers, with the year 1863 being the earliest mention.

The inside scoop
The single-serve portion culinary delight is just the right size to hold in your hand and eat from a paper bag. The pie is essentially eaten like a sandwich and never eaten with a knife and fork (like some of our Aussie friends). This leaves your other hand free to hold a chilled bottle of L&P to wash down the pie. The best bit? This delicious treat is a hearty staple that is perfectly fine to eat at any time of the day. Be it breakfast, morning tea, lunch, afternoon tea, or dinner.

It is the perfect portable meal that can be found literally anywhere. Cafes, restaurants, dairys (corner store), bakeries, petrol stations, supermarkets… wherever you are, there is a pie waiting for you. How convenient!


The pie evolution
From modest beginnings, New Zealand’s classic meat pie has changed… for the better. Today, there isn’t just one flavour, there are many! You could say there is plenty of versatility when it comes to satisfying one’s cravings. The fillings include but are not limited to; steak, lamb, chicken, mince and cheese, seafood, bacon and egg, kumara (sweet potato) and feta and potato top. Even butter chicken.

The options are endless and it’s clear to see why the humble Kiwi pie is consistently voted as New Zealand’s favourite comfort food.

New Zealand-Style Beef & Cheddar Pies

Ingredients
1 tablespoon olive oil
1 small onion, finely diced
1 clove garlic, minced
1 pound lean ground beef
1/2 teaspoon salt
3 tablespoons flour
1 1/2 cups beef stock
1 teaspoon Worcestershire sauce
2 450-gram packages pre-rolled butter puff-pastry, thawed in the fridge
3/4 cup (100g) aged white cheddar cheese, finely diced
1 egg

Directions
Heat oil in a large frying pan over medium heat. Add onion, cook, stirring often until tender and starting to brown on the edges, about 2-3 minutes. Add garlic, cook 1 minute. Add ground beef to pan and cook, breaking up with a wooden spoon, until no pink remains, about 5-6 minutes.
Stir in salt and a few cracks of black pepper. Sprinkle flour over beef and cook, 1 minute. Pour in beef stock and Worcestershire sauce. Bring to a boil, scraping all the brown bits off the bottom of the pan. Reduce heat to medium-low and let simmer until gravy has reduced and thickened, about 6-8 minutes.
Scrape beef mixture into a bowl and let cool to room temperature. Cover and refrigerate until completely chilled, this will take at least 1-2 hours. The filling can easily be made the day before.
Remove puff pastry from fridge. Roll sheets to 1/8-inch thick. Cut puff pastry into twelve 4-inch rounds and twelve 3-inch rounds. Pre-mark where you will cut each round as you will have just enough dough for all the rounds. Place onto a parchment-lined baking sheet and let chill in the fridge for 30 minutes.
Lightly grease a 12-cup muffin tin. Place larger puff pastry rounds in the base of each muffin tin, pressing along the sides so they are flush with the bottom and sides of the tin. The dough should slightly overlap the rims, stretch dough slightly if needed.
Remove the chilled beef mixture from the fridge. Stir in the diced cheese. Evenly divide filling between each pie, packing them right to the top.
Whisk the egg in a bowl. Brush the edges of the pastry overlap with the egg mixture and top with smaller pastry rounds. Press around the edges of the pies using the tines of a fork to create a seal. Cut a small slit into the top of each pie. Use the remaining egg to brush the tops of each pie. Place the tray in the freezer to chill for 15 mins before baking.
While the pies are chilling preheat the oven to 425° F. Bake pies for 20-25 minutes, until golden brown. Let cool 10 minutes before serving.

If you’ve never tried it please make sure to ask for it when you  travel to New Zealand

spotted in www.gourmettraveller.com.au


Travel Talks Platform

More about our Facebook Group

Join our Facebook Group

Travel platform to expand your travel knowledge, follow the latest destination news and participate in daily questions, like “Travel Trivia”, “Where in the World” and “Amazing Travel Facts”.

What’s cooking in Kazakhstan – BESHBARMAK

blank

What’s cooking? World recipes

what is cooking - recipe Italy

Kazakh Beshbarmak basically means “five fingers” in Kazakhstan. It is probably the most popular dish in the land. The name five fingers is what is required to enjoy it, all five of them. Typically this dish is made with either horse meat or mutton. Beef is sometimes used but the others are much more common. In fact horse meat is so common in Kazakhstan that Olympians had to beg the Olympic committee to allow them to bring it the games so that they could maintain their normal diet. Needless to say, you can certainly enjoy this dish made with beef or lamb and be authentic. This dish is almost always served on a large platter to be enjoyed by guests on a Darsakstan (either a low table or clear cloth over a rug, on the floor) . Be sure to use all five fingers, it is a real treat and fun to do. This is also almost always served with a bowl of the broth on the side called shorpa. See https://www.internationalcuisine.com/kazakh-shorpa/ for the the proper way to serve it. Also if you don’t have the time to make the noodles from scratch, you can use lasagna noodles as a fine substitute. A delicious main dish from Kazakhstan… Enjoy!

Kazakh Beshbarmak (Boiled meat with noodles)

Ingredients
2 1/2 lbs. lamb or beef with bone
1 large onion peeled and sliced into rings divided
1 bay leaf
ground pepper
Water to cover
For the noodles:
2 eggs
3/4 to 1 cup water
1/2 teaspoon salt
plain flour – about 600 grams
or you can use lasagna noodles as a quick and easy alternative to making the noodles from scratch.
Instructions
Put your meat and 1/2 the onion in a deep enough dish to cover it with cold water leaving enough space on the top so that it doesn’t boil over.
Bring to the boil, constantly removing the foam, Reduce heat to simmer when it starts to boil. Cover it.
Let it cook for about 2 1/2 hours or until the meat is tender and falling off the bone.
Meanwhile, prepare your noodle dough.
In a bowl mix the sifted flour (300-400 g), the eggs (whisk the eggs before you add into flour), add salt and pour water until a dough is formed.
Knead pastry, adding flour or water as needed.
Knead the dough well, wrap in plastic wrap and leave for 20-30 minutes.
Sprinkle the work top with sifted flour and divide your dough into a few small balls
Then keeping the worktop lightly covered with flour roll each piece of pastry into a fairly thin layer.
Keep sprinkling with flour so that it doesn’t stick to your hands or work surface.
Cut into squares (10x10cm). Leave them on a worktop lightly covered with flour. The pieces should not touch or they will stick together. By the time you are ready to cook the noodles it should be dry a bit.
minutes before your meat is ready, add the other half of the onion (cut in ring shapes), salt and pepper to taste, into your stock.
Remove the meat and bones, separate as you will only serve the tender cooked meat.
Bring the stock to a boil for about 7 or so minutes.
Now cook the noodles in batches in the same stock for about 7-8 minutes. Sieve them out on to the big plate leaving the space in the center for meat. Then add your meat chopped in bite size pieces and put it in the center of the dish. Pour some broth over the meat.
Sprinkle some chives and parsley to garnish over the top.
Strain the broth and serve in bowls as shorpa alongside the platter of Beshbarmak
Beshbarmak is served.

If you’ve never tried it please make sure to ask for it when you travel to kazaksthan

spotted in www.internationalcuisine.com


Travel Talks Platform

More about our Facebook Group

Join our Facebook Group

Travel platform to expand your travel knowledge, follow the latest destination news and participate in daily questions, like “Travel Trivia”, “Where in the World” and “Amazing Travel Facts”.

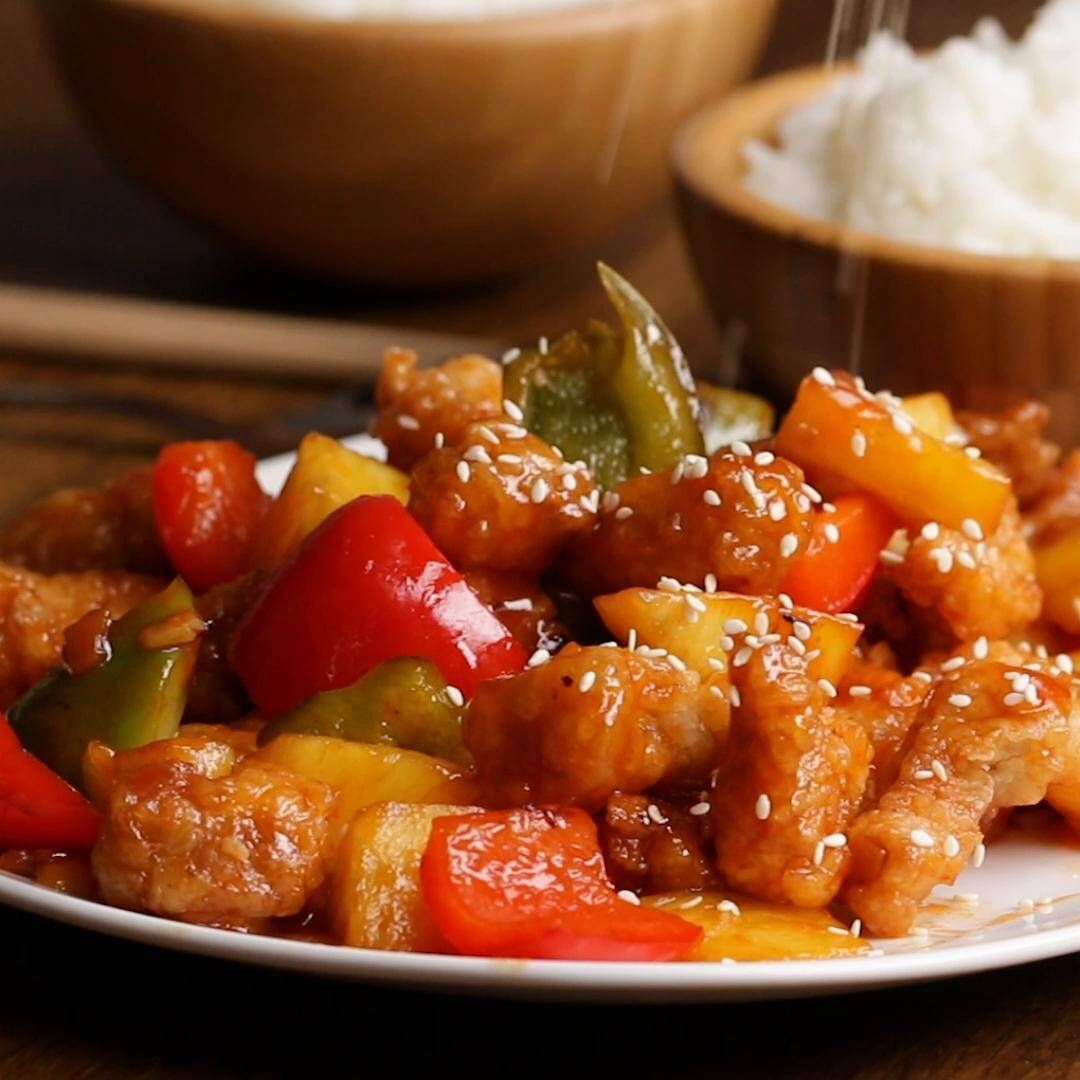
What’s cooking in Hong Kong – Sweet and Sour Pork

blank

What’s cooking? World recipes

what is cooking - recipe Italy


If you’ve never tried it please make sure to ask for it when you travel to Hong Kong

spotted in www.chinahighlights.com


Travel Talks Platform

More about our Facebook Group

Join our Facebook Group

Travel platform to expand your travel knowledge, follow the latest destination news and participate in daily questions, like “Travel Trivia”, “Where in the World” and “Amazing Travel Facts”.

What’s cooking in China – Fried Rice

blank

What’s cooking? World recipes

what is cooking - recipe Italy

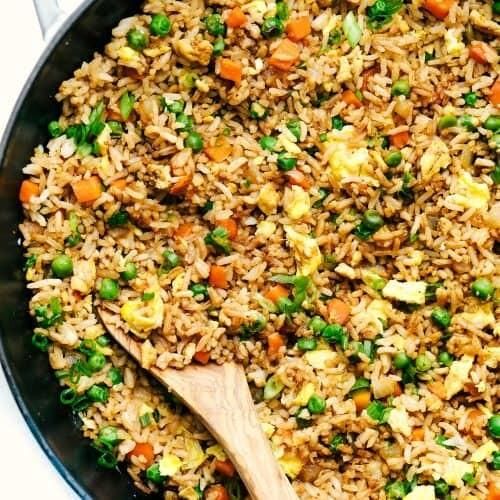
The earliest record of fried rice is found in the Sui dynasty (589–618 CE). Though the stir-frying technique used for fried rice was recorded in a much earlier period, it was only in the late Ming dynasty (1368–1644 CE) that the technique became widely popular.

Fried rice is believed to have started as a way to accommodate leftovers. Traditionally, Southern Chinese prefer their rice polished and plain, as a base staple to eat with meat and vegetables. The vegetables, meat and rice leftovers from the day before—which have passed their prime but are still good to consume, and too good to be fed to animals—are seasoned with soy sauce, lard and garlic, and stir-fried, making a hot meal.

The basic elements of Chinese fried rice include rice, meat and vegetables, soy sauce and garlic. A number of fried rice recipes have been developed in China, such as Yangzhou and Sichuan fried rice. Leftover cooked rice among the Cantonese is commonly made into fried rice, prepared with chopped vegetables and meat. It is believed[by whom?] that the basic stir-fried technique to cook fried rice, which required Chinese wok, spread from Southern China to other rice farming cultures in East and Southeast Asia.

Ingredients and preparation
File:Fried Rice In China.webm
Cooking Chinese fried rice video for a Western audience
The basic elements of Chinese fried rice are cooked rice—preferably leftovers from the previous day, meat and vegetables—possibly also leftovers, mixed with egg, soy sauce and garlic for flavour and seasoning, also cooking oil for greasing; either using lard, vegetable oil or sesame oil. The oil and soy sauce grease and coat the rice grains, thus preventing them from burning and sticking to the cooking vessel. Sometimes chopped scallion, ginger, chili pepper and mushroom, also diced processed pork are added into the mixture. All ingredients are stir-fried on a strong fire using a Chinese wok cooking vessel, and the rice is turned, stirred and agitated using a spatula to evenly cook the rice and distribute the seasoning.

INGREDIENTS
Nutrition
3⁄4cup finely chopped onion
2 1⁄2 tablespoons oil
1egg, lightly beaten (or more eggs if you like)
3drops soy sauce
3drops sesame oil
8ounces cooked lean boneless pork or 8 ounces chicken, chopped
1⁄2cup finely chopped carrot (very small)
1⁄2cup frozen peas, thawed
4cups cold cooked rice, grains separated (preferably medium grain)
4green onions, chopped
2cups bean sprouts
2tablespoons light soy sauce (add more if you like)

DIRECTIONS
Heat 1 tbsp oil in wok; add chopped onions and stir-fry until onions turn a nice brown color, about 8-10 minutes; remove from wok.
Allow wok to cool slightly.
Mix egg with 3 drops of soy and 3 drops of sesame oil; set aside.
Add 1/2 tbsp oil to wok, swirling to coat surfaces; add egg mixture; working quickly, swirl egg until egg sets against wok; when egg puffs, flip egg and cook other side briefly; remove from wok, and chop into small pieces.
Heat 1 tbsp oil in wok; add selected meat to wok, along with carrots, peas, and cooked onion; stir-fry for 2 minutes.
Add rice, green onions, and bean sprouts, tossing to mix well; stir-fry for 3 minutes.
Add 2 tbsp of light soy sauce and chopped egg to rice mixture and fold in; stir-fry for 1 minute more; serve.
Set out additional soy sauce on the table, if desired.

If you’ve never tried it please make sure to ask for it when you travel to China

spotted in www.food.com


Travel Talks Platform

More about our Facebook Group

Join our Facebook Group

Travel platform to expand your travel knowledge, follow the latest destination news and participate in daily questions, like “Travel Trivia”, “Where in the World” and “Amazing Travel Facts”.

cambodia cooking

What’s cooking in Cambodia – Samlor Korko

blank

What’s cooking? World recipes

what is cooking - recipe Italy

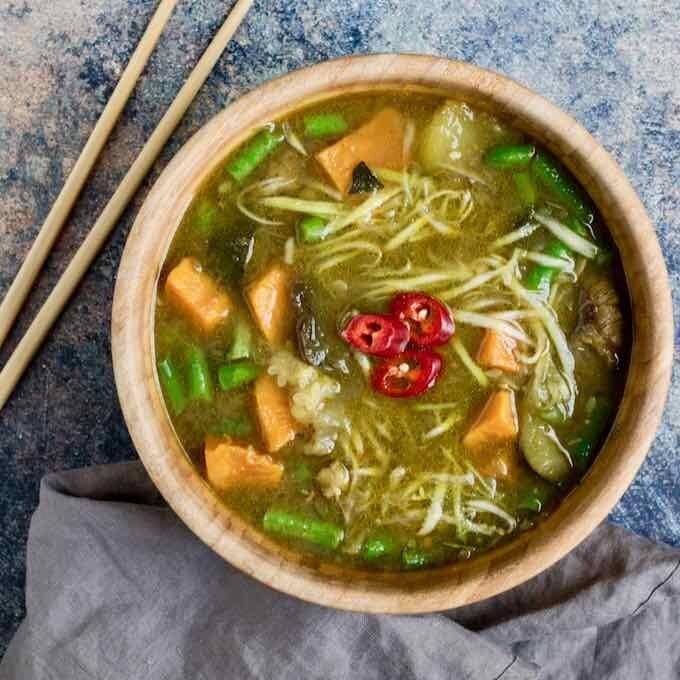
Samlor Korko is the most popular of Cambodian food dishes. In English, it is means stirring soup. Actually, it is a special vegetables soup with many greenness leaves. Samlor Korko served for the King’s food for long time. The ingredients of this special soup were nearly hundreds of vegetables and fruits. Samlor Korko is the healthiest food because it contains variety of vegetables, green leaves and some yellowness vegetables and fruits, which are riches of multivitamin. Truly, everyone are able to add meat if you prefer. The suitable meats are fish, chicken or mixed pork meat. The following I will share any experience for cooking Samlor Korko. I hope all of you enjoy.

A. Ingredients:
1. Half cup Khmer kreung
2. tablespoon fish paste
3. 3 tablespoons of pa-ulr (rice grains fried and pounded)
4. Fish flesh, cleaned and sliced.
5. 200g of chicken meat
6. Vegetables (pumpkin, green papaya, green banana, green jack fruit, long bean, eggplant, Khmer eggplant, chili leaf, bitter gourd leaf)
7. 1 tablespoons of palm sugar
8. 3 tablespoons of fish sauce

B. Preparation:
1. First of all, put an iron pot on a moderate heat; then add chicken when pan is hot enough.
2. Add the Khmer Kroeung and prohok into an iron hot pot with chicken, mix it well with together.
3. Then add the fish flesh, palm sugar and fish sauce. Stir for about 3 minutes; add all the vegetables except green leafy.
4. Mix everything in the iron pot about 3 minutes;
then add boiling water into the iron pot, and then cook it with moderate heat until the vegetables are cooked.
5. Finally, Add the green leafy vegetables and adjust the taste. Samlor Korko is ready to serve.

If you’ve never tried it please make sure to ask for it when you travel to Cambodia

spotted in wa-shoku.info/


Travel Talks Platform

More about our Facebook Group

Join our Facebook Group

Travel platform to expand your travel knowledge, follow the latest destination news and participate in daily questions, like “Travel Trivia”, “Where in the World” and “Amazing Travel Facts”.

bali cooking

What’s cooking in Bali – Balinese chicken satay

blank

What’s cooking? World recipes

what is cooking - recipe Italy

You might have had chicken satay before, but trust us, it won’t have tasted as good as this! This Balinese chicken satay with peanut sauce infuses the meat with lots of traditional Indonesian flavours including garlic, kaffir lime and kecap manis, a type of soy sauce. Served with a creamy peanut dip, this is a great addition to any BBQ or family dinner spread.

Ingredients
For The Marinade:
2 cloves of garlic, crushed
1tsp soy sauce
1tbsp kecap manis (Indonesian soy sauce)
3 kaffir lime leaves, fresh or dried, finely shredded
6 skinned, boned chicken thighs, cut into 2cm (3⁄4in) squares
For The Peanut Sauce:
2tbsp veg oil
3 shallots or 1 onion, peeled and finely chopped
1 red bird’s eye chilli, thinly sliced or 1⁄2-1tsp dried chilli flakes
1tbsp tomato purée
1⁄2tsp shrimp paste
1tbsp palm sugar or muscovado sugar
165ml can coconut cream
100g roasted peanuts, finely chopped
2tsp kecap manis
Juice of 1 lime
You Will Need:
12 bamboo skewers soaked in cold water for at least 30 mins
Method
To make the sauce, heat the oil in a small pan over a low heat. Add shallots, or onion, and fry gently until soft and lightly browned. Take out half the mixture and set aside for the marinade. Add the chilli, tomato purée and shrimp paste to the pan and cook for 2 mins. Stir in the sugar and coconut cream, and simmer for 2 mins to reduce and thicken it. Add the nuts with the kecap manis and lime juice. Season with a little salt. It should be sweet, sour, salty and spicy. Cool.

To make the marinade, stir the garlic, soy sauces, 2tsp coarsely ground black pepper and lime leaves into the cooked shallot with 1tbsp oil. Add the chicken and mix well. Leave to marinate for 10 mins or longer.

Thread 5-6 pieces of meat on to each skewer. Brush the sticks lightly with more oil. Cook on a griddle, BBQ or under a hot grill for 5-7 mins, turning once until cooked through. Serve hot with the peanut sauce.

Top tip for making Balinese chicken satay with peanut sauce
Soaking skewers in cold water before cooking prevents them from burning.

If you’ve never tried it please make sure to ask for it when you travel to Bali

spotted in www.bbcgoodfood.com


Travel Talks Platform

More about our Facebook Group

Join our Facebook Group

Travel platform to expand your travel knowledge, follow the latest destination news and participate in daily questions, like “Travel Trivia”, “Where in the World” and “Amazing Travel Facts”.

Azerbaijan cooking

What’s cooking in Azerbaijan – Plov

blank

What’s cooking? World recipes

what is cooking - recipe Italy

Plov is probably one of the national dishes of Azerbaijan.

What is plov?
Plov or aş (ash) in Azeri, is what is referred to as pilaf in a number of other countries.
Plov is cooked for guests to show respect and sympathy and also during special occasions like weddings, birthdays and other important family events, such as a farewell meal before a long journey. The dish is a very important part of a traditional Azeri wedding. Dancers in national costume typically set the plov alight and present the flaming dish to the bride and the groom in a ceremony that is often accompanied by big fire sparklers. The flame refers to the couple’s future life, and signifies success, friendship and warm family feelings. The rice represents wealth.

What are the versions of plov?
It is often said that there are more than 40 types of plov in Azerbaijan. The reality is that there are probably way more as each family will have its own version of each recipe.

The most famous recipes of plov include kourma plov with lamb and onion,
chilov plov with bean and fish, sabzi qovurma plov with lamb and herbs, toyug plov with chicken, shirin plov with dried fruits, syudli plov with rice cooked in milk, sheshryanch plov, the six-color plov with sunny side up eggs on a fried green and white onions.

Traditional Azerbaijani plov typically consists of three components that are most of the time served on separate platters: rice, gara (fried meat, dried fruits, eggs, or fish), and aromatic herbs. In the region of Nakhchivan however, plov is also prepared with the local staple grain called yarma, a ground pearl wheat also known as Azerbaijani bulgur.

There are three main preparation methods plov: dashma plov, suzme plov, and dosheme plov.

Dashma plov, also known as chekme in some regions, is also the oldest and easiest to make. It is probably the method that is most common in Western cuisines. In this preparation method, rice is boiled in water until it is all absorbed. Meats, vegetables, dried fruits and herbs are cooked with the rice in the same pot.

The suzme plov (drained pilaf) method consists in parboiling presoaked rice in salted water. The rice is then drained and heaped in the form of a pyramid. Saffron and butter are often poured over the rice, which is then steamed until light and fluffy. Suzme plov is traditionally served with toppings that may include beef, lamb, poultry, or fish, with sweet or sour dried fruits, fresh fruits, chestnuts, and fresh herbs.

Dosheme plov, which is the method I decided to use today, consists in parcooked and drained rice that is then cooked in a pot in alternating layers of meats, vegetables, dried or fresh fruits, and herbs. It is then served all together. The layers that are served under the rice are called plovalti, which literally translates as “under-rice”.

The parcha-dosheme plov recipe can be prepared with lamb or chicken.

In a traditional plov, long grain rice is steamed with saffron on top and a layer of golden crust called gazmag (or qazmaq) forms at the bottom. This crust can be prepared from eggs, flour, butter and yogurt. It can also be prepare with sliced potatoes or lavash (flat bread). The simplified version we are making today doesn’t include the qazmaq layer. This layer is the same as the one called tahdig by Persians.

Parcha-dosheme plov is similar to the recipe of shirin plov, an exquisite rice dish originating from Azerbaidjan’s capital Baku. However, shirin plov traditionally doesn’t include any meat. Shirin plov alone features dozens of versions depending on family traditions but also seasons. In the fall, chestnuts are typically added. In the winter, dried black plums give a warm sour flavor. In the summer, the tartness of apricots provides a balance with the sweetness of raisins.

The dried sour plums that are used in Azerbaijan are called albukhara. They are similar to dried greengage plums. These dried plums are used in a variety of plov like turshu plov (sour pilaf) or turshu qovurma (sour fried meat). When chestnuts, dried apricots and raisins are added like in today’s recipe, the dish is sometimes called shirin qovurma (sweet fried meat).

What makes the cuisine of Azerbaijan so unique in addition to all the influences from the surrounding countries is its climate. Indeed, out of 11 climate zones that are known in the world, the Azerbaijani climate features nine. This diversity in climate contributes to the fertility of the land and the richness of its cuisine, with an abundance of vegetables, greens and fruits used seasonally as in today’s recipes.

Plov is such a famous dish in Azerbaijan that it now has its festival. The International Plov Festival has been held in December in Baku for the past 2 years. It attracted cooks not only from Azerbaijan but also from Turkey, Iran, Indonesia, Saudi Arabia, Korea, Japan, Uzbekistan, Tajikistan and other countries.

Ingredients
580 g long-grain white Basmati rice
60 g butter , melted
150 g peeled chestnuts
130 g pitted dried apricots
150 g dried sour plums (golden plums or prunes, pitted, or dried barberries)
80 g pitted dates
75 g golden raisins
700 g skinless , boneless chicken cut into 2-inch/5cm cubes
1 onion , peeled, cut in half, then thinly sliced
⅓ teaspoon ground saffron threads , dissolved in 3 tablespoons hot water
Salt
Black pepper

Instructions
Place the rice on a fine-mesh strainer or colander and wash thoroughly under lukewarm water until the water runs clear. The rinsing process removes the starch so that the rice grains will remain separate after cooking.
Soak the rice in a large container filled with lukewarm water mixed with 1 tablespoon of salt.
In a medium frying pan, heat 2 tablespoons butter (30g) over medium heat. Add peeled chestnuts and stir-fry for about 3 minutes.
Add dried apricots, plums and dates and stir-fry for another 3 minutes. Add raisins and stir-fry for 1 more minute. Remove from heat.
In a large non-stick saucepan, combine 10 cups (2,5l) of water and 2 tablespoons salt. Bring to a boil. Drain the soaked rice and add it, in batches, to the pot. Boil for about 7 to 10 minutes, stirring occasionally with a wooden spoon, to prevent rice grains from sticking to the bottom. Watch the rice closely so as not to overcook. It must be barely done – not fully cooked and not too soft.
Drain the rice in a large fine-mesh strainer or colander. Set aside.
Rinse the pot you boiled the rice in. Melt 1 tablespoon (15g) butter over medium heat. Arrange the meat in one layer at the bottom of the pan. Sprinkle with ½ teaspoon salt and pepper, to taste.
Follow with the layer of sliced onions. Simmer over medium heat uncovered, without stirring, for about 3 minutes.
Place half of the rice in the pot over the onion. Arrange the dried fruits and chestnuts in one layer on top of the rice. Pile the rest of the rice on top of the fruits, mounding the rice in the shape of a pyramid. Pour 1 tablespoon melted butter over the rice.
Place a clean dishtowel or 2 layers of paper towel over the pot and cover firmly with a lid to absorb the steam. Lift the corners of the towel over the lid.
Reduce the heat to low and cook for 30 minutes. Then open the lid and sprinkle the saffron water on top of the rice.
Cover again and simmer for another 30 minutes.
When ready to serve, gently take 1 spatula full of rice, fruits and meat at a time, placing it on the large serving platter.

If you’ve never tried it please make sure to ask for it when you travel to Azerbaijan

spotted in www.196flavors.com


Travel Talks Platform

More about our Facebook Group

Join our Facebook Group

Travel platform to expand your travel knowledge, follow the latest destination news and participate in daily questions, like “Travel Trivia”, “Where in the World” and “Amazing Travel Facts”.

Armenia cooking

What’s cooking in Armenia – Dolma (Tolma)

blank

What’s cooking? World recipes

what is cooking - recipe Italy

Armenian Dolma (Tolma) Served With Yoghurt-Mint Sauce.

“Dolma: is a family of stuffed dishes common in Mediterranean cuisine and surrounding regions including the Balkans, the South Caucasus, Central Asia, India and the Middle East.”

Ingredients
Servings:-2+
500 g minced beef
150 g rice
3 medium fine chopped onions
3 cloves chopped garlic
1 big bunch of coriander and parsley
150 g tomato sauce
15 g salt
3 g black pepper
300 g grape leaves
1 cup plain yoghurt
15 g chopped mint
1 clove chopped garlic for the sauce
Step 1/9

500 g minced beef 3 medium fine chopped onions3 cloves chopped garlic1 big bunch of coriander and parsley150 g tomato sauce15 g salt3 g black pepper
In a large bowl, mix all ingredients, except rice and grape leaves, well by hand.

Step 2/9

150 g rice
Add rice and mix by hand. For those who don’t eat rice for some reason , they can make it without rice!

Step 3/9

300 g grape leaves
If using fresh grape leaves, cut off the stems and blanch them in boiling water first. But if you are using canned leaves, wash in hot water.

Step 4/9

Next, prep your pot. Place some grape leaves on the bottom of a medium to large pot to prevent the dolma from sticking.

Step 5/9

Now the fun part. Spread a leaf on a plate or cutting board, wrong side up and stem end towards you. Put a teaspoon of filling near the stem end. With your hands fold the sides and then roll up like a cigar.

Step 6/9

Place the rolled dolma in the pot. Layer the dolma in two or three layers.

Step 7/9

To ensure stability, place a plate over the top and fill the pot with 2 cups of water. You can add more tomato sauce for extra flavor.

Step 8/9

Heat stove to 150C, and cook for 50 minutes.

Step 9/9

1 cup plain yoghurt1 clove chopped garlic for the sauce
Sauce: yoghurt, mint and garlic mix together. Salt and pepper to taste.

If you’ve never tried it please make sure to ask for it when you travel to Armenia

spotted in www.kitchenstories.com


Travel Talks Platform

More about our Facebook Group

Join our Facebook Group

Travel platform to expand your travel knowledge, follow the latest destination news and participate in daily questions, like “Travel Trivia”, “Where in the World” and “Amazing Travel Facts”.

What’s cooking in Mali – Tiguadege Na

Tiguadege Na

Tiguadege Na

Tiguadege Na is the national dish of Mali that is prepared with lamb or chicken. The word ‘Tiguadege Na’ basically means ‘meat in peanut butter sauce’.

This peanut butter stew is extremely delicious and rich in texture. Large chunks of potatoes and carrots are added to enhance the flavour of this amazing dish. Although making this dish is time consuming, the final product is definitely worth the wait.

Recipe Tiguadege Na

Ingredients
1 chicken
White rice
3 medium tomatoes (quartered)
1 1/2 cup peanut butter
1 small handful peanuts
4 carrots (peeled and sliced)
3 bell peppers (sliced)
2 potatoes (cubed)
1 bunch spinach
1 small cabbage
A few mushrooms
Veggies (add as you like)
1 large yellow onion (diced)
5 cloves garlic (minced)
Bob Marley cassette tape (use digital music file as alternative)
2 tablespoons salt
2 tablespoons paprika
2 tablespoons cumin
1 teaspoon black pepper
1/2 teaspoon cinnamon
Spicy chili peppers or hot sauce (add as you like)
Flour
Cooking oil

Preparing for Tiguadege Na

This is what you in Mali

Tell a child to go grab a chicken and kill it. Be careful to negotiate price first. Otherwise, just go to the supermarket.

Start fire and find an old bicycle wheel. Alternatively, start the stove.

Using wheel as grill, burn feathers off of chicken.
Gut and cut into pieces. If unable to kill own squab, purchase cut up chicken, or cut your own if you know how to use a knife.

You may feel free to use just breasts of chicken, but I think the dark meat is better. Tofu people should begin improvising now.

In Dutch oven (deep pot) heat 3-tablespoons of oil.
Cook onion in oil until translucent over medium heat.
Drop in garlic oil with onion over medium heat.
Dredge chicken pieces in flour (or shake in plastic bag of flour).

Drop pieces in oil with now translucent oil and goodies and brown them slightly over medium to high heat.

Place Bob Marley cassette in ‘tape deck’ and switch on.
When chicken pieces are browned a bit, drop in tomatoes and “stir it up.”
Pour 4 cups of water over the whole mixture and crank up the heat until it boils.
If it seems too much, cut it down, if it doesn’t seem enough to stew the meat and veggies to follow, add more.

When it boils, add 1 cup of peanut butter and a small handful of peanuts. Stir it up.

Add salt, depending on your taste, paprika, cumin, black pepper, cinnamon, and some of whatever it is you use to add a bit of hot to your food. (red pepper, cayenne, some green hot type, etc.)

Add in carrots, bell peppers, potatoes, and spinach. Whatever your own personal vegetable fetish is, now is the time to do it. Okra is nice, as are eggplants. But do not overdo it now. Show a bit of restraint… but do not block your natural verve either.

Toss it all in there. Should be enough liquid to cover it all up and still leave you some gravy. If not, add some more plus a cup of white wine. Cook for 20 minutes.
Now get yourself some nice white rice and cook it up. BUT, do not commit the occidental sin of putting too much water into your rice, or you’ll end up with gloppy muck. 1-cup rice to 1.5 cups water is usually okay.

Taste, re to salt if necessary, re to spice, add more peanuts if you like, toss in a few more peppers or another ½-cup peanut butter if needed. The consistency shouldn’t be too thick, but shouldn’t be like soup either. You gotta use the force here.
Enjoy…

If you’ve never tried Tiguadege Na, please make sure to ask for it when you travel to Mali

spotted in www.peacecorps.gov


Travel Talks Platform

More about our Facebook Group

Join our Facebook Group

Travel platform to expand your travel knowledge, follow the latest destination news and participate in daily questions, like “Travel Trivia”, “Where in the World” and “Amazing Travel Facts”.

Zimbabwe cooking

What’s cooking in Zimbabwe – Sadza

blank

What’s cooking? World recipes

what is cooking - recipe Italy


Sadza is the most common food, a nationwide staple, in Zimbabwe. Almost every household partakes daily of sadza nenyama nemuriwo (pap, meat and leafy vegetables) during lunch and dinner times. Newborn babies in Zimbabwe, when they are ready to take solid foods, a most often given Sadza to eat first.

Traditional Plain Zimbabwean Sadza Recipe-
Ingredients:
3 heaping cups of “mealie-meal” (cornmeal) plus some more, as needed
1 cup cold water
24 oz. boiling water
Directions:
Have 24 oz. of water boiling on the stove.
Put the mealie-meal in a large cooking pot. Add in 1 cup of cold water, and stir vigorously to make a paste.
Place the pot on the stove over high heat, and add boiling water while constantly stirring.
Keep adding and stirring until the entire mixture is boiling. Reduce the heat to just a lively simmer. Place the lid on the pot, and gently cook for 15 minutes.
After 15 minutes has elapsed, take off the lid, and add more mealie-meal, little by little. This is a crucial step in the preparation. You want to achieve a very thick, pasty-porridge consistency.
When it’s just about at the consistency you desire, cover the pot again, and allow it to simmer for about another 5 minutes.
Your all done! Simple and easy, your Zimbabwean sadza is ready to eat. Serve with any of your preferred Zimbabwean side dishes.

If you’ve never tried it please make sure to ask for it when you travel to Zimbabwe

spotted in ethnicfoodsrus.com


Travel Talks Platform

More about our Facebook Group

Join our Facebook Group

Travel platform to expand your travel knowledge, follow the latest destination news and participate in daily questions, like “Travel Trivia”, “Where in the World” and “Amazing Travel Facts”.

Tunisia cooking

What’s cooking in Tunisia – Tunisian Couscous

blank

What’s cooking? World recipes

what is cooking - recipe Italy


Couscous is a staple in most Maghreb cuisines. It is known as the national dish in Tunisia, but also in Algeria and Morocco, as well as Mauritania and Libya. Tunisian couscous is one of the countless variations of this delicious and versatile dish.

It is thought that the original name of couscous (Arabic: كسكس) could have come from the Arabic word kaskasa, which means “to pound in small pieces” or from the Berber word seksu, which means “rounded” or “well rolled”.

It is called kousksi in Tunisia, taam, kosksi or kesksu in Algeria, seksu in Morocco, and maftoul in Jordan and Lebanon. It is also used in Sicily where it is known as cuscusu.

Couscous is made from small durum semolina balls that are crushed and steamed.

Where does couscous come from?
The origin of couscous is not very clear. It is thought that it might have been invented by the Berbers, as early as the 3rd century AD. Primitive couscous steamers dating from the reign of the Berber king Massinissa were found in Algeria.

Other sources say that couscous was born between the end of the Zirid dynasty (Berber dynasty from central Maghreb) and the beginning of the Almohad caliphate around the twelfth century.

Other historians have proved that the method of cooking couscous, which consists of cooking the semolina over water or broth, in a special pot (couscoussier), may date back to the 10th century and could have started in the West African regions of the Kingdom of Sudan, today’s Niger, Mali, Mauritania, Ghana and Burkina Faso.

Even today, in parts of Guinea and Senegal, recipes that are based on millet couscous with meat or peanut sauce are still popular.

In the 13th century, a Syrian historian from Aleppo referred to couscous in his work, confirming that couscous had spread fairly quickly, mainly from the former Libyan province of Tripolitania to the west.

Couscous is also popular in West Africa, as well as in Central Africa, and has even spread to the southern Turkish provinces from Syria around the sixteenth century.

Note that couscous was originally prepared with millet and not wheat. Most historians believe that the transition to wheat occurred in the 20th century, although there are still many areas that use millet to make couscous.

Couscous is traditionally steamed in a couscous steamer (couscoussier) to produce softer, larger grains. Nowadays, the couscous grain (semolina) that is sold in most supermarkets in the western world is pre-steamed and then dried.

Precooked couscous, also known as instant couscous, takes less time to prepare than traditional couscous, and is almost as good, although purists

The different couscous recipes
Couscous is also the name of the recipe made with the semolina of the same name. There are a multitude of North African couscous recipes, including vegetarian, meat (beef, lamb, etc), chicken, fish, seafood and even butter couscous (couscous au beurre).

The version presented here is the Tunisian version. There are also as many versions as families or regions in Tunisia. However, Tunisian couscous has some characteristics that differentiate it from Algerian and Moroccan couscous.

First, the Tunisian couscous sauce is always red, because of the tomato or tomato sauce that is used.

The “white” sauce, which is often used in Algerian couscous (in areas not close to the Tunisia border), does not include tomatoes, but rather spices such as cinnamon.

While white sauce couscous can be found in Algeria and Morocco, there is hardly any in Tunisia. In Morocco, there are also more sweet versions such as couscous seffa, a couscous dish with almonds and raisins or couscous tfaya with caramelized onions and raisins.

Among the Tunisian versions, you will find the couscous barbouche, a typical dish of southern Tunisia, prepared with tripe and herbs (cilantro, parsley), and served traditionally with hard-boiled eggs.

The couscous with grouper (couscous au mérou) is a couscous with the typically Tunisian fish which you can also find in Sicily. The fish couscous, or sékssou bel hout (سكسو بالحوت), is a traditional couscous of the region of Sfax in Tunisia, but also from Moroccan cities on the Atlantic coast.

When preparing a meat couscous, it is important to choose only one meat. Indeed, the couscous is steamed with the vegetable and meat broth, and this broth should give the aroma of only one meat.

It is for this reason that the “couscous royal”, a French invention that generally includes several meats, is absolutely not traditional in the Maghreb. Some couscous recipes from North Africa add merguez, but most traditional couscous are prepared with only one meat.

Couscous can also be prepared with several spices, and spice blends. In Tunisia, tabel is the preferred spice blend. It usually includes coriander, caraway, garlic and chili powder at a minimum.

There is also ras el hanout, a spice blend from the Maghreb whose recipes also vary but which often include spices such as cumin, ginger, turmeric, cinnamon or coriander.

In Tunisian Jewish homes, the couscous that is prepared for Shabbat is often served with meatballs. These meatballs are quite unique and characteristic of Tunisian Jewish cuisine.

These meatballs are prepared with ground beef, stale bread (rehydrated), and various spices including crushed rose petals. Each oblong meatball is made with one piece of cut vegetable that may include potato, celery, zucchini or artichoke. They are breaded and then fried. They can be served as is or cooked slowly with the couscous broth.

Since most people do not own a couscous steamer (couscoussier), I am sharing a couscous recipe where the couscous semolina is prepared separately instead of being steamed at the top of the double boiler.

However, it is important to impregnate the semolina with the broth at least an hour before serving so that the semolina has time to absorb the aromas of the meat and vegetables broth.

This couscous recipe is validated by our expert in Tunisian cuisine, Chef Mounir Arem. Chef Mounir is the chef-owner of the restaurant Le Baroque in Tunis.

Ingredients
900 g lamb stew meat , cut into large pieces
1 kg couscous fine semolina (or medium)
2 onions , finely chopped
2 cloves garlic , pressed
4 tablespoons tomato paste
2 tablespoons harissa
2 tablespoons ground caraway
1 tablespoon ground coriander
1 teaspoon chili powder
4 turnips , cut in half
6 medium carrots , peeled
4 zucchini , peeled lengthwise, alternately leaving a layer of skin
6 small potatoes , peeled
300 g chickpeas (canned)
4 green hot peppers , fried in oil (optional)
Vegetable oil
Salt
Pepper

Instructions
Add ½ cup (120ml) of oil into a large pan. Fry the onion over medium heat for 2 minutes.
Add the garlic, tomato paste and harissa and continue frying for 2 minutes.
Add the caraway, coriander, and chili powder. Mix and continue cooking for another 2 minutes.
Add the lamb meat and mix well so that the pieces are covered with the sauce. Cook for 5 minutes stirring regularly.
Cover with water. Add the turnips and carrots, and cook on low/medium heat for 45 minutes.
Meanwhile, prepare the couscous semolina as indicated on the package, with boiling water, salt, and oil.
After 45 minutes, add the zucchini, potatoes and chickpeas.
Cook for at least another 30 to 40 minutes over low to medium heat. Monitor the cooking of the vegetables. If some vegetables are cooked before the meat, remove them from the pan and place them on a serving platter. Proceed in the same way with all the vegetables to prevent them from cooking too much.
10 minutes before the end of cooking, get a few ladles of broth (one at a time) and wet the couscous semolina. Mix the semolina well after each ladle until it gets moistened enough.
Arrange the semolina in a tajine pot. Decorate the dish with the vegetables and the meat all around. Garnish with fried green hot peppers (optional).

If you’ve never tried it please make sure to ask for it when you travel to Tunisia

spotted in www.196flavors.com


Travel Talks Platform

More about our Facebook Group

Join our Facebook Group

Travel platform to expand your travel knowledge, follow the latest destination news and participate in daily questions, like “Travel Trivia”, “Where in the World” and “Amazing Travel Facts”.

blank


Private Facebook group
for the travel industry

Travel Talks Platform Group


5.8k members

Travel Talks Platform for the travel industry

Follow the travel news – Traveltalksplatform is the number 1 news site to stay updated on amazing travel facts, the latest news, events, incentive ideas, MICE news, job opportunities and shows.

Specially composed for the travel industry, you will find the latest travel facts at your fingertips.

Submit


Subscribe

Stay updated about the latest travel news worldwide

blank

The latest airline news, hotel news, cruise news and MICE news in your inbox:
Stay updated about
the latest travel news worldwide


Copyright © 2021 e-motions international

disclaimer:

We assume no responsibility or liability for any errors or omissions in the content of this site. The information contained in this site is provided on an "as is" basis with no guarantees of completeness, accuracy, usefulness or timeliness.