Author: Leandro Agostini

Russia HTL

Hyatt Place enters another country with Ekaterinburg opening

blank

Travel news from around the world

blank

The launch of the 146-room Hyatt Place Ekaterinburg, developed by LLC Hotel Development Company, marks the upscale’s brand’s much-anticipated debut in Russia.

This elegant property, only the second Hyatt Hotels Corporation-branded property in Ekaterinburg, features Hyatt Place’s signature intuitive design, casual atmosphere and helpful amenities.

A strategic location

Developed by LLC Hotel Development Company, Hyatt Place Ekaterinburg is ideally located in the city centre, and equally suited to catering for leisure and business travellers. The fourth largest city in Russia, Ekaterinburg is a major gateway between Europe and Asia as well as being an important stop on the Trans-Siberian Railway.

“As Ekaterinburg continues to grow and thrive economically, we are excited to add to the momentum by welcoming the first Hyatt Place hotel to the area,” said Ekaterina Lonshakova, general manager of Hyatt Place Ekaterinburg. “With our smartly designed social spaces and guestrooms with separate work and sleep areas, our multitasking guests can easily accomplish what they need to do while on the road.”

Made for business and leisure

The new Hyatt Place hotel is home to 146 modern rooms with separate spaces to sleep, work, play and unwind, including a Cozy Corner with sofa-sleeper. Breakfast is included in every guest’s stay.

Travellers can pick up a bite to eat at The Market, which serves freshly prepared grab-and-go items, and dine at Zoom Bar & Restaurant, where the global dining concept showcases multicultural cuisine. Amenities such as free wifi and a necessities programme for forgotten items further enhance the guest offering.

Events are hosted in 4,200 sq ft of flexible meeting space and the 24-hour fitness centre boasts cardio equipment with LCD touchscreens.

Andrey Soldatov, general director of the LLC, said: “Ekaterinburg is a vibrant city, filled with friendly people, great neighbourhoods and an ever-expanding list of great places to visit and things to do or see. Hyatt Place Ekaterinburg is central to all of them and we are confident that the hotel will exceed guest expectations and provide them with everything they need while visiting our area.”

Best hotel in Russia

Spotted in: //tophotel.news/


Travel Talks Platform

More about our Facebook Group

Click if you want to join

Travel platform to expand your travel knowledge, follow the latest destination news and participate in daily questions, like “Travel Trivia”, “Where in the World” and “Amazing Travel Facts”.

australia htl

City overview: 5,400 new rooms on the books in Melbourne

blank

Travel news from around the world

blank

The TOPHOTELPROJECTS construction database shows that Melbourne is home to a steadily growing market, with a healthy mix of four- and five-star hotel schemes.

Victoria’s largest city will soon be home to 24 new hotels with a total of 5,444 rooms. We take a closer look at these upcoming openings.

Melbourne hotel launches by year

In the second half of 2021, five hotels with 1,074 rooms are due to open their doors.

In 2022, another eight projects with 2,076 keys are scheduled to go live. For 2023 and beyond, 11 more properties are already in the pipeline.

Of Melbourne’s 24 new hotels, 14 will be in the four-star category, while the other ten are in the five-star segment.

Top hotel brands expanding in Melbourne

IHG’s Hotel Indigo brand will open two properties in the city, delivering a total of 378 keys, making it the most active flag in our database.

Elsewhere, luxury brand Shangri-La Hotels and Crown Resorts are each planning one new hotel, with 500 and 388 rooms respectively.

Exciting hotel launches coming up in Melbourne

Q3 2022 will boast three exciting hotel openings in Melbourne.

Veriu Queen Victoria Market is a project in downtown Melbourne owned by PDG. This 116-room hotel will be part of a newbuild mixed-use development, complete with an underground car park, childcare and family services, upmarket retail and a small number of residences. Architect and interior designer Bates Smart is working to ensure the property blends in well with the rest of this vibrant neighbourhood.

Located on the edge of Melbourne’s central business district, meanwhile, the new Courtyard West Melbourne will be only a 20-minute drive from the airport and a short walk from the city’s celebrated dining, entertainment, sports and arts scene. The 150-room hotel will offer a range of amenities, including an outdoor swimming pool and a 24-hour fitness centre with sauna and steam rooms. There’ll also be 250 sq m of flexible meeting space, a signature restaurant with outdoor seating, and a grab-and-go outlet.

A third high-profile addition for the city will be Shangri-La Hotel Melbourne CBD. A 500-key property consisting of two towers overlooking the World Heritage Site-listed Carlton Gardens, it’ll feature a roof garden and pool, a gym, a yoga space, a lounge and a bar. Fender Katsalidis Architects and Bond Design Studio have been tasked with bringing Shangri-La’s luxury ethos to life in the heart of Melbourne.

Best hotel in Australia

Spotted in: //tophotel.news/


Travel Talks Platform

More about our Facebook Group

Click if you want to join

Travel platform to expand your travel knowledge, follow the latest destination news and participate in daily questions, like “Travel Trivia”, “Where in the World” and “Amazing Travel Facts”.

BElgium

The Standard, Brussels to open in 2025

blank

Travel news from around the world

blank

Standard International has signalled its intention to launch a hotel within Zin, real estate specialist Befimmo’s landmark mixed-use scheme in the heart of the Belgian capital.

Befimmo’s ongoing redevelopment of two towers at Brussels’ World Trade Centre in the Northern Quarter, the city’s Central Business District, for an ambitious project known as Zin has received a major boost.

The Standard’s growing international presence

For Standard International, this newly announced property adds to a portfolio of celebrated properties in destinations ranging from New York and Miami to London and the Maldives. And for Befimmo, it promises to significantly strengthen the offer of Zin, which aims to bring an attractive mix of residential, commercial and leisure space under the same roof.

“This property is a perfect step for The Standard in Europe,” said Standard International CEO Amar Lalvani. “Once again, we will be completely and unexpectedly reinventing a property and transforming a neighbourhood. We can’t wait to surprise people and show them just how intriguing Brussels is and why we love it.”

“We are extremely proud to welcome The Standard in Zin,” added Jean-Philip Vroninks, CEO of Befimmo. “This iconic brand fits perfectly within the vision we have for Zin and will amplify the redynamisation of the Brussels North Quarter. Thanks to the mix of functions (offices, hotel, apartments and shared spaces), we will create a building where there will always be life, 24/7, with different users occupying the spaces at different times.”

Designed for guests and locals alike

The Standard, Brussels will accommodate travellers across 180 guestrooms and 20 branded apartments, and feature unique public areas including a lush ground-floor greenhouse and a rooftop showcasing outstanding F&B. Its restaurants and bars will be created with both guests and locals in mind, taking inspiration from the city’s culture and community. 

Brussels will add to The Standard’s growing global footprint, following on from the recent announcement of The Standard, Fitzroy in Melbourne. Other upcoming openings include The Standard, Hua Hin, which is slated to open in November 2021, and The Standard, Bangkok Mahanakhon, expected to launch early next year.


Best hotel in Belgium

Spotted in: //tophotel.news/


Travel Talks Platform

More about our Facebook Group

Click if you want to join

Travel platform to expand your travel knowledge, follow the latest destination news and participate in daily questions, like “Travel Trivia”, “Where in the World” and “Amazing Travel Facts”.

portugal cooking

What’s cooking in Portugal – Bacalhau à Brás

blank

What’s cooking? World recipes

what is cooking - recipe Italy

How to Cook Bacalhau à Brás

Bacalhau à Brás (Cod à Brás) is a simple recipe from the Portuguese cuisine, but it explores all the flavours of its ingredients, resulting in a classic dish full of personality.

Among the most important ingredients in Portuguese cuisine, cod is a highlight. One of Portugal’s most traditional dishes is Bacalhau à Brás (Cod à Brás), a classic recipe with lots of flavors, ideal to surprise family and friends.

About Bacalhau à Brás
Bacalhau à Brás is a dish that perfectly reflects Portuguese cuisine. Simple in origin and preparation, the taste of this recipe is the result of good ingredients and the appreciation of their flavours.

The original recipe for Bacalhau à Brás was created by Mr. Braz, who was the owner of a local tavern in Lisbon. The dish quickly became very popular and spread inside and outside the country. Today, for example, it is common to find variations of Bacalhau à Brás in Spain which is known as Bacalhau Dourado. Also, the dish evolved for a technique, you can find a variety of dishes made “a Brás” style.

The recipe for Bacalhau à Brás includes desalted shredded cod and straw potato. As complements, olives, eggs, onions, and parsley are added. The result is a creamy, authentic-tasting, and very easy dish.

Essential ingredients for a traditional Bacalhau à Brás recipe

– Desalted codfish: When preparing Bacalhau à Brás, the less noble parts of the codfish can be used, making it a perfect dish to take advantage of the leftovers not used in other recipes. The desalting process can be easily done at home. However, if you want to simplify the recipe, you can buy the already desalted cod.
– Straw Potatoes: In the most traditional recipes, the straw potato is homemade – which makes them much tastier. If you want to make it more practical, you can buy them ready.
– Eggs: The eggs beaten with a fouet are the great secret of the creaminess of Bacalhau à Brás. Otherwise, the dish tends to become dry.

Secrets for a perfect Bacalhau à Brás
How to desalt the cod
Those who choose to do the desalting at home should plan the process ahead. The time required varies according to the size of the portions:

For Shredded Codfish: 6 hours (change the water every 3 hours)

For Cod Pieces: 24-48 hours (change the water every 6 hours)

The process is always the same, first wash the cod pieces under running water. Then soak the fish in cold water and take it into the refrigerator. The skin of the codfish must be left on top. Then change the water periodically until the desired salt point is reached.

How to prepare homemade straw potatoes
If you want to prepare the traditional recipe, the big difference is to make the straw potatoes at home instead of buying them ready.

The process is quite simple and the dish is much tastier. First, cut the potatoes into very thin sticks. Next, wash the sticks in water until the excess starch is removed. Then fry in very hot oil, using a pan or fryer. Place them on paper towels to remove the excess fat and season with a little salt.

If you want to avoid excess fat, another option is to use the air fryer to prepare the potatoes or bake them in the oven.

How to make Bacalhau à Brás soft and creamy
One of the great secrets to avoiding Bacalhau à Brás becoming dry are the eggs. In many of the traditional recipes, eggs are added during the cooking of the dish. But to maintain the creaminess, one of the tips is to add only half of the eggs during cooking, and the rest only when finishing the dish. The eggs will be cooked by the remaining heat of the dish and make the Bacalhau à Brás more succulent.

INGREDIENTS
600 g desalted codfish
200 g straw potato
6 eggs
1 onion – sliced
4 garlic cloves
2 bay leaves
black olives
olive oil
parsley – chopped
salt
black pepper

Cook and shred the codfish:
1-Take a pan of water, bay leaves, and 2 cloves of garlic to boil;
2-As soon as it boils, add the codfish;
3-When it boils again, turn off the heat and set it aside for 15 minutes;
4-Remove the cod from the water and let it cool;
5-Once cooled, remove the skin and bones and shred the cod.

Prepare the Bacalhau à Brás:
1-Heat a frying pan over low heat in olive oil and saute the onion and 2 cloves of chopped garlic;
2-Add the shredded cod and cook for a few minutes;
3-Add the potatoes, mixing carefully;
4-In a separate bowl, beat the eggs lightly with the help of a fouet;
5-Add half of the beaten eggs to the codfish stew, mixing well;
6-Season with salt and black pepper to taste and let the eggs cook, always stirring the mixture;
7-Turn off the heat and mix in the rest of the eggs;
8-Sprinkle the dish with parsley and black olives;
9-Serve it hot.

Spottted in foodandroad.com

If you’ve never tried it please make sure to ask for it when you travel to Portugal


Travel Talks Platform

More about our Facebook Group

Join our Facebook Group

Travel platform to expand your travel knowledge, follow the latest destination news and participate in daily questions, like “Travel Trivia”, “Where in the World” and “Amazing Travel Facts”.

malta cooking

What’s cooking in Malta – Kapunata

blank

What’s cooking? World recipes

what is cooking - recipe Italy

Maltese Caponata, Kapunata, is a simple and flavourful salty, sweet and sour salad. Made from a mix of fresh summer vegetables that can be served warm or cold.

What is caponata?
Most probably you’ve already heard about Sicilian caponata, as it is the most popular version of this dish around the world. Sicilian caponata is made of fresh summer vegetables such as aubergines, tomatoes, onions, garlic, olives, capers, pine nuts. Sometimes you can also find it with raisins.

However, Maltese Kapunata is like the underdog. It might not be as popular, and gets confused a lot with her Sicilian sister, but it is unique and flavourful, ready to make your meals tastier. To us Maltese, it makes our summers much more special. Nothing beats a day by the beach with a good piece of ħobż biż-żejt (Maltese Bread) and some kapunata. Or a bbq with some kapunata ready to be enjoyed before the bbq even starts or as a side with the main food. It’s so special, that you’ll be lucky if your grandmother passes on her secret recipe to you!

Maltese version

The main difference between the two caponatas, is that the Maltese version has bell peppers and sometimes even courgettes (another staple in the Maltese cuisine), seasoned with mint . It also doesn’t contain pine nuts or raisins. Although, at the end of the day, the beauty of the kapunata is that you can put and mix any vegetables you like.

Cooking Kapunata
The traditional way of cooking kapunata is by frying all the vegetables separately, so that you get an even cooking. However, you can also bake the vegetables prior to mixing them all together. The latter uses less oil and can speed up the process.

As kapunata is a sweet and sour salad, the recipe calls for vinegar (sour) and some sugar for an added sweetness. Instead of using a teaspoon of white sugar, a good technique that I like to use is to peel and chop up half an apple and let it cook until it dissolves in the sauce. Another great substitute is adding apple sauce with no added sugars.

I like my kapunata to have a certain bite, so my recipe here is to achieve that texture. However, if you like your kapunata more soft you have to cook the vegetables for longer. The same thing goes for the size of the vegetables, you can either keep them chunkier or even chop them more finely. All these little tweaks will vary in how your kapunata will look at the end.

How to serve it
Kapunata can be served hot or cold. Ideally enjoyed with some crusty fresh bread as an appetiser or as a main dish. It can also be served as a side with fish or meat, as an easy pasta sauce, as a pizza topping or even as a version of shakshuka! The options are endless, as caponata is an extremely versatile dish.
Storing or Preserving the Kapunata
You can easily batch cook kapunata in the Summer months when all these vegetables are in season, and preserve in bottles for the colder winter months. Kapunata can be easily stored in the fridge for about 5-7 days or else you can simply freeze it.

INGREDIENTS
1 aubergine about 300g
2 small bell peppers (yellow/green) about 300g
5 tomatoes
4 tbsp olive oil 60 ml
1 white onion
2 large garlic cloves
3 tbsp tomato paste 70g
2 tbsp red wine vinegar 30ml
1/2 apple or 2 tsp sugar
3 tbsp capers 20g
1/3 cup olives (a mix of green & black) 60g
1 tbsp fresh mint
1 tbsp fresh basil
salt & pepper

INSTRUCTIONS

Start by prepping and chopping up all the ingredients. Prior to start cooking, I recommend to season the chopped aubergine with salt and let it sit for about 30 minutes. Remove the excess water and salt with a paper towel.
Heat two tablespoons of olive oil in pan on medium heat. Add the chopped aubergines and let cook for about 7 minutes until golden brown.
Once cooked, clean the frying pan, add two tablespoons of olive oil and add the diced white onion. Cook on medium heat. As soon as the onion gets translucent, add the garlic and let cook for 2 minutes.
Add the diced green and yellow bell peppers to the onion and garlic and let cook for a couple of minutes until they start to soften.
Add the tomato paste, the apple and the tomatoes. Mix well and let cook for about 10 minutes.
Once most of the tomatoes have cooked down, add the cooked aubergines, the red wine vinegar, the olives and the capers. Mix well together and let cook for some more minutes.
Season with salt and pepper, if necessary.
Finally, top the kapunata with some mint and basil. You can either serve immediately as a hot dish, or else let it cool down and refrigerate for later use.

Spottted in apronandwhisk.com

If you’ve never tried it please make sure to ask for it when you travel to Malta


Travel Talks Platform

More about our Facebook Group

Join our Facebook Group

Travel platform to expand your travel knowledge, follow the latest destination news and participate in daily questions, like “Travel Trivia”, “Where in the World” and “Amazing Travel Facts”.

ireland cooking

What’s cooking in Ireland – Irish Stew

blank

What’s cooking? World recipes

what is cooking - recipe Italy

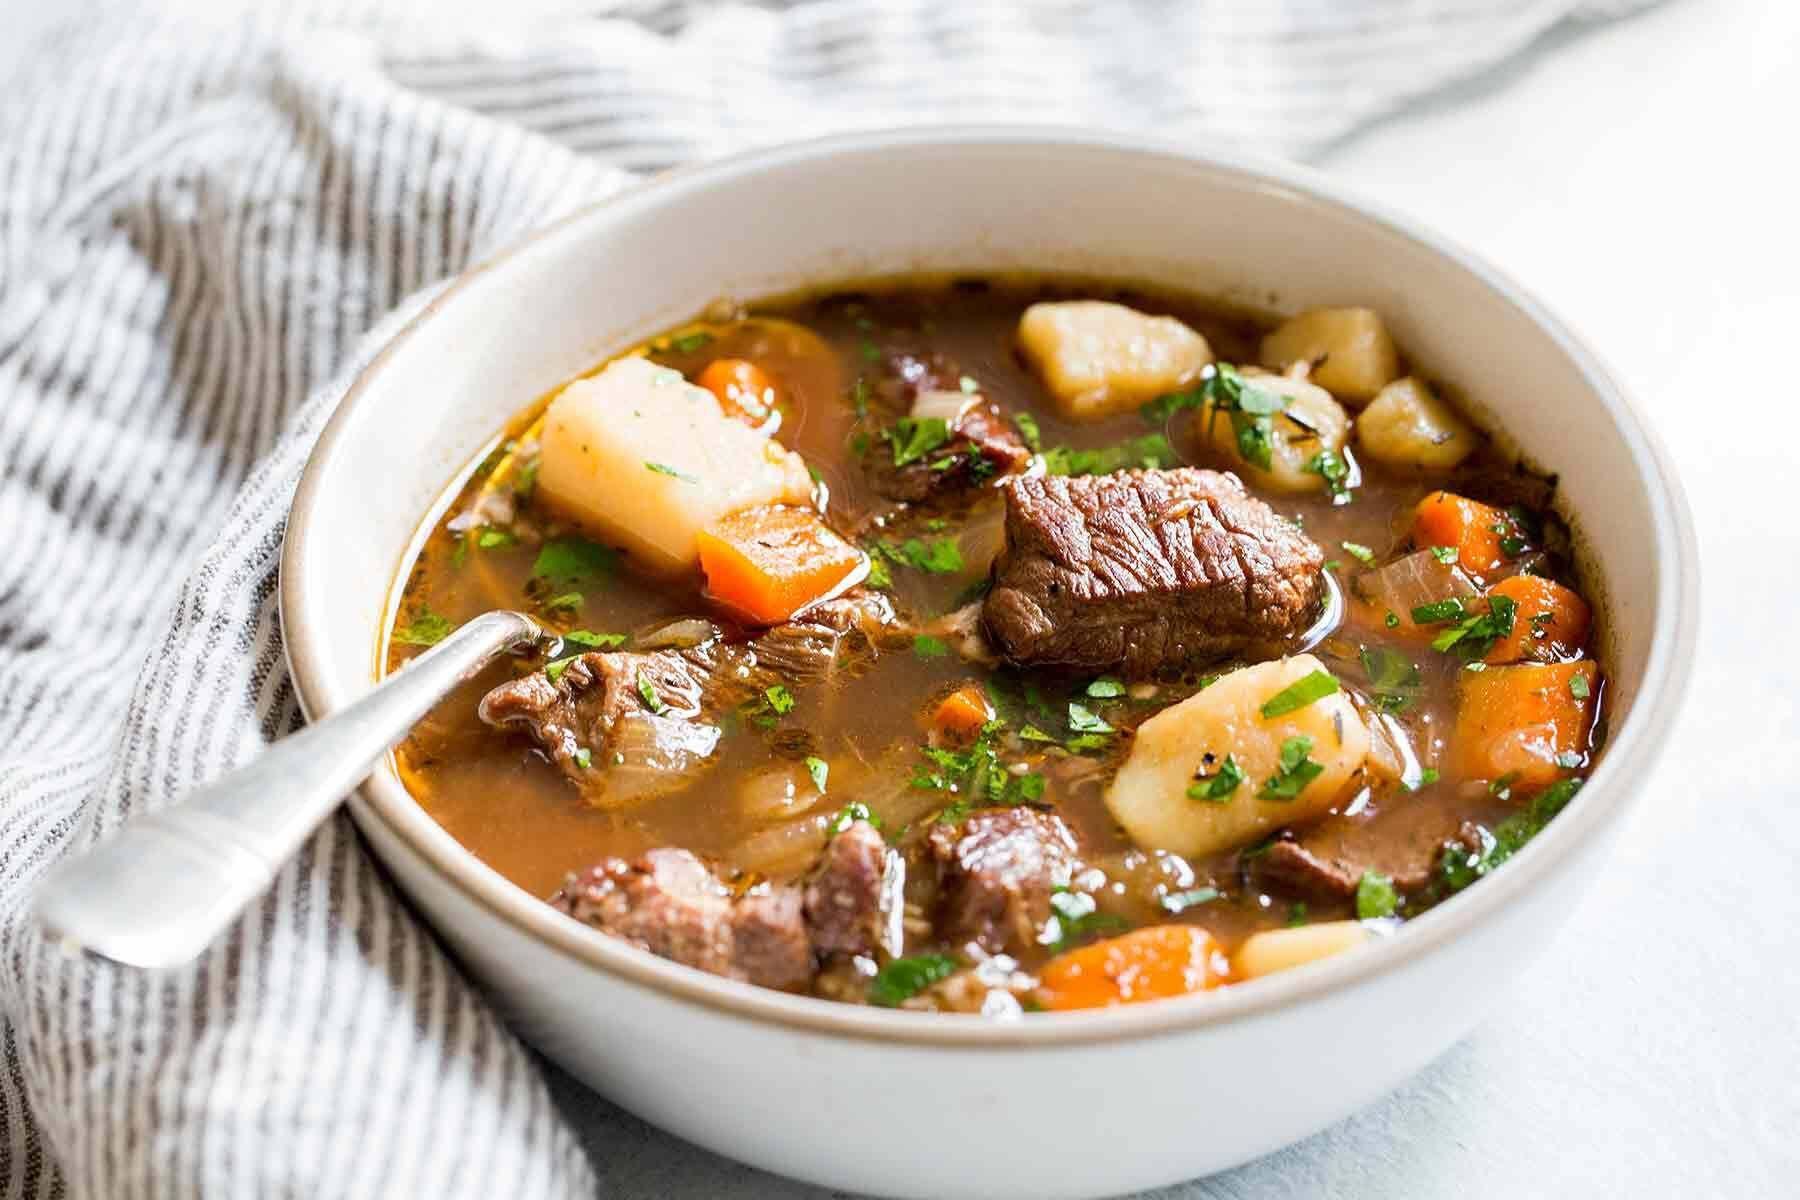
Nothing is more warming and filling than a delicious bowl of Irish stew, a popular dish from Ireland and loved the world over. It was traditionally made with mutton (sheep), but it is now often made with the easier-to-find lamb. Either meat will make a delicious, hearty stew.

Controversy reigns over whether adding vegetables other than potatoes makes the perfect Irish stew, but the choice is yours. Adding onions, leeks, carrots, and cabbage does add extra flavor and nutrition to the stew and means that little else is needed to make it a meal.

Though a hugely popular dish on St Patrick’s Day, it’s far too good to reserve for a few days a year—eat it when you want something comforting and warming. Serve with crusty bread to soak up all of the delicious sauce.

Ingredients
2 tablespoons vegetable oil, divided
1 pound lamb cutlets or mutton (bones removed, cut into 2-inch/5-centimeter chunks), divided
2 pounds potatoes (peeled and cut into quarters), divided
1 cup roughly chopped carrots, divided
1 cup roughly chopped onion, divided
1 cup finely sliced leeks, cleaned and divided
2 tablespoons all-purpose flour
3 cups dark beef stock (1 1/2 pints)
2 or 3 cabbage leaves, thinly sliced, optional
Salt, to taste
Pepper, to taste

Steps to Make It

Gather the ingredients. Preheat the oven to 350 F/180 C/Gas Mark 4.

In a large frying pan, heat 1 tablespoon of the oil until hot but not smoking. Add half of the lamb pieces and brown all over by turning in the hot oil.

Remove the lamb pieces with tongs and place them in a Dutch oven or ovenproof stockpot.

Cover with half of the potatoes, half of the carrots, half of the onion, and half of the leeks.

Add the remaining oil to the frying pan and heat. Add the remaining lamb and brown all over as before and add to the Dutch oven.

Cover with the remaining potatoes, remaining onion, remaining leeks, and remaining carrots.

Add the flour to the still-hot frying pan and stir really well to soak up any fat and juices. Cook over low heat for 3 minutes.

Add the stock a ladle at a time and mix until you have a thick, lump-free sauce. You will not add all of the stock.

Pour this sauce over the lamb and vegetables.

Add the remaining stock to the Dutch oven, cover with a tight-fitting lid, and cook in the preheated oven for 1 hour.

Add the cabbage (if using), replace the lid, and cook for another hour. Check from time to time to make sure the stock hasn’t reduced too much. If it has, add a little boiling water. The meat and vegetables should always be covered in liquid. If the sauce is too runny at the end, you can always cook the stew a little longer with the lid removed.

Season with salt and pepper to taste. Serve piping hot and enjoy.

Spottted in /www.thespruceeats.com

If you’ve never tried it please make sure to ask for it when you travel to Ireland.


Travel Talks Platform

More about our Facebook Group

Join our Facebook Group

Travel platform to expand your travel knowledge, follow the latest destination news and participate in daily questions, like “Travel Trivia”, “Where in the World” and “Amazing Travel Facts”.

iceland cooking

What’s cooking in Iceland – Hákarl

blank

What’s cooking? World recipes

what is cooking - recipe Italy

Have you ever eaten or heard of hákarl or Icelandic fermented shark meat? I was introduced to this Icelandic delicacy by our friends Julia and Andy. Julia visited Iceland for her friend’s wedding and returned home with a small container of this exotic meat for us to taste and smell. A small group of us sampled these ammonia smelling meat cubes (outside the house) followed by gulping down several shots of vodka…hoping to mask the smell and prevent any after taste. For some reason no one seemed to be too thrilled for a second bite. Andy and Julia wrapped the container tightly in layers and gave me the rest to take home. I think secretly they were overjoyed to have a recipient for the leftovers. For some people the smell is strong and perhaps even a bit offensive–some have described it as “rotten or gangrenous” meat. When I tasted the meat I realized I ate something similar in my past but I could not put my finger on it. On the drive home I realized during my previous trip back to Vietnam my cousin Khiem made me some dried sting ray. If you like hákarl then you may enjoy my Grilled Dried Sting Ray (or Kho Ca Duoi Nuong). Although the dried sting ray did not have as strong a taste or aroma. My cousin Ngoc made a nice tamarind sauce but omitted the fish sauce. Below is a recipe for the sauce that is inspired by my mother. She thinks the tamarind fish sauce would go well with it. You can dip the meat in the sauce or coat the meat in the sauce and serve it as I did. Although I did not grow up eating either the hákarl or dried sting ray I did not mind them. I would eat them again if given a chance. Luckily the weather outside is warm so we opened all the windows and doors to air out the smell in our home before we can accept any future guests. Hopefully my neighbors don’t call the police because they smelled decomposing flesh!

Ingredients:

About 1/2 cup cubed Hákarl (Icelandic Fermented Shark Meat), roughly 3-oz
1 recipe of Tamarind-Fish-Chili Sauce (see recipe below)

Method:

Make the Tamarind-Fish-Chili Sauce and mix in the Hákarl (Icelandic Fermented Shark Meat) until all the meat has been coated. Add more chili pepper if interested.

Tamarind-Fish-Chili Sauce

Ingredients:

About 3 Tbsp water
About 1 Tbsp tamarind pulp
A squirt of chili pepper
About 1/2 tsp fish sauce
About 1/2 tsp brown sugar

Method:

Heat water and tamarind pulp in a small pot or pan. Avoid boiling. Mash the pulp gently to remove as much of the tamarind as possible. Strain the liquid and scrape the back of the bottom of a strainer to remove as much tamarind sauce as possible. Return the liquid and tamarind sauce into a clean pan or pot. Add chili pepper, fish sauce and sugar. Stir until the sugar has dissolved.

Spottted in www.thanhskitchen.com

If you’ve never tried it please make sure to ask for it when you travel to Iceland.


Travel Talks Platform

More about our Facebook Group

Join our Facebook Group

Travel platform to expand your travel knowledge, follow the latest destination news and participate in daily questions, like “Travel Trivia”, “Where in the World” and “Amazing Travel Facts”.

germany cooking

What’s cooking in Germany – Sauerbraten

blank

What’s cooking? World recipes

what is cooking - recipe Italy


An Authentic German Sauerbraten takes longer than other roast beef recipes to prepare, but one bite of the melt-in-your-mouth tender beef proves it’s more than worth the wait. You want to marinate your rump roast at least 2 days to get enough sour flavor, so make sure to plan ahead if you are making this dish for the holidays. Prep this German-style pot roast during the week and cook low and slow for a flavorful Sunday dinner and leftovers for the following week.

A German Sauerbraten is roast beef marinated in a sour, vinegar base that tenderizes the meat and gives it flavor. The marinade for this sauerbraten recipe is vinegar and beef broth with pickling spices and a hint of sugar. The beef is braised in the marinade in the oven to soak up even more flavor. The Sauerbraten is then served with a sweet and tangy gravy made from the same marinade, thickened with crushed gingersnaps.

Traditional German Sauerbraten is served with German Cabbage and Mashed Potatoes, using the delicious sauce as a gravy for the meat and potatoes. Make sure to serve some soft, doughy bread like Dinner Rolls or Beer Bread (made with German beer of course) to soak up the thick, sweet-sour gravy. A dollop of sour cream and shredded red cabbage is great garnish for German Sauerbraten too!

Tips for Making German Sauerbraten

Marinate sauerbraten at least 3 days but you can keep it in the marinade up to 10 days! The longer you marinate the meat, the more tender and flavorful it will be.
Sauerbraten will cook quicker the longer it has been marinated, so check the temperature periodically after 2 hours, especially if you marinate for more than 3 days.
Strain the braising liquid with a fine-meshed strainer so that no bay leaves or cloves remain, and you get a smooth and thick gravy.
You can marinate the beef in the dutch oven or a large container instead of a bag, just be sure to turn the meat daily if it is not fully submerged in the marinade.
Taste and adjust your gravy to your liking, depending on how sweet or sour you like it. Check out our variations on how to adjust sweet and sour flavors.

VARIATIONS ON GERMAN SAUERBRATEN

Meat: Sauerbraten is a great recipe for any lean or tougher roast like pork roast, venison, lamb roast, bottom round, or chuck roast. Make it with mutton or lamb during the spring holidays!
Veggies: Add aromatic vegetables like leeks, carrots, and celery to your marinade. You can return the veggies to the gravy after you strain the spices.
Sour: Use cider vinegar instead of red wine vinegar, or add a cup of dry red wine like Pinot Noir for a different sour flavor. You can add up to a ½ cup lemon juice when making the gravy.
Sweet: Along with gingersnaps, you can add brown sugar, honey, golden raisins, or beet syrup to make the gravy more sweet.
Spices: If you like, add cracked juniper berries and peppercorns for Sauerbraten spices you’d find in any German restaurant. You can also add seasonings like rosemary, thyme, or pickling spices.

Ingredients
1.36 kg beef rump roast
239 g red wine vinegar
240 g beef broth
1 tablespoon kosher salt
1 tablespoon coarse ground black pepper
1 tablespoon white sugar
10 whole cloves
2 bay leaves
2 yellow onions , chopped
2 tablespoons vegetable oil
1 teaspoon kosher salt
1/2 teaspoon coarse ground black pepper
5 gingersnap cookies , crushed to crumbs

Instructions

Add beef, red wine vinegar, beef broth, 1 tablespoon kosher salt, 1 tablespoon black pepper, sugar, cloves and bay leaves to a large ziplock bag.
Mix ingredients together, remove all air and marinate for 3 days.

Preheat oven to 325 degrees.

Remove beef from marinade, reserve marinade, and dry well.

Add vegetable oil to large pot on high heat.
Season beef with 1 teaspoon kosher salt and ½ teaspoon coarse ground black pepper.
Sear on all sides until well browned, about 3-4 minutes on each side.

Add in the onions, and the marinade.
Cover and cook for 3 hours.

Remove the beef from the pot and strain the liquid in the pot.
If too much liquid cooked off, add 1 cup beef broth.
Add in half the cookie crumbs and cook until sauce thickens.
If it stays too thin, add remaining cookies.
Slice the beef against the grain and serve with sauce.

If you’ve never tried it please make sure to ask for it when you  travel to Germany

spotted in dinnerthendessert.com


Travel Talks Platform

More about our Facebook Group

Join our Facebook Group

Travel platform to expand your travel knowledge, follow the latest destination news and participate in daily questions, like “Travel Trivia”, “Where in the World” and “Amazing Travel Facts”.

czech republic cooking

What’s cooking in Czech Republic- Vepřo-knedlo-zelo

blank

What’s cooking? World recipes

what is cooking - recipe Italy

WHAT IS VEPŘO KNEDLO ZELO?
Literally translated, vepřo knedlo zelo is an abbreviation for Czech roast pork, dumplings, and sauerkraut. This trio is served warm on one plate, poured with flavorful gravy.

Going into details, it’s a slowly roasted piece of pork shoulder, bountifully spiced with crushed garlic and caraway seeds. Sliced bread dumplings and braised sauerkraut are served as a side dish. The gravy is made from juices and fat, remaining in a pan after roasting the meat.

In this post, you’ll learn how to make pork roast (vepřo). Here you’ll find separate recipes for BREAD DUMPLINGS (knedlo) and BRAISED SAUERKRAUT (zelo).

Tip: Sometimes this Czech national dish is called knedlo vepřo zelo – the names of the individual components are placed in a different order.

INGREDIENTS

Here is what you need for the VEPŘO part of this recipe:

Pork shoulder; roasted in one piece. I used a pork collar (krkovice in Czech).
Onions; peeled and chopped finely
Cloves of garlic; peeled and pressed
Pork lard; or vegetable oil like canola or sunflower
Caraway seeds; crushed – do not confuse caraway with cumin; caraway is a spice used frequently in Czech gastronomy
All-purpose flour; to thicken the gravy
Salt, ground pepper
Water; as much as you need, about 3 cups – 720 ml

INSTRUCTIONS
STEP 1: Preheat the oven to 320 °F (160 °C). Cut onion roughly. Peel cloves of garlic and press them.

STEP 2: Salt the meat generously. Dust it with pepper and crushed caraway seeds from all sides. Then rub the pressed garlic onto the pork.

STEP 3: Grease a roasting pan with lard. Pour the onion over the bottom of the pan. Place the seasoned meat on the onion. Pour in 1 cup of water.

STEP 4: Roast the pork uncovered for 2-2.½ hours or until soft. Flip the meat from time to time, that it has a nice brown color over the whole surface. Also, stir the onion occasionally to prevent it from burning. If all the water evaporates, add ⅓ cup more.

STEP 5: Transfer roasted meat to a clean plate, cover with foil and keep it warm.

STEP 6: Place the uncovered roasting pan with onion on the stove over medium heat. Reduce the juices to a necessary minimum, stir occasionally.

STEP 7: Add 1 Tbsp all-purpose flour and fry for 1 minute while stirring, preferably with a flat spatula; it helps you scrape the bottom of the pan to avoid burning flour.

STEP 8: Pour in 2 cups of water, stir well, and bring to a boil. Reduce heat to ⅓ and let the gravy simmer for 20 minutes.

STEP 9: Strain the gravy through a sieve—season with pepper and salt to fit your taste.

If the gravy’s flavor is not strong enough, pour it into a pan, bring it to a boil and reduce the amount of the liquid. You’ll boost the taste of the gravy significantly.

SERVING
Our task now is to arrange a slice of roasted pork, braised sauerkraut, and sliced dumplings on a plate nicely. Here we go.

Let’s start with sauerkraut. Place 2-3 Tbsp of warm braised sauerkraut (ZELO) on the side of a plate.
Add slices of bread dumplings (KNEDLO). Arrange them along the edge, partly covering each other.
Cut pork roast (VEPŘO) in about ½-inch slices, add one or two slices on a plate, with a crust side up.
Pour the gravy over the pork roast and braised sauerkraut.
Enjoy your meal with lovely Czech beer!

If you’ve never tried it please make sure to ask for it when you  travel to Czech Republic

spotted in www.cooklikeczechs.com


Travel Talks Platform

More about our Facebook Group

Join our Facebook Group

Travel platform to expand your travel knowledge, follow the latest destination news and participate in daily questions, like “Travel Trivia”, “Where in the World” and “Amazing Travel Facts”.

Cyprus cooking

What’s cooking in Cyprus – Fasolada

blank

What’s cooking? World recipes

what is cooking - recipe Italy

Fasolada is a white bean or fava bean soup that dates back to the Ancient Greeks and which is popular in both Greece and Cyprus. In fact, fasolada is often referred to as the national dish of Greece.

There are variants all throughout the region, including an Italian one called pasta e fagioli. The Portuguese feijoada is also a variant of fasolada. There are variants throughout the Levant, including an Arab version called fasoulia.

Fasolada is traditionally made without meat, which makes it an important dish for Lent. Aside from the beans, other vegetables that can be included are celery and onion. It will also have a tomato base.

It is typically made with olive oil, or it may be added to the bowl at the table.

Fasolada is thought to have originated with a soup made to celebrate the Greek god Apollo. The name comes from the word faso, which means bean.

Ingredients:
1 lb dried white beans
1 large yellow onion, peeled and roughly chopped
3 carrots, peeled and sliced
3 sticks celery, strings removed and sliced
3 ripe tomatoes, peeled, seeded and roughly chopped (or a 15oz can peeled tomatoes)
2 tbsp tomato paste
5 tbsp olive oil
2 bay leaves
Handful of fresh flat-leaf parsley leaves
Salt
Freshly ground black pepper
Preparation:
Drain the beans and place in a large saucepan.

Cover with cold water and bring to a boil, skimming off any froth with a slotted spoon.

Add all the other ingredients except the seasonings, and simmer for 1 1/2 hours or until tender.

Allow to cool slightly, season with salt and pepper, and ladle into bowls.

Serves 6 to 8

If you’ve never tried it please make sure to ask for it when you  travel to Cyprus

spotted in www.justaboutcyprus.com


Travel Talks Platform

More about our Facebook Group

Join our Facebook Group

Travel platform to expand your travel knowledge, follow the latest destination news and participate in daily questions, like “Travel Trivia”, “Where in the World” and “Amazing Travel Facts”.

croatia cooking

What’s cooking in Croatia – LAMB PEKA

blank

What’s cooking? World recipes

what is cooking - recipe Italy


Peka is one of the most famous and widespread dishes of traditional Croatian cuisine. The speciality of Peka is that it is prepared in a special baking tray. Actually, it’s after the tray – the dish got its name. It is a shallow circular bowl, which is covered with a wide bell. On that bell wooden embers are placed on top and around the bowl.

Like any traditional dish, there are numerous variations of ingredients. Usually, it is made of meat (veal, lamb) or octopus, potatoes, vegetables, spices and herbs.

It is ubiquitous in almost all parts of Croatia, so different names are used according to the region. Thus, we can find it under the name of peka, šač, čripnja, lopiž or pokrivac.

Peka is basically an effortless dish. It is made by putting meat, potatoes and spices together in a clay or iron pan. Everything is covered with a large dome and wooden embers are then placed on top and around the dome.

In this way, the meat and vegetables are first cooked and then baked in their own juices. The result is an incredibly well-paired and natural taste. For this reason, I consider Peka to be one of my favourite Croatian traditional dishes.

The history of Peka has been associated with this region for millennia. There are archaeological remains from the eastern part of Croatia with clay Peka pots over 5,000 years old. It is believed that through history they have kept baking in the region thanks to the Illyrians, the natives before the Great Migration.

Although they were under the rule of Rome, they did not accept the Roman baking furnace. They remained to prepare their meals in this way. Of course, delicious food has always been preserved throughout history, and so has the case of baking.

The Ottoman Empire brought one innovation for Peka. Specifically, they introduced a cast-iron Peka.

Today, baking in Croatian gastronomy is an integral part of any traditional restaurant. Most often it is made from veal and/or lamb, potatoes, other vegetables and herbs. In the coastal part of Croatia, it is often possible to find an octopus prepared in this way.

1 kg Lamb shoulder or any kind of fatty lamb meat
1 kg Veal
1.5 kg Potatoes peeled
2 big pcs onion peeled roughly chopped
3 pcs tomatoes roughly chopped
2 pcs bell peppers roughly chopped
2 tablespoon Lard
1 glass White wine
1 stem fresh rosemary
4 tablespoons Salt
1 teaspoon Black pepper

Steps
1The first step is to prepare fire and embers. It is best to use are high-calorie wood such as beech or hornbeam.

2Cut meat into large pieces about 250-300 grams, well-salted and put it in the bottom of the baking tray together with lard.

3Add the peeled potatoes in one piece or slashed in half in case of larger pieces.

4Add other vegetables, pepper, salt, wine and rosemary.

5Cover and put ambers around Peka and most importantly on top of it.

6After 45 minutes, remove the Peka cover, turn the meat over and continue baking for 45-60 minutes.

7Serve hot.

8Peka goes best with bread and white wine.


If you’ve never tried it please make sure to ask for it when you  travel to Croatia

spotted in www.worldfoodstory.co.uk


Travel Talks Platform

More about our Facebook Group

Join our Facebook Group

Travel platform to expand your travel knowledge, follow the latest destination news and participate in daily questions, like “Travel Trivia”, “Where in the World” and “Amazing Travel Facts”.

Baltic cooking

What’s cooking in Baltic – Karbonāde

blank

What’s cooking? World recipes

what is cooking - recipe Italy

Tafelspitz
Boiled veal, or Tafelspitz, is the king of the beef dishes in Vienna.

When the Viennese talk about beef, they mean boiled veal or Tafelspitz, the king of the beef dishes.

There is practically no more delicious proof of how firmly the Austrian cuisine is rooted in the heart of Europe than one of the most typical of Viennese dishes: boiled veal, or Tafelspitz. Good-quality beef, a few vegetables, aromatic spices, and plenty of water to cook in are the vital ingredients. The same ingredients as when the French are creating their “pot-au-feu” or the Italians their “bollito misto”.

How to make it:
Step 1:
Slice the unpeeled onion in half widthways and fry off the cut surfaces without fat until fairly well browned.

Step 2:
Put around 3 litres of water into a large saucepan. Add the root vegetables, leek, halves of onion, bay leaves, and peppercorns and bring to a boil. Add the washed meat and bones and, depending on the type of meat, allow to cook until softened in gently simmering water, which will take around 2 1⁄2 – 3 hours. Add more water as required and skim off any foam from the surface.

Step 3:
Season well with salt, but only after a good 2 hours.
Once the meat has softened, remove it from the pan and keep it warm in some of the liquid from the soup. Season the remainder of the soup again with salt to taste, and strain it (optional). Serve with semolina dumplings or frittata and freshly chopped chives as a starter.

Step 4:
Slice the boiled beef by cutting on the bias and arrange on pre-heated plates, or serve in the hot soup in a decorative soup tureen.
Serve with roast potatoes, a bread and horseradish mix, green beans in a dill sauce, or creamed spinach and chive sauce. If the root vegetables are to be served at the same time, cook some of them separately to be served al dente.

Cooking time: approx. 2 1⁄2 – 3 hours

If you’ve never tried it please make sure to ask for it when you  travel to Austria

spotted in www.austria.info


Travel Talks Platform

More about our Facebook Group

Join our Facebook Group

Travel platform to expand your travel knowledge, follow the latest destination news and participate in daily questions, like “Travel Trivia”, “Where in the World” and “Amazing Travel Facts”.

Austria cooking

What’s cooking in Austria – Tafelspitz

blank

What’s cooking? World recipes

what is cooking - recipe Italy

Tafelspitz
Boiled veal, or Tafelspitz, is the king of the beef dishes in Vienna.

When the Viennese talk about beef, they mean boiled veal or Tafelspitz, the king of the beef dishes.

There is practically no more delicious proof of how firmly the Austrian cuisine is rooted in the heart of Europe than one of the most typical of Viennese dishes: boiled veal, or Tafelspitz. Good-quality beef, a few vegetables, aromatic spices, and plenty of water to cook in are the vital ingredients. The same ingredients as when the French are creating their “pot-au-feu” or the Italians their “bollito misto”.

How to make it:
Step 1:
Slice the unpeeled onion in half widthways and fry off the cut surfaces without fat until fairly well browned.

Step 2:
Put around 3 litres of water into a large saucepan. Add the root vegetables, leek, halves of onion, bay leaves, and peppercorns and bring to a boil. Add the washed meat and bones and, depending on the type of meat, allow to cook until softened in gently simmering water, which will take around 2 1⁄2 – 3 hours. Add more water as required and skim off any foam from the surface.

Step 3:
Season well with salt, but only after a good 2 hours.
Once the meat has softened, remove it from the pan and keep it warm in some of the liquid from the soup. Season the remainder of the soup again with salt to taste, and strain it (optional). Serve with semolina dumplings or frittata and freshly chopped chives as a starter.

Step 4:
Slice the boiled beef by cutting on the bias and arrange on pre-heated plates, or serve in the hot soup in a decorative soup tureen.
Serve with roast potatoes, a bread and horseradish mix, green beans in a dill sauce, or creamed spinach and chive sauce. If the root vegetables are to be served at the same time, cook some of them separately to be served al dente.

Cooking time: approx. 2 1⁄2 – 3 hours

If you’ve never tried it please make sure to ask for it when you  travel to Austria

spotted in www.austria.info


Travel Talks Platform

More about our Facebook Group

Join our Facebook Group

Travel platform to expand your travel knowledge, follow the latest destination news and participate in daily questions, like “Travel Trivia”, “Where in the World” and “Amazing Travel Facts”.

Albania Cooking

What’s cooking in Albania – Byrek

blank

What’s cooking? World recipes

what is cooking - recipe Italy

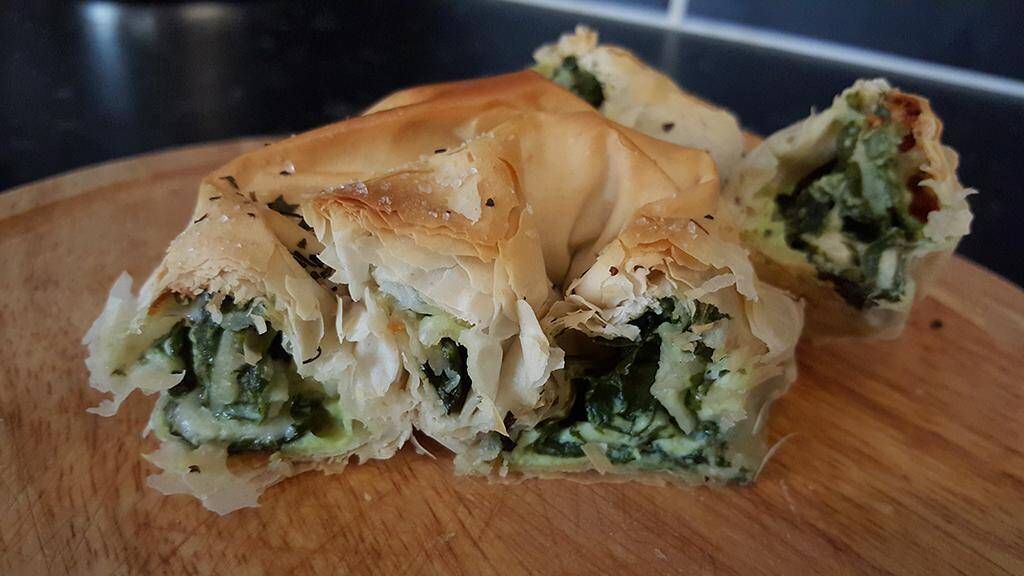
Baked Albanian Spinach Pie or byrek rolls with phyllo dough, feta, and cottage cheese, the perfect party appetizer or snack.

This Albanian spinach pie or byrek rolls are just wonderful: crispy on the outside, with a soft savory filling, easy to make, and perfect for any kind of gathering.

What is byrek?
Or borek or burek, depending on where you are.
A byrek is filled fried or baked pastry made with phyllo or yufka dough.
It is very popular in the Balkan area and actually throughout the former Ottoman Empire.
It can be filled with meat, spinach, cheese or mixtures of several ingredients.
Byrek can be baked in large baking dishes or it can be shaped as rolls or triangles.
The smaller shaped ones are often deep-fried, especially those sold by street vendors or in restaurants.
And if you like this kind of byrek, you will also love the Turkish borek with spinach or the Romanian pie with lots of cheese. Or this more extravagant version of a turkey and vegetable-filled burek.

What do you need?
Phyllo dough:

3 very large sheets or enough to make 16 byrek rolls.
As phyllo dough comes in different sizes (depending on the brand and where you buy it), I recommend just buying a package and use as much as needed.
If you have leftovers, wrap them well, so that they do not dry out and use them to make something else during the next couple of days.
How about a pumpkin pie with phyllo or the Serbian gibanica.

Spinach:

I always use frozen spinach. Defrost the spinach and squeeze very thoroughly in your hands before adding to the filling. All the excess moisture has to be removed, otherwise, the rolls my get soggy.
Dairy:

Feta, cottage cheese and smetana (typical Eastern European dairy product).
Smetana can be replaced with crème fraiche (closest fit) or sour cream.
Other ingredients: green onions, garlic, eggs and oil.

How to shape the byrek rolls?
Place one sheet of phyllo pastry on the working surface and brush it with oil.
Place another sheet on top, brush again, and finish with another phyllo pastry sheet. Brush this one as well.
Cut the phyllo sheets in order to get 16 rectangles of about 25×18 cm/10×7 inches. If your pastry sheets are not large enough for you to get 16 pieces, repeat the procedure with another 3 sheets of pastry.
Place one heaped tablespoon of the filling on the lower side of each rectangle. Fold the sides over the filling and roll the pastry starting on the lower side.
Place the rolls on a baking sheet lined with baking paper with the seam facing down.
Brush the rolls with oil as well.

Ingredients
1 tablespoon olive oil
4 green onions
450 g/12.8 oz frozen spinach
2 garlic cloves
250 g/7 oz feta (from a block, not already crumbled)
225 g/8 oz/1 cup cottage cheese
100 g/ 3.5 oz/ scant ½ cup smetana or crème fraiche
2 small eggs
fine sea salt and pepper
1 packet phyllo dough (Note)
about 4-5 tablespoons olive oil, as needed for brushing

Instructions
Defrost the spinach and squeeze it very well to remove the excess moisture. Preheat the oven: 200 degrees Celsius/400 degrees Fahrenheit.
Chop the onions very finely and cook them in 1 tablespoon olive oil for a couple of minutes.
Mix the onions, spinach, grated garlic cloves, crumbled feta cheese, cottage cheese, smetana/creme fraiche and eggs very well. Add salt and pepper to taste.
Place one sheet of phyllo pastry on the working surface. Brush it with oil. Place another sheet on top, brush it as well, and finish with another phyllo pastry sheet. Brush this one as well. Cut the phyllo sheets in order to get 16 rectangles of about 25×18 cm/10×7 inches.
Place one heaped tablespoon of the filling on the lower side of each rectangle. Fold the long sides over the filling and roll the pastry starting on the lower side. Place the rolls on a baking sheet lined with baking paper with the seam facing down. Brush the rolls with the remaining oil.
Bake for 30 minutes or until golden brown. Cover the rolls loosely with aluminum foil after half the time if they seem to get too dark.

If you’ve never tried it please make sure to ask for it when you  travel to Albania

spotted in whereismyspoon.co


Travel Talks Platform

More about our Facebook Group

Join our Facebook Group

Travel platform to expand your travel knowledge, follow the latest destination news and participate in daily questions, like “Travel Trivia”, “Where in the World” and “Amazing Travel Facts”.

CAnada Cooking

What’s cooking in Canada – Poutine

blank

What’s cooking? World recipes

what is cooking - recipe Italy

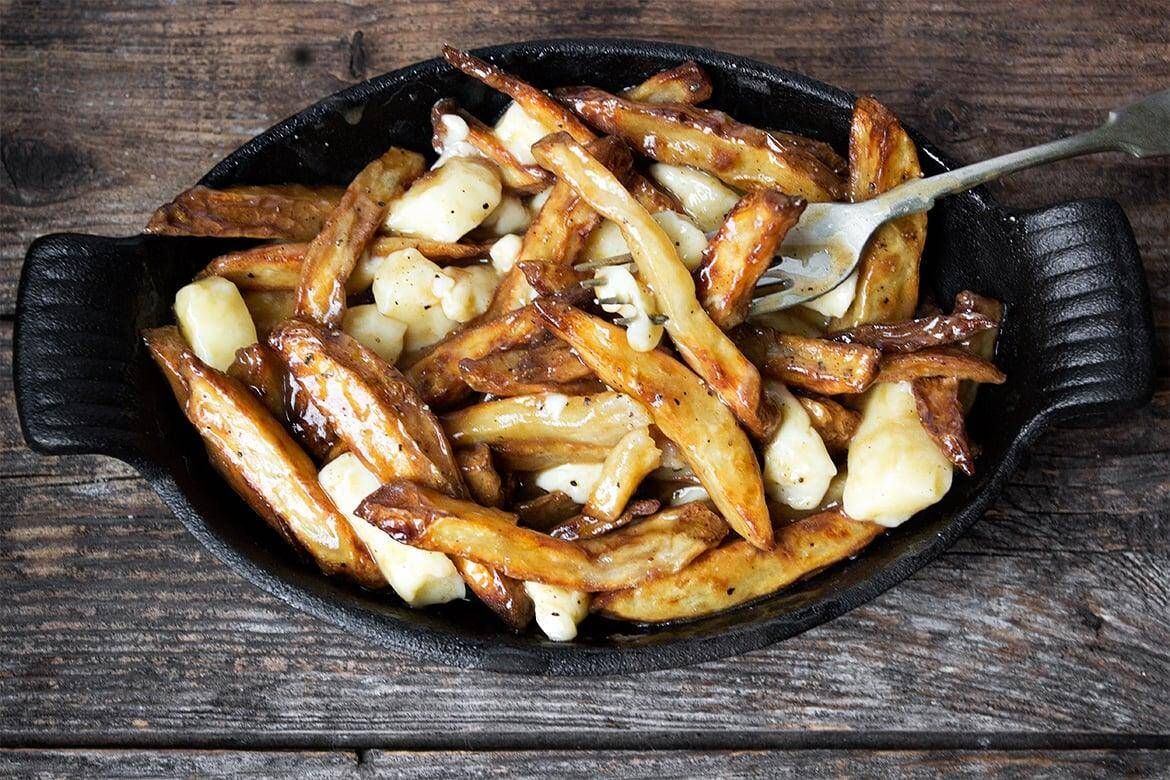
WHAT IS POUTINE?
As a Canadian, it’s seriously shocking to me when someone asks “what’s poutine?” I need to remind myself that not everyone has been blessed enough to enjoy this dish for most of their life. So let me explain to you what you’ve been missing out on!

Poutine is a dish that originated in Quebec back in the 1950’s. I’ve heard stories of a man asking a restaurant to add cheese curds to his fries, that said restaurant later added to their menu. A couple years later, the restaurant served these fries and cheese curds on a plate, then added gravy to keep them warm. This, my friends, is what we call Poutine!

Now that’s just one of many origin stories, but just like with the Nanaimo Bars, no one really knows how it truly originated. Either way, I’m glad it did because this is one of my most favourite dishes ever!

Poutine has always been popular in Canada, but it’s grown even more in popularity over the past few years. Pretty much every restaurant that has fries, has included a poutine variation onto their menu, even McDonalds!

Now if you don’t live in Canada, you’re probably not gonna find poutine in every corner of your city. Well today I’ll be showing you how to make your own poutine that tastes just as good (and dare I say BETTER) than the ones at the restaurants!

PEELING AND CUTTING THE FRIES
Alright, let’s start with the fries! You’ll need 4 pounds of Russet potatoes, preferably all the same size. A lot of people like to keep the skin on their potatoes when making fries or wedges, so if you do, wash your potatoes before slicing. I don’t like the skin, so I run the potatoes under cold water while peeling.

To cut the potatoes into french fry sticks, start by slicing your potato into ¼-inch thick “disks”. Then slice each disk into sticks. See the photos below to better understand what I’m talking about.

As you’re cutting your fries, place them into a large bowl or container filled with cold water. You’ll want to do this right away as the potatoes will start to brown if left out too long. Once all of your fries are in the cold water, cover and refrigerate overnight. This is important because it removes the starch which results the crispiest fries!

FRYING THE FRENCH FRIES
Before frying, you’ll need to drain the starch water from the fries, then rinse them TWICE to make sure all the starch is gone. After the fries have been rinsed, dry them as well as you can. Water and oil is not a good mix, so after you place them on paper towel, use another sheet or two to dry them a handful at a time before adding to the oil.
Fill a very deep pot with 3-inches of oil, then heat it to 300°F. I used a thermometer, but you can test it by adding a small fry after a few minutes, and once it begins to fry gently, the oil is ready.

You’ll be frying the fries twice, once at 300°F for 4-5 minutes to cook the inside, then again at 400°F for 3-5 minutes to get a golden brown crispy outside.

TIPS FOR FRYING THE FRIES
Use a large deep pot: Since we’ll be deep frying, we need a lot of oil. Like enough to go 3-inches up your pot, so you’ll need a pot that’s at least 6-inches high or more, because once the fries are added, the oil will rapidly bubble up and you wanna make sure there’s enough room so it doesn’t spill over.

Fry in small batches: There’s a lot of fries, so you may be tempted to fry a ton at once to get it over with but DON’T! The first time I fried french fries, I accidentally added too many fries to the pot and the oil bubbled up, spilled over, and set the entire pot on fire. Yes, it’s THAT dangerous! I was able to put it out without problem and continue frying, but it could’ve ended way worse so please fry in very small batches to avoid this.
Don’t leave the pot: Pay close attention to the fries when frying. Even though I gave you a time, this is the time it took ME to fry. Things may end up differently for you, especially with the second fry. Some batches took 3 minutes to reach the golden crispy stage, while other batches took 5 minutes or more which is why the time is 5-3 minutes. Once you see the fries getting brown and crispy, take them out. You don’t want them to burn.

WHAT KIND OF CHEESE SHOULD I USE?
White cheese curds is the cheese used in every authentic Canadian poutine! Once again, poutine is so popular here that our grocery stores specifically sell “poutine cheese curds”.

CHEESE CURD SUBSTITUTIONS
Alright, chances are you’re probably gonna have a hard time finding cheese curds so a great substitution is a ball of soft mozzarella torn into chunks. The type of mozzarella you can’t use a shredder for, I use this soft mozzarella every time I make lasagna! When adding the gravy, the cheese is supposed to get melty and gooey, only soft, torn pieces of mozzarella can give you similar results.

Speaking of the cheese curds, one thing that’s always annoyed me is how much some restaurants skimp on the curds! Like a bucket of fries with 3-4 cheese curds, ridiculous! So now that I have full control over my curds, I went a bit crazy and added 2 full cups :D.

HOW TO MAKE POUTINE GRAVY
The GRAVY! This is what ties the whole dish together. The gravy can make or break a good poutine. For instance, Popeyes has amazing fries, and the cheese curds made them better, but their poutine gravy did not taste great to me so after the first try, I never bought it again.

So if you’ve got bad gravy, you’ve got bad poutine.

That’s why I was so nervous the entire time I was making this gravy. Thankfully it turned out AMAZING! I’m talking dip your already gravy-soaked fries into a side bowl of more gravy, amazing!

Making the gravy is very simple. Start by making a roux, which is butter and flour cooked together on the stove. Once the roux is bubbling, slowly pour in the beef stock. You can substitute with chicken stock, but you’ll end up with a very light gravy when poutine gravy is supposed to be dark. The beef stock will also give the gravy a better flavour.

For additional flavour, you’ll add ketchup, Worcestershire sauce, salt and pepper. Whisk everything together and let it come to a boil. Pour in a cornstarch slurry (water + cornstarch combined) into the gravy and whisk until it’s incorporated. Let the gravy bubble and boil until it’s thickened. From there, you can taste the gravy and adjust the salt and pepper to your liking.
Now immediately pour the gravy onto the fries and cheese curds while it’s hot! The main purpose of the gravy is to melt the cheese curds into the fries so everything becomes one deliciously gooey mess!

If you’ve never tried it please make sure to ask for it when you  travel to Canada

spotted in www.queensleeappetit.com


Travel Talks Platform

More about our Facebook Group

Join our Facebook Group

Travel platform to expand your travel knowledge, follow the latest destination news and participate in daily questions, like “Travel Trivia”, “Where in the World” and “Amazing Travel Facts”.

Miami cooking

What’s cooking in Miami – The Cuban Sandwich

blank

What’s cooking? World recipes

what is cooking - recipe Italy

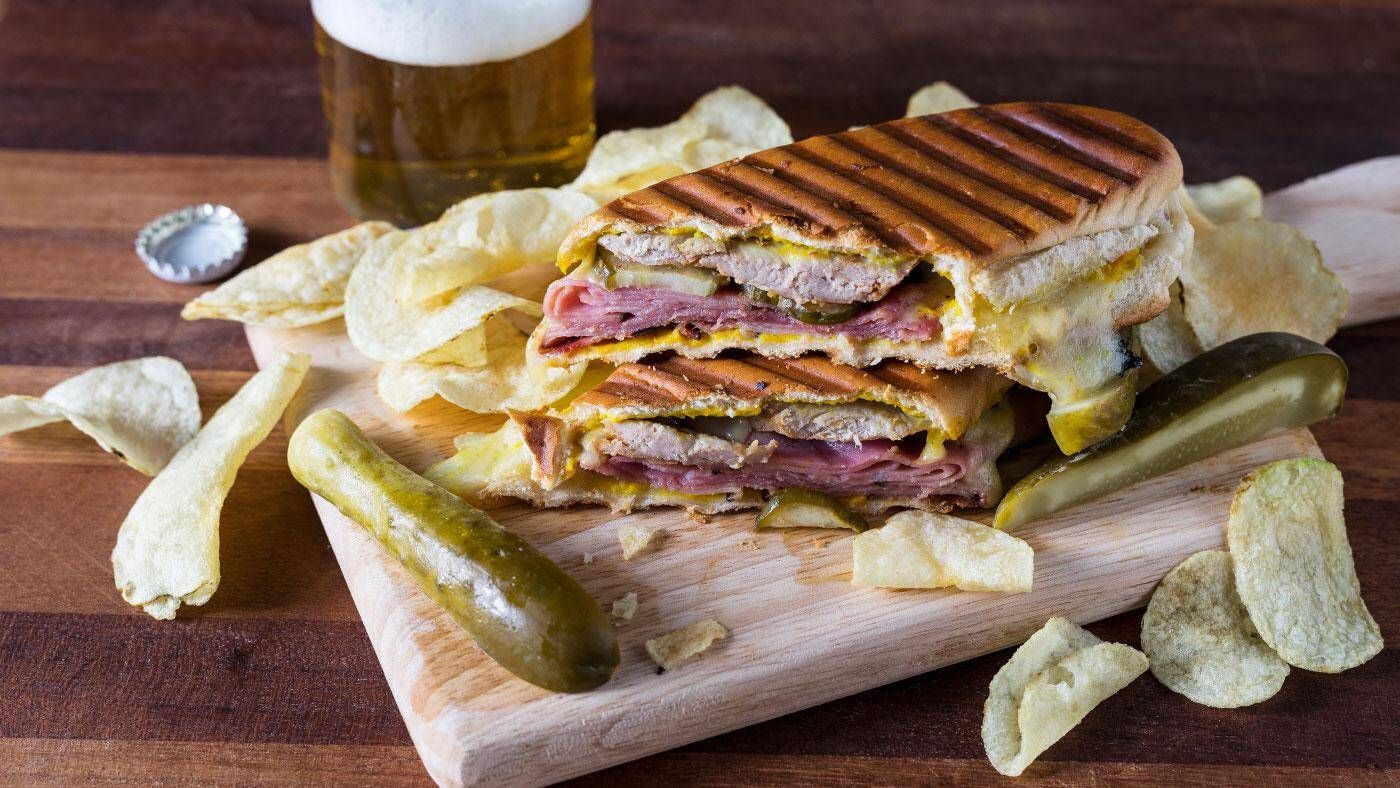
The best Cuban sandwich makers in Miami have elevated sandwich making to an art form. The larger restaurants station the sandwich maker in a prominent spot where everyone can enjoy the show. Armed with a long, thin, serrated knife, the sandwich maker expertly cuts the ham and pork, usually from a whole pork leg. Using the flat surface of the broad knife, he artfully arranges the layers of meat onto the sandwich.
The Cuban Sandwich
Glenn Lindgren: No one is certain exactly where and when the Cuban sandwich was invented. We do know that Cuban sandwiches (called “a sandwich mixto”) were common on cafeteria and restaurant menus in Cuba by the 1930s, and there is some evidence of them as early as the turn of the century.

Raúl Musibay: They were very popular with workers in Cuba’s sugar mills. People set up restaurants inside the mills and sold the sandwiches to the workers on their lunch breaks.

Jorge Castillo: In the Province of Oriente, the eastern part of Cuba, they eat a different version of the Cuban sandwich. It is exactly like the traditional Cuban sandwich, but the bread is rubbed with garlic first.

Glenn Lindgren: The Cuban is a sandwich with universal appeal because it’s a combination of ingredients that are almost universally loved. The Cubano is basically a grilled ham and cheese sandwich — a type of sandwich you’ll find in many cuisines from the simple grilled American cheese and white bread sandwich many Americans grew up with to the French croque-monsieur.

Jorge Castillo: How does such a simple sandwich create so much passion? The Cuban sandwich is nothing more than a loaf of Cuban bread, cut in half, buttered on both sides, and stuffed with dill pickles, roast pork, ham, and Swiss cheese — not exactly rocket science.

Raúl Musibay: There are a couple of variations on the Cuban sandwich worth noting: “Sandwich Cubano Especial ” with thinly sliced Serrano ham that adds a salty tang. Or one of my favorites, the Cuban sandwich with olive salad. I had that one many times in Cuba.

Cuban Sandwich (Cubano) Recipe
By Three Guys From Miami

Prep time: 5 minutes
Cook time: 5 minutes
Total time: 10 minutes
Yield: 4 sandwiches
The Cuban Sandwich (Cubano) is basically a grilled ham and cheese sandwich — Cuban style!

INGREDIENTS:

1 loaf Cuban bread
3 tablespoons butter
1 pound ham
1 pound Cuban pork (lechón asado)
1/2 pound Swiss cheese
15 slices dill pickles
OPTIONAL INGREDIENTS:

8 slices Serrano Ham (Jamon Serrano)
OR

1 tablespoon olive salad (giardiniera)

If you’ve never tried it please make sure to ask for it when you  travel to Miami

spotted in icuban.com


Travel Talks Platform

More about our Facebook Group

Join our Facebook Group

Travel platform to expand your travel knowledge, follow the latest destination news and participate in daily questions, like “Travel Trivia”, “Where in the World” and “Amazing Travel Facts”.

California cooking

What’s cooking in Los Angeles – French Dip Sandwich

blank

What’s cooking? World recipes

what is cooking - recipe Italy


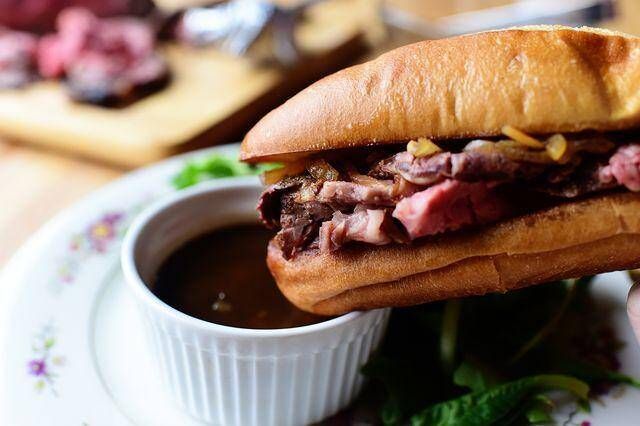
A French Dip Sandwich is a hot beef sandwich consisting of tender thin slices of beef layered a long white French roll that is dipped into a flavorful sauce made from the pan juices. American menus often describe the pan juice as “au jus (pronounced oh zhoo’).” Au jus is a French expression, which means “with broth” or “with juice.”

French Dip sandwiches have become a common menu item at a wide range of restaurants, sandwich shops, and fast food outlets.

History of French Dip Sandwich:

Phillippes Sign1918 – Although the French Dip Sandwich is not French, the inventor, Philippe Mathieu was. In 1918, Philippe owned the still existing delicatessen and sandwich shop called Philippe the Original in Los Angeles. It is considered one of Los Angeles’ oldest restaurant still in business today.

According to the story at the restaurant, Philippe was preparing a sandwich for a policeman and accidentally dropped the sliced French roll into the drippings of a roasting pan. The policeman liked the sandwich and came back the next day with some friends to order the sandwich dipped in the meat pan. From that day on, a new sandwich was born.


1951 – Because of the 101 Freeway construction in 1951, Philippe’s moved to its current location on Alameda across from Union Station. Not much has changed since – the saw dust on the floors, cafeteria style dining and the hot mustard are still the same.

Matt Weinstock, then a reporter for the Los Angeles Daily News wrote:

“. . . Philippe’s was something special. It had sawdust on the floor and cracks in the wall but you didn’t care. Y ou went there for the luscious French-dipped sandwich, the boiled eggs, the hot mustard, the potato salad, the cole slaw, the immense hunks of pie, the always hot mugs of coffee. You also woke up at night, maybe thousands of miles away, yearning for one of those sandwiches.”


Philippe’s is still in the location they were in 1951, at a machine shop with a hotel on the second floor. Today, Philippe’s “French Dipped Sandwich” is the specialty of the house and consists of either roast beef, roast pork, leg of lamb, turkey or ham served on a lightly textured, freshly baked French roll which has been dipped in he natural gravy of the roasts. Swiss, American, Monterey Jack or Blue cheese may be added.

Ingredients
French Dip Sandwich:
1 (4-pound) beef rib eye, sirloin, or tenderloin roast
1/2 cup black pepper, coarsely-ground
8 French rolls*

Dipping Sauce Ingredients
Beef juices from cooking pan
1 (10.5 ounce) can beef stock of beef broth
1/2 cup water
Salt and pepper to taste
Instructions
French Dip Sandwich Instructions:
Preheat oven to 425 degrees F.

Place beef roast onto a rack in a shallow baking pan; firmly press pepper onto roast. Bake, uncovered, 30 to 45 minutes or until a cooking thermometer, in the thickest part of roast, registers 135 degrees F. Remove from oven and transfer onto a cutting board; let stand 15 minute before carving; slice beef thinly.

Reserve the beef juices and pour into a medium saucepan. Prepare Dipping Sauce.

For each sandwich: Cut French rolls in half. Toast and butter each French roll. Layer about 1/2 pound of sliced beef on bottom slice of each roll; place remaining tops of rolls on top of the beef.

Slice sandwiches in half and serve on individual plates with a small bowl (1/4 cup) of hot Dipping Sauce.

Makes 8 sandwiches.

Dipping Sauce Instructions:
In a medium saucepan, add beef juices, beef broth, water, salt, and pepper; bring just to a boil. Turn off the heat, cover saucepan, and let site 10 minutes before serving.

If you’ve never tried it please make sure to ask for it when you  travel to Los Angeles

spotted in /whatscookingamerica.net


Travel Talks Platform

More about our Facebook Group

Join our Facebook Group

Travel platform to expand your travel knowledge, follow the latest destination news and participate in daily questions, like “Travel Trivia”, “Where in the World” and “Amazing Travel Facts”.

chicago cooking

What’s cooking in Chicago- Chicago Style Deep Dish Pizza

blank

What’s cooking? World recipes

what is cooking - recipe Italy

Chicago-Style Deep Dish Pizza

Did you ever wonder about the “pie” in pizza pie? This dish will make that connection clear for you. With its 1 1/2″ tall crust cradling distinct layers of cheese, sausage, and tomatoes, this is definitely a knife-and-fork pizza PIE. We like to bake this in a big, 14″ deep-dish pizza pan; it makes a spectacular presentation, right out of the oven. But if you don’t have a big pan, feel free to use two 9″ round cake pans.

Ingredients
Crust

4 cups (482g) King Arthur Unbleached All-Purpose Flour
3 tablespoons (35g) yellow cornmeal
1 3/4 teaspoons (11g) salt
2 3/4 teaspoons instant yeast
2 tablespoons (25g) olive oil
4 tablespoons (57g) butter, melted
2 tablespoons (25g) vegetable oil or salad oil
1 cup + 2 tablespoons (255g) lukewarm water
Filling

3/4 lb. mozzarella cheese, sliced
1 pound Italian sweet or hot sausage, cooked and sliced; or about 3 cups of the sautéed vegetables of your choice
28-ounce can plum tomatoes, lightly crushed; or 28-ounce can diced or chopped tomatoes
2 to 4 garlic cloves, peeled and minced, optional
1 tablespoon sugar, optional
1 to 2 teaspoons Pizza Seasoning or mixed dried Italian herbs (oregano, basil, rosemary), to taste
1 cup (113g) freshly grated Parmesan or Asiago cheese
2 tablespoons (25g) olive oil, to drizzle on top
Instructions
To make the crust: Weigh your flour; or measure it by gently spooning it into a cup, then sweeping off any excess. Mix flour with the rest of the dough ingredients, and knead — by hand, mixer, or bread machine — to make a smooth crust. This will take about 7 minutes at medium-low speed in a stand mixer.

Place the dough in a lightly oiled bowl or 8-cup measure (which makes it easy to track its rise), cover, and let rise till very puffy, about 60 minutes.

While the dough is rising, ready your 14″ deep-dish pizza pan. Grease it with non-stick vegetable oil spray, then pour in 3 to 4 tablespoons olive oil, tilting it to cover the bottom of the pan, and partway up the sides.

Stretch the dough to make as large a circle as you can. You can do this on a lightly oiled baking mat, if you choose; or simply stretch the dough in your hands.

Lay the dough in the pan, and stretch it towards the edges until it starts to shrink back. Cover, and let it rest for 15 minutes. Preheat the oven to 425°F while the dough rests.

Continue to stretch the dough to cover the bottom of the pan, then gently push it up the sides of the pan. The olive oil may ooze over the edge of the crust; that’s OK. Let the crust rest for another 15 minutes.

Bake the crust for 10 minutes, until it’s set and barely beginning to brown. While it’s baking, prepare the filling.

Drain the tomatoes thoroughly. Combine them with the Pizza Seasoning or herbs, and the garlic and sugar (if you’re using them). Add salt to taste; you probably won’t need any additional salt if you’ve used the Pizza Seasoning.

Cover the bottom of the crust with the sliced mozzarella, fanning it into the crust. Add the sausage (or sautéed vegetables), then the tomato mixture.

Sprinkle with the grated Parmesan, and drizzle with the olive oil.

Bake the pizza for about 25 minutes, or until the filling is bubbly and the topping is golden brown. Remove it from the oven, and carefully lift it out of the pan onto a rack. A giant spatula is a help here. Allow the pizza to cool for about 15 minutes (or longer, for less oozing) before cutting and serving.

Tips from our Bakers
For individual deep-dish pizzas: Grease the wells of an individual hamburger bun pan. Divide the risen dough into 12 equal pieces; if you have a scale, each piece will weigh about 2 1/2 ounces. Roll each piece into a tight ball, then cover six of them and transfer to the refrigerator. Allow the remaining six balls of dough to rest, covered, at room temperature for 20 minutes. Stretch an unrefrigerated dough ball to cover the bottom of a well, then push it up the sides of the pan. Repeat with the remaining dough. After a 15-minute rest, bake the individual crusts for 10 minutes until they’re set and barely beginning to brown. Fill, then bake the pizzas for another 20 to 25 minutes, until the filling is bubbly and the topping is golden brown. Repeat with the remaining (refrigerated) dough.
Deep-dish pizza has a long history in the city of Chicago, where it’s revered as a delicious native invention. The crust, based on a recipe whose supposed provenance is Chicago’s Pizzeria Uno, has an unusual flaky/tender texture, and great taste — courtesy of three types of fat: vegetable oil, olive oil, and butter. Also, the tiny bit of cornmeal adds subtle but delightful crunch.

If you’ve never tried it please make sure to ask for it when you  travel to Chicago

spotted in www.kingarthurbaking.com


Travel Talks Platform

More about our Facebook Group

Join our Facebook Group

Travel platform to expand your travel knowledge, follow the latest destination news and participate in daily questions, like “Travel Trivia”, “Where in the World” and “Amazing Travel Facts”.

india cooking

What’s cooking in NYC – Manhattan Clam Chowder

blank

What’s cooking? World recipes

what is cooking - recipe Italy

Manhattan clam chowder is most often recognized by its red color, coming from the use of tomatoes and tomato paste. The broth is much thinner than the thick New England version and while it also includes potatoes, most Manhattan-style chowders boast a variety of vegetables like carrots, celery, onion, and garlic for added flavor. The first recipe for “Manhattan Clam Chowder” was published in 1934 in a cookbook called Soups and Sauces by Virginia Elliott and Robert Jones. While the name “Manhattan” stuck, the soup has little to do with New York City’s most popular borough.

While it had its supporters, not everyone was a fan of the tomato-based twist on the original. In New York Cookbook, Molly O’Neill explains, “Manhattan clam chowder reverberated like an act of sabotage against the New England clam chowder tradition.” She went on to detail the outrage associated with the soup’s creation:

Manhattan clam chowder remained “a notable heresy.” In 1939 a Maine legislator introduced a bill outlawing the use of tomatoes in chowder. In 1940, Eleanor Early, lambasted the “terrible pink mixture” in her book New England Sampler. Manhattan clam chowder, she wrote, “is only a vegetable soup and not to be confused with New England Clam Chowder, nor spoken of in the same breath. Tomatoes and clams,” she wrote, “have no more affinity than ice cream and horseradish.”

Not to be left out, New Jersey has also created its own version, which is more similar to Manhattan clam chowder. It’s made with tomatoes, creamed asparagus, light cream, and bacon. It’s also seasoned with Old Bay spice, parsley, and celery powder.

Going further south to Florida, St. Augustine calls Minorcan clam chowder one of its signature dishes. This one is similar to Manhattan-style in that it’s tomato-based. However, Florida’s version includes one very unique ingredient: datil pepper. The pepper — varying in color from green to a yellowish orange — is indigenous to Cuba and was brought to Florida hundreds of years ago. It’s described as sweet, tart, and spicy, giving the soup it’s one-of-a-kind flavor. The name Minorcan refers to Florida settlers from the island of Minorca, Spain who created the hearty soup with local ingredients in their Mediterranean style.

There is also Rhode Island clam chowder, known for its clear broth and its use of quahogs, a type of clam defined by its larger size (they may weigh up to 3 pounds). In fact, the small state also has a red version of the famous soup. Unlike the Manhattan-style chowder, this one is not made with any actual tomatoes — it’s made with tomato purée— or any added vegetables.

In the Outer Banks of North Carolina, there’s a version dubbed Hatteras Island-style clam chowder — a broth-based soup that skips the cream and tomatoes. It’s commonly made with littleneck clams due to their small size and sweet flavor. The ingredients are cooked in clam juice diluted with water and brought to a boil to infuse the flavor of the clams into every bite. Classically, the dish only calls for salt and pepper as a seasoning.

There is also Cabo Clam Chowder, a South of the Border-inspired dish boasting bold Mexican flavors like chipotle. The recipe includes vegetables like onions, corns, jalapeños, and peppers, plus black beans, garlic, cilantro, cumin, and lime. Spicy flavors come from chipotle hot sauce and the dish is garnished with tortilla strips.

Ingredients
2 tablespoons butter
1 cup chopped onion
2/3 cup chopped celery
2 teaspoons minced green pepper
1 garlic clove, minced
2 cups hot water
1 cup cubed peeled potatoes
1 can (28 ounces) diced tomatoes, undrained
2 cans (6-1/2 ounces each) minced clams, undrained
1 teaspoon salt
1/2 teaspoon dried thyme
1/4 teaspoon pepper
Dash cayenne pepper
2 teaspoons minced fresh parsley

Directions
In a large saucepan, heat butter over low heat. Add onion, celery, green pepper and garlic; cook, stirring frequently, for 20 minutes. Add water and potatoes; bring to a boil. Reduce heat; simmer, covered, until potatoes are tender, about 15 minutes.
Add tomatoes, clams, salt, thyme, pepper and cayenne; heat through. Stir in parsley. Serve immediately.

If you’ve never tried it please make sure to ask for it when you  travel to New York

spotted in www.eater.com


Travel Talks Platform

More about our Facebook Group

Join our Facebook Group

Travel platform to expand your travel knowledge, follow the latest destination news and participate in daily questions, like “Travel Trivia”, “Where in the World” and “Amazing Travel Facts”.

india cooking

What’s cooking in India- Tandoori Chicken

blank

What’s cooking? World recipes

what is cooking - recipe Italy

Tandoori chicken (तंदूरी चिकन) is a typical dish of traditional Indian cuisine, very popular in many parts of South Asia, based on chicken marinated in dahi (yoghurt), enriched with a typical blend of spices.

What is tandoori chicken?
As its name suggests, tandoori chicken is cooked in a tandoor after marinating for several hours.

The tandoor is a cylindrical clay oven with an underground base, where the coal that feeds it is placed, and at the top the opening where the food is lowered to be cooked. The oven reaches very high temperatures and was originally used in Mughal cuisine to bake bread, but its use has also been extended to cooking meat.

To bake breads, the bread is hung raw on the inner walls of the oven where it is baked in a few minutes, while the meat is threaded in pieces on vertical skewers and loses its juices which, dripping from top to bottom, leave the pieces from the bottom, in contact with the embers, so as not to dry out too much.

The tandoor oven is widespread throughout India but is typical of the Punjab region.

The tandoori cooking technique is widespread in India, the Middle East and Central Asia, while in the West it is easily savored in many restaurants around the world.

The meat, usually chicken, lamb or beef, is first marinated for a long time.

How to prepare tandoori chicken
The pieces of chicken, which can be either thighs, wings or sometimes cutlets, are previously marinated for several hours in dahi (yoghurt) and seasoned with tandoori masala, a popular spice blend.

The typical red color of tandoori chicken is obtained by using chili powder, Kashmir or cayenne pepper, while a large amount of turmeric can generate a red-orange color. Both colors can be found in many modern versions.

Tandoori chicken is traditionally cooked at high temperatures in a tandoor that can reach about 900 F (480°C), which is unthinkable for any domestic oven.

Since not everyone has a tandoor at home, there are at least two other alternatives: a traditional oven or a charcoal, electric or gas barbecue.

For cooking in a traditional standard oven, tandoori chicken can be cooked on the oven rack placed on a baking dish or using a spit or rotisserie. Skewers are also used for cooking on charcoal or other barbecues.

In a tandoor, the heat being very high, when the fat of the meat drips on the hot coals, it produces smoke.

The dahi marinade helps tenderize the meat. This marinade, combined with the high heat, is the soul of tandoori chicken. Like almost everything in Indian cuisine, it needs a bouquet of spices that give it very intense aromas.

In India and other countries in the region, such as Pakistan and Bangladesh, there are hundreds of such seasoning blends.

What many call curry is a generic name given by the colonizers both for these spice blends and for the dishes prepared with this immense variety of condiments.

Originally, the word referred to a plant native to India, curry, whose leaves frequently appear in these spices. The Indians often call these spice mixtures masala, garam masala being the best known type.

Ingredients
For the chicken marinade
750 g chicken (thighs, upper thighs, wings)
150 ml Greek yogurt (dahi)
1 teaspoon garlic paste
1 teaspoon ginger paste
1 teaspoon garam masala
1 teaspoon red chili powder (or red pepper flakes)
¼ teaspoon white pepper
1 teaspoon ground coriander
½ teaspoon mustard seeds
¼ teaspoon salt
½ teaspoon ground turmeric
1 teaspoon dried fenugreek leaves (kasuri methi)
2 tablespoons lemon juice
1½ tablespoon mustard oil (or vegetable oil)
To grill
1 tablespoon vegetable oil
For the color
1 teaspoon red chili powder
2 tablespoons melted ghee (or mustard oil)

Instructions

Marinade
In a large bowl, pour the dahi.
Then add the garlic and ginger pastes, garam masala, red chili powder, mustard seeds, salt, turmeric, kasuri methi, white pepper and ground coriander. Add the oil and lemon juice.
Mix the marinade, which should have a thick consistency.
Make deep slits on the chicken pieces and place them in the bowl.
Distribute the marinade over the chicken pieces, making sure to also soak the slits.
Cover and marinate in the refrigerator for at least 8 hours.
Cooking
Take the chicken out of the refrigerator 1 hour before cooking and leave it at room temperature.
Preheat the oven to 460 F (240˚C) for 25 minutes.
Line a baking sheet with aluminum foil to collect the drips.
Distribute 1 tablespoon of vegetable oil on a wire rack and place it on the baking sheet lined with aluminum foil.
Place the chicken pieces on the grill. Reserve the rest of the marinade.
Grill the chicken for 15 to 20 minutes.
Combine 1 teaspoon of chili powder and 2 tablespoons of ghee (or mustard oil) in a bowl.
After 15 minutes of broiling, drizzle the chicken with half of the reserved remaining marinade and brush the chicken with half the red chili ghee (or mustard oil).
Turn the chicken pieces over and brush them with the remaining marinade and the remaining red pepper ghee.
Grill another 6 to 10 minutes or until the chicken is cooked through. Adjust the cooking time according to the size of the chicken pieces.
For the last 5 minutes, move the aluminum foil lined baking sheet and wire rack to the highest rack to give the chicken a nicely roasted color.
Serve with onion rings, lemon and naan bread.

If you’ve never tried it please make sure to ask for it when you  travel to India

spotted in www.196flavors.com


Travel Talks Platform

More about our Facebook Group

Join our Facebook Group

Travel platform to expand your travel knowledge, follow the latest destination news and participate in daily questions, like “Travel Trivia”, “Where in the World” and “Amazing Travel Facts”.

blank


Private Facebook group
for the travel industry

Travel Talks Platform Group


5.8k members

Travel Talks Platform for the travel industry

Follow the travel news – Traveltalksplatform is the number 1 news site to stay updated on amazing travel facts, the latest news, events, incentive ideas, MICE news, job opportunities and shows.

Specially composed for the travel industry, you will find the latest travel facts at your fingertips.

Submit


Subscribe

Stay updated about the latest travel news worldwide

blank

The latest airline news, hotel news, cruise news and MICE news in your inbox:
Stay updated about
the latest travel news worldwide


Copyright © 2021 e-motions international

disclaimer:

We assume no responsibility or liability for any errors or omissions in the content of this site. The information contained in this site is provided on an "as is" basis with no guarantees of completeness, accuracy, usefulness or timeliness.