waldorf salad

Waldorf Salad – famous since1890

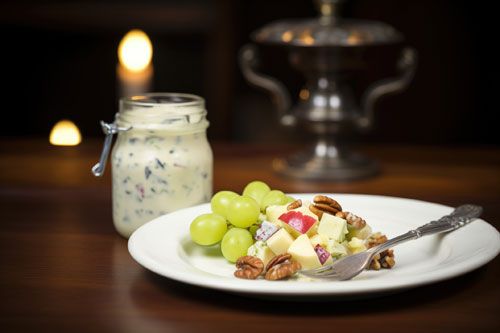
Today we  journey back to the glitzy days of the late 1800s, where the Waldorf Salad made its grand entrance. Picture this: crisp apples, snappy celery, juicy grapes, and crunchy walnuts, all mixed together in a creamy dressing. This salad has been the belle of the ball for generations, and today, we’re sharing how to whip up this culinary classic in your very own kitchen!

The Waldorf Salad Saga:

So, picture yourself at the  Waldorf-Astoria Hotel in New York City, circa the late 1800s. Oscar Tschirky, the maître d’hôtel extraordinaire, is on a mission to wow the hotel’s guests. And voilà, the Waldorf Salad was born! Originally, it was a simple mix of apples, celery, and mayo. But as time went on, it got a glow-up with grapes and walnuts joining the party.

Recipe:

Ingredients Waldorf Salad:

  •  2 sassy apples (Granny Smith or Honeycrisp, take your pick), diced
  • 1 cup thinly sliced celery (it’s like the salad’s crunchy sidekick)
  • 1 cup of grapes, halved (because life’s too short for whole grapes!)
  • 1/2 cup of toasted walnuts, roughly chopped
  • 1/2 cup of mayo (the creamier, the better!)
  • 2 tablespoons of lemon juice (to give it that zesty zing)
  • 1 tablespoon of honey (to sweeten the deal)
  • A pinch of salt and pepper (because seasoning is everything)
  • Fresh parsley, for a fancy finish (optional, but oh-so-pretty)

Instructions Waldorf Salad:

  1. Let’s Dress to Impress: Grab a bowl and whisk together the mayo, lemon juice, honey, salt, and pepper. Give it a taste and adjust to your liking. Set it aside for now.
  2. Time to Toast, Toast, Toast: Preheat your oven to 350°F (175°C). Spread those walnuts on a baking sheet and pop ’em in the oven for about 8-10 minutes. They’re done when they’re golden and fragrant. Let them cool while you resist the urge to eat them all!
  3. Mix and Mingle: In a big ol’ bowl, toss together your diced apples, celery, halved grapes, and those irresistible toasted walnuts. Let ’em get acquainted.
  4. Get Saucy: Pour that creamy dressing all over your apple party and gently mix until everything’s coated in deliciousness. It’s like giving your salad a cozy blanket of flavor.
  5. Make It Look Pretty: Transfer your Waldorf wonder to a serving dish and sprinkle some fresh parsley on top. You eat with your eyes first, after all!
  6. Dive In and Chow Down: Grab a fork and get ready to taste the magic! Whether it’s a light lunch or a side dish for dinner, this Waldorf Salad is sure to steal the show.

And there you have it, the Waldorf Salad, a true gem of culinary history! So next time you’re in the mood for something fresh, crunchy, and downright delicious, give this recipe a whirl. With its crisp apples, snappy celery, juicy grapes, and creamy dressing, it’s a salad that’s sure to put a smile on your face. Bon appétit!

Why not plan a trip to New York and taste this wonderful salad in it’s hometown. Check out your options here


The perfect braai – South African number 1 recipe

The word ‘braai’ is Afrikaans, originating from the Dutch word ‘braden’ which means ‘to roast’.

The perfect Braai

What’s cooking in South Africa? Well, how about the Perfect Braai?

Braai’s are a method of cooking meat in South Africa, a way to socialise and a way of life. 

The long cooking times allow South Africans to connect with their family and friends by sharing drinks and stories next to the fire. It can last for hours.

The perfect braai

The word ‘braai’ is Afrikaans, originating from the Dutch word ‘braden’ which means ‘to roast’.

So what can you cook and put on this perfect braai? Traditionally, you will braai boerewors, steaks, chicken, and other sausages. Anything goes, really

A traditional braai is cooked on local wood, while modern-day braai’s use charcoal instead, and both give the meat a distinct flavour. Using gas to cook doesn’t count as a real braai.

travel to South Africa

Travel Talks Platform

More about our Facebook Group

Join our Facebook Group

Travel platform to expand your travel knowledge, follow the latest destination news and participate in daily questions, like “Travel Trivia”, “Where in the World” and “Amazing Travel Facts”.

Continue reading

The most iconic Australian food

The most iconic Australian food

The most iconic Australian food

You may have heard of some of the iconic Aussie cuisines, but have you tried them all? Some of them you will discover on board a Mojosurf tour! My personal fav the almighty Vegemite (pronounced Veggiemight), a delicacy only the finest of palettes enjoy. 

1. Vegemite

Vegemite is the most common one that ‘foreigners’ discover, and more often than not, hate! No matter how many people tell you it’s disgusting you should try it at least once. It’s an acquired taste…

So what is Vegemite? Vegemite is a dark brown paste made from various vegetables, yeast extract and spice additives. The most popular way to eat it is on toast with butter. Australian’s also eat it with avocado, melted cheese or tomato. I thought it would taste like syrup, but it tastes very salty and not sweet at all. Best way to eat it is with loads of butter and a thin spread of vegemite.

2. Fairy Bread

Now this one is really strange and you probably won’t come across it unless you happen to find yourself at a kids party. Fairy Bread is simply white bread with butter sprinkled with hundreds and thousands!

3. Tim Tams!

Any backpacker who has traveled through Australia will have tried Australias favourite chocolate biscuit… the Tim Tam. I ate my first Tim Tam after a Mojosurf lesson in Byron Bay and I loved it! If you eat one, it’s hard not to eat a second or third. Warning!! It’s got hidden addictive powers. 

From one of the Mojosurf Crew I heard that the best way to eat on is the famous Tim Tam slam: bite the diagonal corners off the Tim Tam and take a cup of coffee, tea or hot chocolate. Use the Tim Tam as a straw and suck the drink through the biscuit. Then before it gets too soggy, and falls into your drink, you eat the soft, gooey (warmness!) #chocolateheavan even better after a winter surf lesson! 

4. Meat Pies

Pies are a popular snack to eat on the go and almost every corner shop, bakery and supermarket will have a display case with lots of hot meaty pies to choose from. There are even specialty pie shops! Australians have many different savoury pies you can buy, however they are usually stuffed with minced meat, gravy, mushrooms, onions and cheese. It’s also a good snack after a long night of partying (better than a kebab!). After drinking and dancing you end the night with a meat pie in your hand, sitting on the pavement waiting for your taxi to go home. 

Pies come in all flavour combos we also loved the cauliflower & cheese pies for vegetarians needing a midnight snack!

5. Anzac Biscuits

ANZAC stands for the Australian

 and New Zealand Army Corps that fought together during WWI. ANZAC Day is a public holiday in Australia to celebrate the men that fought for the country. During the war, the wives baked these delicious ANZAC biscuits to send off to their men at war. They were cheap to make and could stay fresh throughout long boat journeys. They are made with coconut, golden syrup and oats… yum!

(Never call these Anzac Cookies as that will upset Aussies more than you can imagine!)

6. Chicken Parma (AKA Chicken Parmigiana)

Ok, I know this doesn’t sound particularly Australian, but this is one of the most common foods you’ll find in an Australian pub. Loads of pubs have a parma night where you can grab a decent priced chicken parma with a beer. A chicken parma is a chicken schnitzel (chicken covered in flour, egg and then breadcrumbed), topped with a tasty tomato sauce with melted cheese on top. It’s like Australia meets Italy on a plate! 

7. Pavlova

The Aussies and the Kiwis have long fought over the sovereignty of Russel Crowe, Crowded House and the mighty Pavlova – a meringue cake base topped with whipped cream and fruit. 

Regardless of its origin, the pavlova is absolutely delicious! You are most likely able to find a Pavlova in most cake shops or bakeries. You can also buy them pre-made from most major supermarket chains (look in the bread or frozen dessert section). Hot Tip: Make friends with an Aussie girl or guy and get invited to their next family BBQ, and taste Nanna’s Pav, it’ll blow your socks off!

8. Witchetty Grub

If you really want to experience some proper Aussie Bush Tucker – then a Witchetty Grub is the way to go. These little fellas taste a little like chicken and contain just as much protein as an entire piece of steak! The first Australian indigenous community have eaten these for years and the nutritional benefits may just help you to overcome the texture.

9. BBQ’s

When you think of Australia you think of surfing, nice weather, kangaroos and the barbecue. “Throw another shrimp on the barbie” is a quote often said even though Australians call them prawns and not shrimps! In fact, many Aussies dislike this phrase and claim that it’s just another Australian stereotype.

A typical Aussie barbecue is with sausages, burgers, steak, fresh seafood, bread and tomato or barbecue sauce, they sometimes include salad but it’s mainly about the meat and fish (and of course a few stubbies – that’s beer to the non-Australians). 

Australians will literally have a barbeque anywhere, not just at home. Local councils provide barbeques for the general public to use at popular tourist spots like beaches. (Just clean up after yourself!) When you’re staying with Mojosurf or you meet a few locals, you’re sure to have at least one Barbe a week!

10. Kangaroo

While visitors usually take pictures of kangaroos bouncing around. Aussies actually eat Kangaroo meat. You’ll see them packed on supermarket shelves and on restaurant menus. Kangaroo is lean red meat, it’s healthy and you can prepare it in many ways – steaks, burgers, sausages, and much more. 

Aussies also eat Emu, yes Emu – in case you don’t already know the Kangaroo and the Emu are on the Aussie coat of arms, I kid you not, google it! Could it be that the Aussies are the only ones in the World to actually eat their coat of arms? 

11. Lamingtons

If you like coconut you’ll love this classic Aussie dessert – The Lamington. 

Made up of a deliciously, delicate soft, sponge cake, and topped with decadent chocolate topping and immersed in coconut flakes, the ole’ Lamington has been a fixture on the dessert table for generations. 

Book your travel to Australia
Latest posts

blank

blank

blank

Travel Talks Platform

More about our Facebook Group

Click if you want to join

Travel platform to expand your travel knowledge, follow the latest destination news and participate in daily questions, like “Travel Trivia”, “Where in the World” and “Amazing Travel Facts”.

Continue reading

cooking in Thailand

the hottest curry in the world?

the hottest curry in the world

the hottest curry in the world?

Did you know that arguably the hottest curry in the world is prepared by a chef wearing a gas mask?

Brick Lane Curry House is known for having one of the spiciest curry dishes in the world. 

the hottest curry in the world?

Phaal curry is a British-Indian dish known to be the hottest in the world, and at Brick Lane Curry House it’s so hot that thex chef has to wear a gas mask while making it to not choke on the spicy fumes released. Their website even describes the order as:

“An excruciatingly hot curry, more pain and sweat than flavor. For our customers who do this on a dare, we require you to state a verbal disclaimer not holding us liable for any physical or emotional damage after eating the curry.”

The dish is created using about 10 to 12 ground chili peppers, including the hottest one—Carolina Reaper. Once finished and served it has a heat of about 2.2 million Scoville! (For reference, jalapeños range from 2,500 to 8,000 Scoville…so if you find jalapeños too spicy then you may want to sit this challenge out.)

Recipe – try at your own risk!

1 pound chicken breast, chopped (or use lamb) 
1 tablespoon vegetable oil
3 ghost peppers, chopped
1 medium onion, chopped
1/4 cup chopped green onions
4 cloves garlic, chopped
1 tablespoon finely chopped ginger 
and here is the rest….

source for the hottest curry in the world

If you’ve never tried it here’s your chance – travel to Brick Lane in the UK travel to London

Travel Talks Platform

More about our Facebook Group

Join our Facebook Group

Travel platform to expand your travel knowledge, follow the latest destination news and participate in daily questions, like “Travel Trivia”, “Where in the World” and “Amazing Travel Facts”.

Continue reading

Ramen Festival in Tokyo – Delicious what’s cooking in Japan

Ramen Festival in Tokyo

Ramen Festival in Tokyo

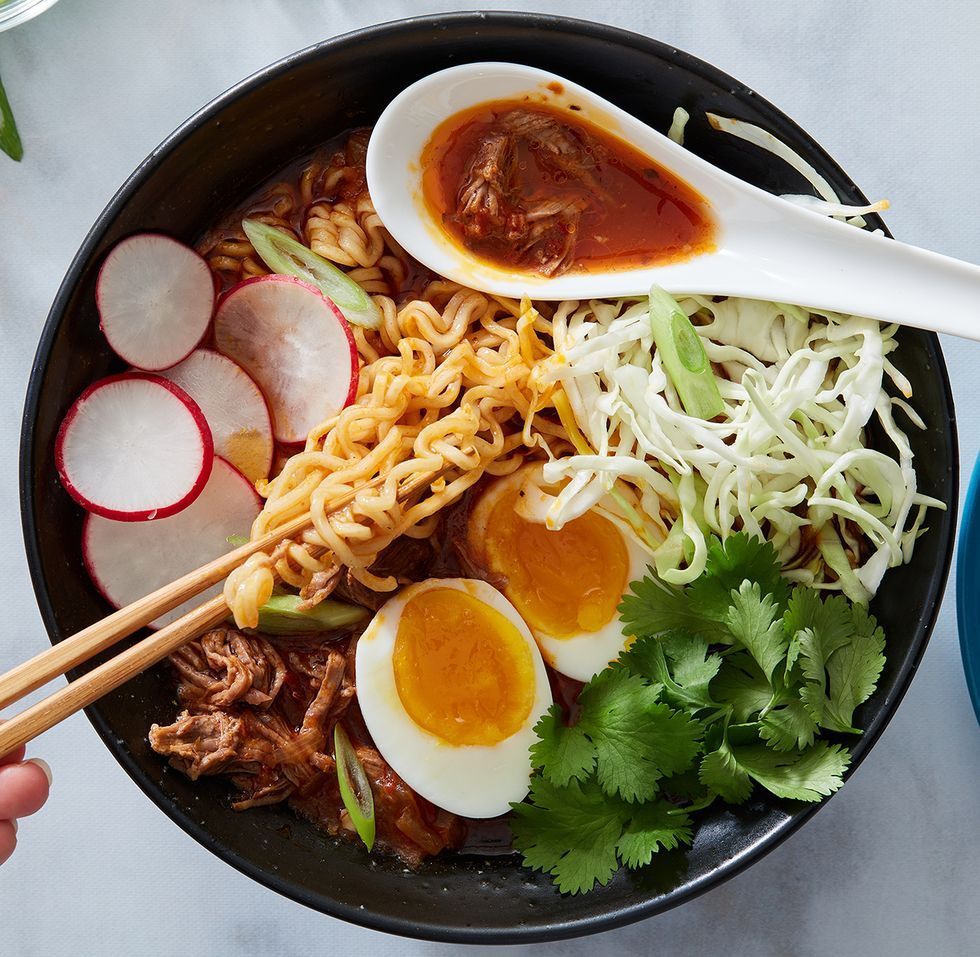
What’s cooking in Tokyo? Well, Tokyo’s largest ramen event arrives in late October to early November for almost 10 days.

Almost 40 vendors from around Japan will be serving up their unique regional varieties. Only the greatest Ramen shops are qualified to serve their proud Ramen bowls at this event and visitors are sure to find a style that suits them.

Take your pick of the many shyoyu (Japanese soy sauce), tonkotsu (based pork bones), and shio (salt) bowls available – each one is available from 880 JPY. Ramen fans who do not have time to visit their favorites around Japan won’t want to miss this event out.

Ramen Festival in Tokyo

It’s what it says on the bowl — lots and lots of ramen. Entry to the event at Komazawa Olympic Park is free, but tickets that are exchanged for a bowl of ramen cost R123.05 * each. If you’ve ever wondered about all the different styles from around Japan, this is your chance to try them out.

What ingredients should I put in my ramen? Top off your ramen with lots of fun goodies to give your bowl flavor, color, and texture. Here are some fun ideas: sriracha, kimchi, sesame seeds, crumbled bacon, nori (dried seaweed), fresh herbs (cilantro, Thai basil, chives), a drizzle of toasted sesame oil, crushed chiles, furikake, or a wedge of lime.

What are the different styles of Ramen?
If you’ve ever had the privilege of slurping up real-deal Ramen, then you’ve been exposed to the various types. The menus are always full of options and the differences in tastes and broth-textures are notable. When you decide to make your homemade Ramen bowls, you might want to check out different varieties for some inspiration! Here are some of the most popular types:

Shoyu
This is the most common style of Ramen. Shoyu is the Japanese word for soy sauce, and that’s exactly what’s simmered into the base of this broth. The result is a light-bodied broth that is brown and clear, unlike the more milky and opaque tonkatsu broth. Intrigued? Check out my recipe for Spicy Shoyu Ramen.

Shio
Another light broth—in both body and flavor—is shio, which means salt. This simple broth is golden in color and is made up of chicken or fish bones.

Miso
If you’ve had miso soup, then you’re familiar with this cloudy and complex broth. Made with fermented soy bean paste, miso can be white or red in color. The broth is packed with umami and feels thicker on the palate than the lighter broths used for shio or shoyu broths. If this sounds good to you, check out my Miso Ramen.

What is Ramen?
You’ve certainly heard people joke about Ramen being a food staple for broke college students. But today, Ramen joints are popping up in Western cities everywhere, attracting even the haughtiest of food snobs. So, what the heck is it—a meal for cheapskates or nosh for the posh? Both, really.

Traditionally, Ramen is a Japanese noodle soup made with a rich-flavored broth, then topped with an assortment of meats, vegetables, and a soft-boiled egg. In Japan, Ramen is dubbed a fast food and it’s made available in tiny restaurants and late-night street carts.

But no matter where you’re slurping your Ramen, whether it be in a shoddy college dorm or that chic new Ramen bar in town, comfort is the name of the game with this coveted soup. 

If you’ve never tried Ramen here’s your chance – travel to Japan

Travel Talks Platform

More about our Facebook Group

Join our Facebook Group

Travel platform to expand your travel knowledge, follow the latest destination news and participate in daily questions, like “Travel Trivia”, “Where in the World” and “Amazing Travel Facts”.

Continue reading

What’s cooking in Thailand – Spicy Tom Yum Goong

What's cooking in Thailand - Spicy Tom Yum Goong

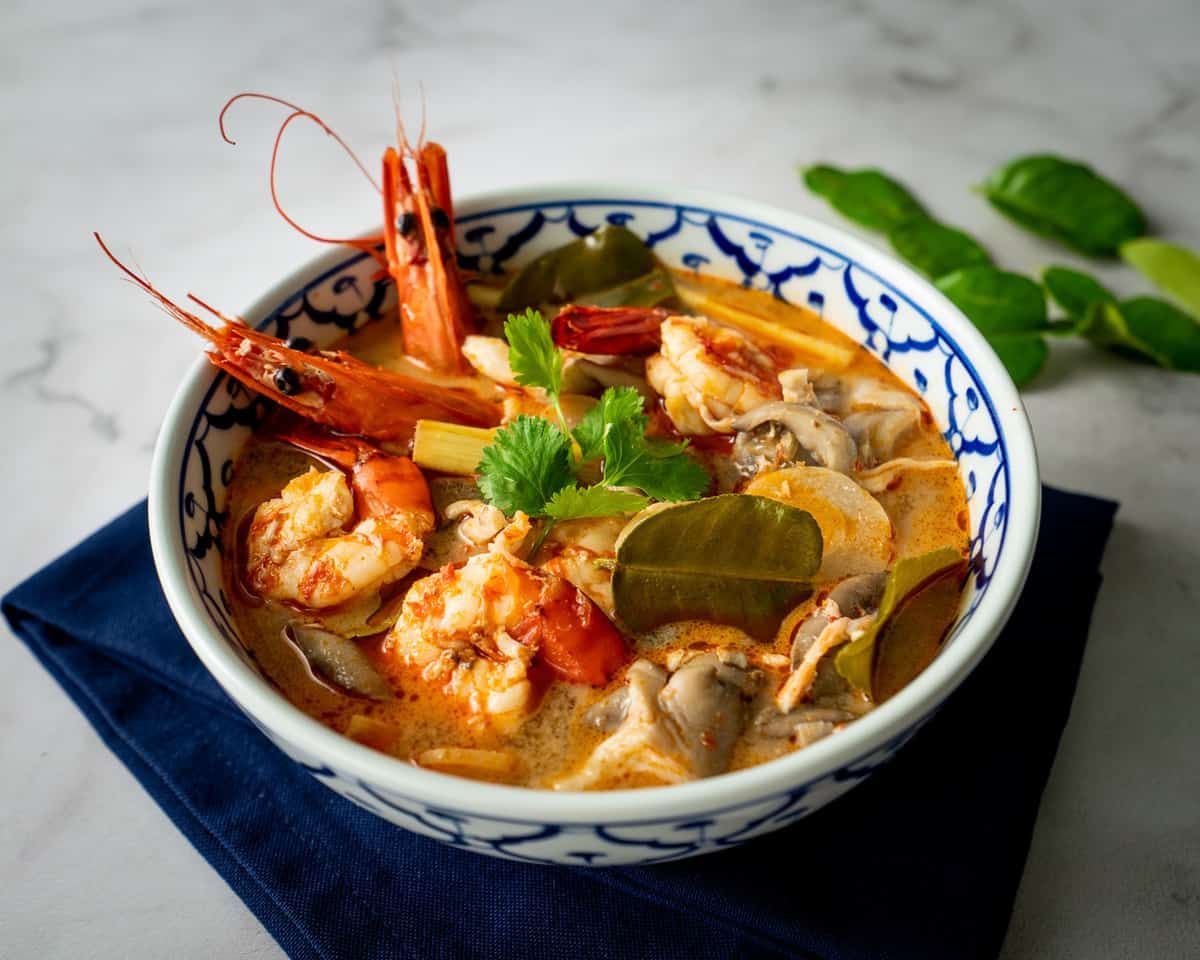
What’s cooking in Thailand – Spicy Tom Yum Goong

Delicious Thailand food is universally regarded as some of the world’s finest. The variety of Thai cuisine, especially its world-acclaimed street food, is astounding, but mainly covers noodles, stir-fries, curries, soups and salads, available anywhere from mobile food carts to Bangkok’s Michelin-starred restaurants. For the best Thai food, here’s our recommended top must-try dishes.

Pad Thai (Stir-Fried Noodles)

Thailand’s noodle dishes were introduced by Chinese immigrants and arguably, Pad Thai ranks as the most celebrated all. This signature dish is a great go-to introduction to Thai food as it’s not too spicy. Similar to many dishes, Pad Thai varies regionally, but is classic ingredients of flat rice noodles, seafood (alternatively, chicken, pork, or tofu), dried shrimp, tamarind, fish sauce, bean sprouts, shallots and egg, all stir-fried in a hot wok, plated-up and sprinkled with roasted peanuts, fresh herbs and chilis (optional). Pad Thai epitomizes that Thai trademark sweet, sour and salty combo of flavors and well-balanced texture contrast.

Spicy Tom Yum Goong (Hot & Sour Shrimp Soup)

One of Thailand’s most iconic dishes, this popular soup is a spicy, sour and aromatic tastebud extravaganza! Hailing from the central region, the unique flavors of this piquant clear soup derives from the marriage of fragrant lemongrass, shallots, fish sauce, galangal, mushrooms, kaffir lime leaves, lime juice and red chili peppers. Although shrimp (Goong) is most commonly used – regarded as the most delicious version – other variations cover chicken, fish or mixed seafood. If you find this all too spicy, northern specialty, Thai chicken coconut soup, lends a milder, sweeter and delicious alternative; it has the same sublime flavors and spices, yet the chilies are optional and the creamy coconut milk tempers the heat.

Kaeng Lueang (Yellow Curry)

Thailand’s world-famous curries range from mild to explosive and sweet to sour and invariably concocted with coconut milk, present a soup-like consistency. There are endless regional varieties, but the three main curry types, red, green and yellow are the best known internationally, with differences according to spiciness levels and dominant ingredients.
Yellow curry has a strong southern Thai influence, with a rich texture and characteristic hue derived from generous use of turmeric. This is pounded together with classic aromatic ingredients which usually cover coriander, cumin, shallots, lemongrass and galangal. Coconut milk, vegetables and potatoes are added, along with chicken, or alternative protein or tofu options. As this curry type generally contains less chilies, it isn’t so spicy as its green and red curry counterparts, thus suitable for those – including children – who prefer a mellower taste.

Interested in cooking classes in Thailand to taste this dish?
 

Travel Talks Platform

More about our Facebook Group

Join our Facebook Group

Travel platform to expand your travel knowledge, follow the latest destination news and participate in daily questions, like “Travel Trivia”, “Where in the World” and “Amazing Travel Facts”.

Continue reading

What's cooking in France

What’s cooking in France – French onion soup

cooking in Thailand - Thai Chicken Coconut Curry

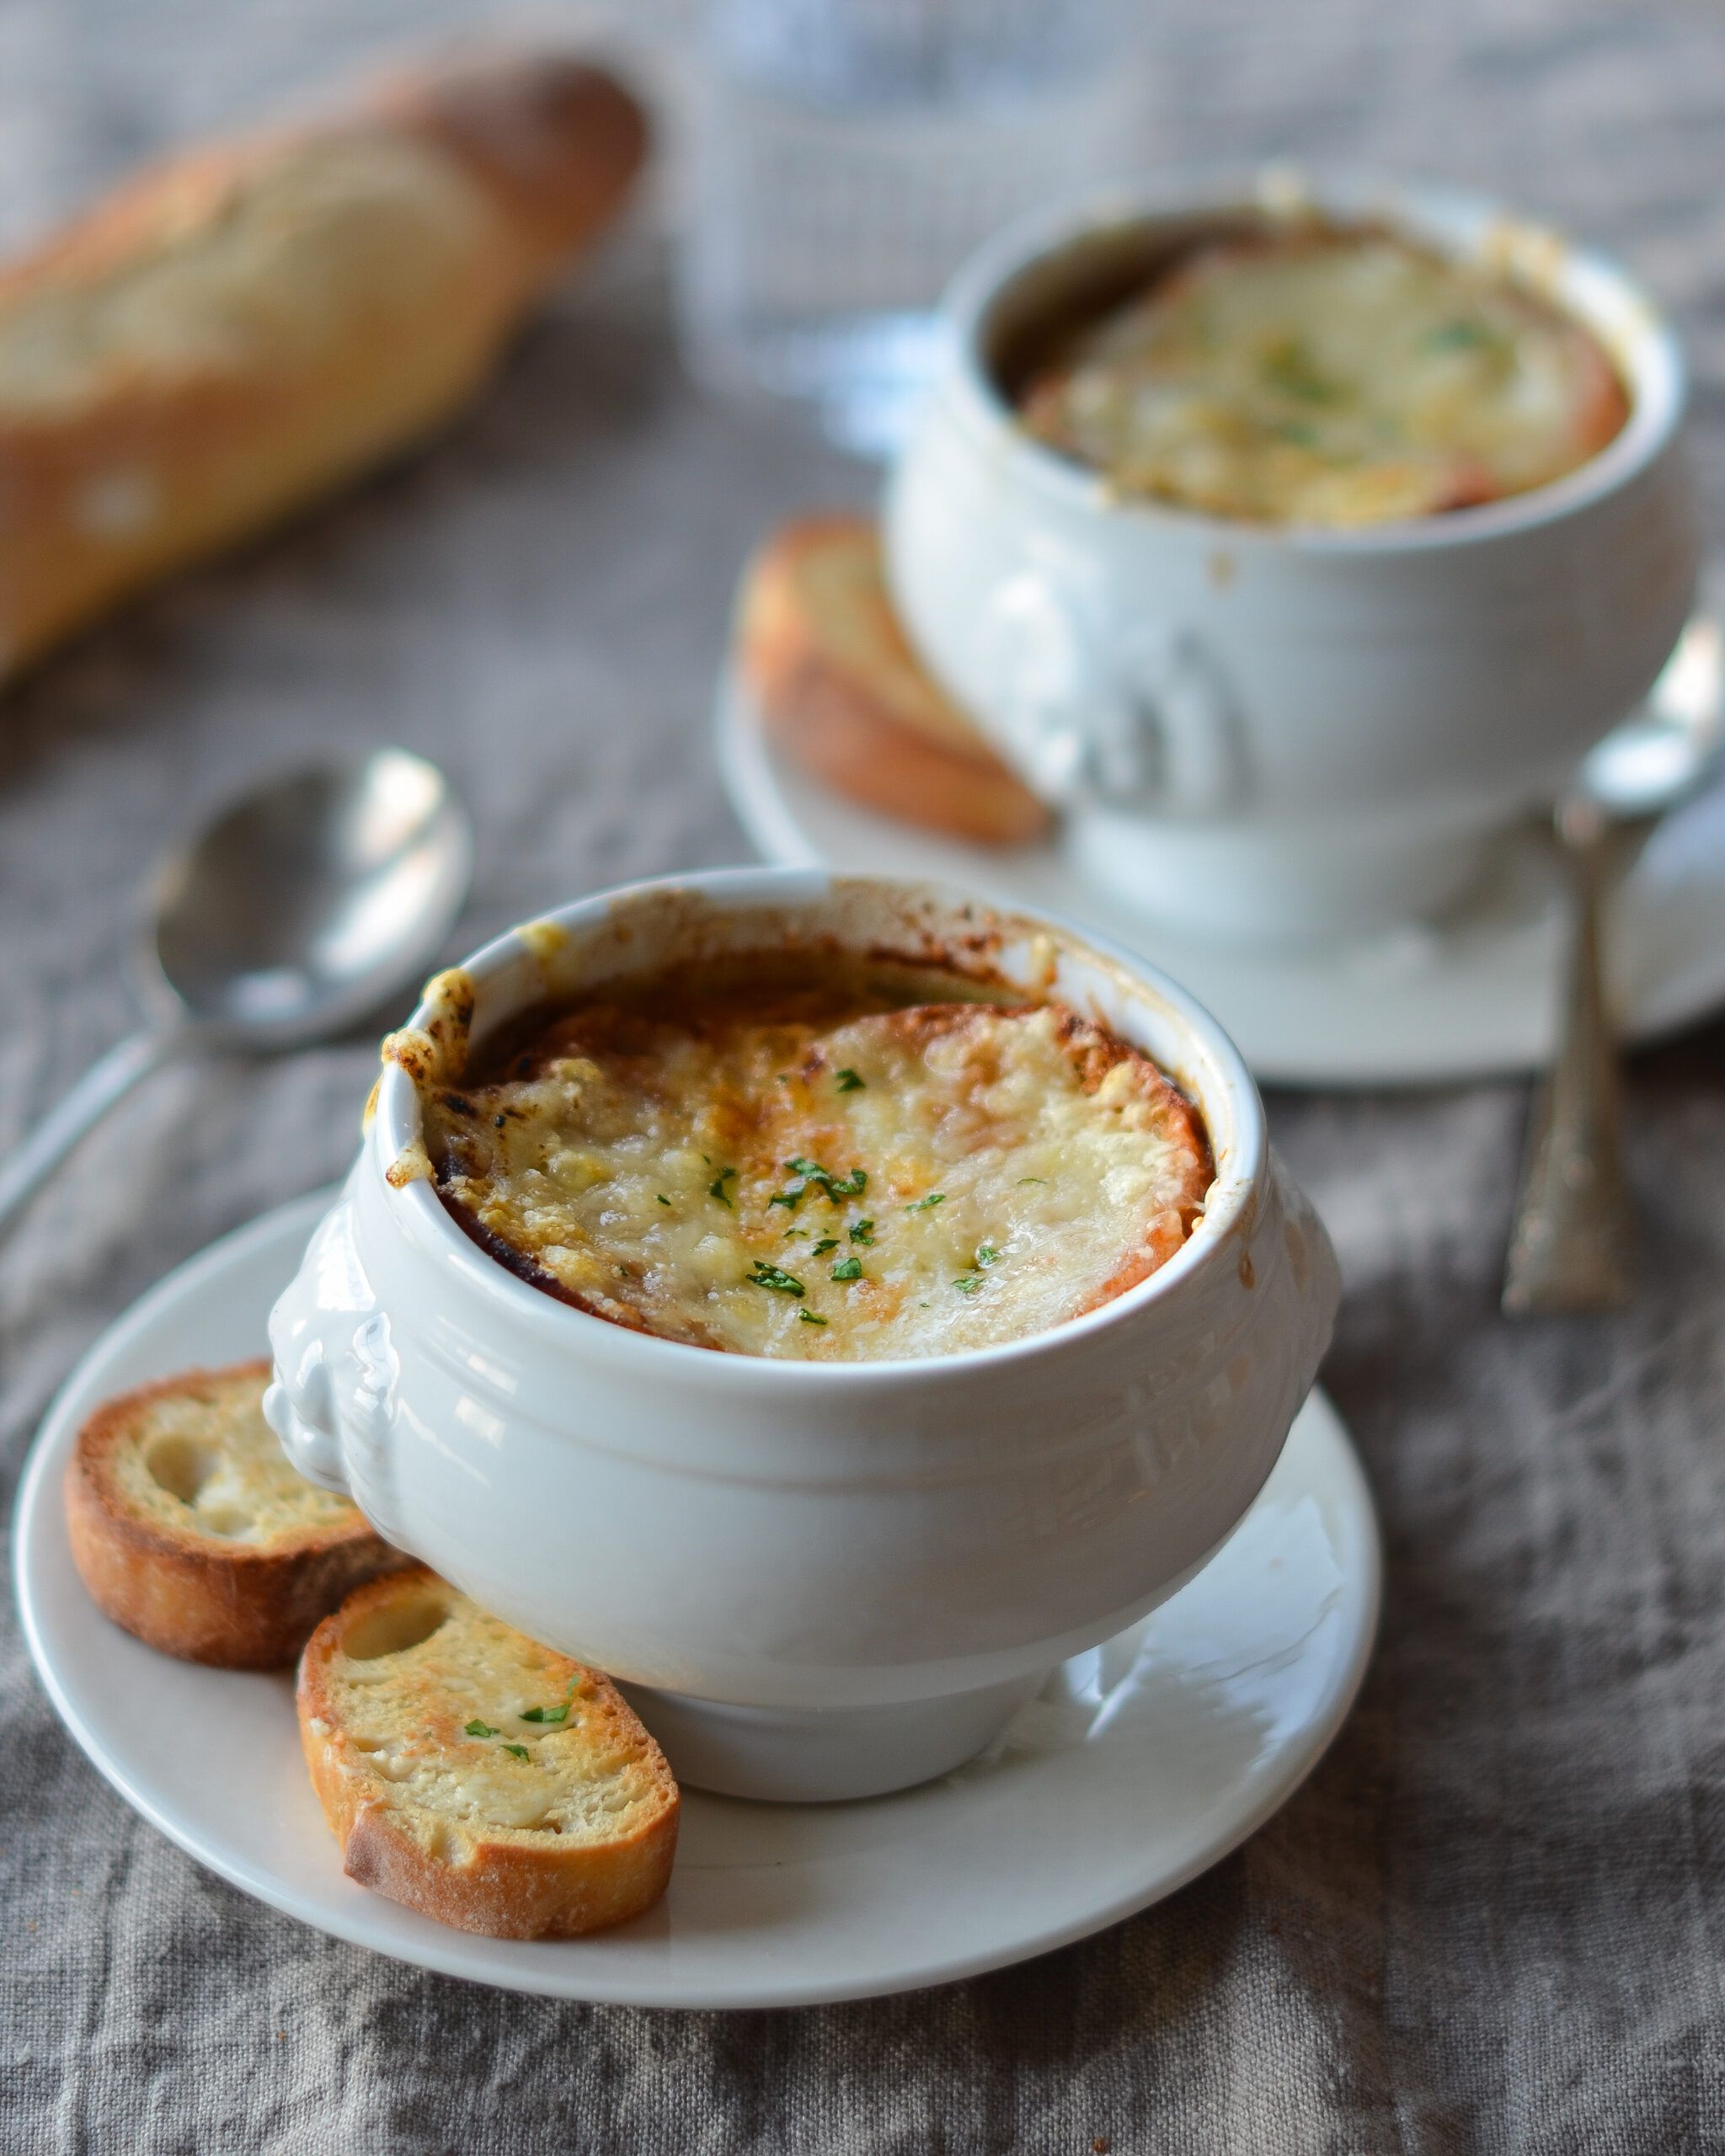
What’s cooking in France – French onion soup

French onion soup is a soup usually based on meat stock and onions, and often served gratinéed with croutons or a larger piece of bread covered with cheese floating on top. Ancient in origin, the dish underwent a resurgence of popularity in the 1960s in the United States due to a greater interest in French cuisine. French onion soup may be served as a meal in itself or as a first course

What’s cooking in France

History

Onion soups have been popular at least as far back as Roman times. Throughout history, they were seen as food for poor people, as onions were plentiful and easy to grow. The modern version of this soup originates in Paris, France in the 18th century, made from beef broth, and caramelized onions.

It was introduced to the United States by the New York restaurant of Henri Mouquin in 1861, where his wife Marie Julie Grandjean Mouquin was the chef. It is often finished by being placed under a salamander in a ramekin with croutons and Comté melted on top. The crouton on top is reminiscent of ancient soups.

Recipe

Much of the success of this soup depends on the stock that you are using, and stock varies tremendously in its taste. Depending on your stock, you may need to bump up the flavor with some beef bouillon (we recommend Better Than Bouillon brand).
Taste the soup before putting it in the oven, and if it needs more seasoning, don’t be afraid to add more!

Ingredients
6 large red or yellow onions , peeled and thinly sliced root to stem, about 10 cups of sliced onions total
4 tablespoons extra virgin olive oil
2 tablespoons butter
1 teaspoon sugar
Kosher salt
2 cloves garlic, minced
8 cups beef stock, chicken stock, or a combination of the two 
1/2 cup dry vermouth or dry white wine
2 bay leaves
1 tablespoon fresh thyme leaves (can also use a few sprigs of fresh thyme) OR 1/2 teaspoon dried thyme (more to taste)
1/2 teaspoon freshly ground black pepper
2 tablespoons brandy (optional)
8 slices (1 inch thick) French bread or baguette
1 1/2 cups grated Gruyere
Sprinkling of Parmesan

Method

Caramelize the onions:
In a 5 to 6 quart thick-bottomed pot, heat 3 tablespoons of olive oil on medium heat. Add the onions and toss to coat with the olive oil.

Cook the onions, stirring often, until they have softened, about 15 to 20 minutes.

Increase the heat to medium high. Add the remaining tablespoon of olive oil and the butter and cook, stirring often, until the onions start to brown, about 15 more minutes.

Sprinkle with sugar (to help with the caramelization) and 1 teaspoon of salt. Continue to cook until the onions are well browned, about 10 to 15 more minutes.
 
Deglaze the pot with vermouth or wine:

Add the wine or vermouth to the pot and scrape up the browned bits on the bottom and sides of the pot, deglazing the pot as you go.

Add the stock, bay leaves, and thyme:

Add the stock, bay leaves, and thyme. Bring to a simmer, cover the pot and lower the heat to maintain a low simmer. Cook for about 30 minutes.

Season to taste with more salt and add freshly ground black pepper. Discard the bay leaves. Add brandy if using.

Toast the French bread slices:

While the soup is simmering, line a sheet pan with parchment paper or foil and preheat the oven to 450°F with a rack in the upper third of the oven.

Brush both sides of the French bread or baguette slices lightly with olive oil (you’ll end up using about a tablespoon and a half of olive oil for this).

Put in the oven and toast until lightly browned, about 5 to 7 minutes. Remove from oven.

Turn the toasts over and sprinkle with the grated Gruyere cheese and Parmesan. Return to oven when it’s close to serving time and bake until the cheese is bubbly and lightly browned.

Serve:

To serve, ladle soup into a bowl and transfer one cheesy toast onto the top of each bowl of soup.

Alternatively, you can use individual oven-proof bowls or one large casserole dish. Ladle the soup into the bowls or casserole dish. Cover with the toast and sprinkle with cheese. Put into the broiler for 10 minutes at 350° F, or until the cheese bubbles and is slightly browned.

If you’ve never tried French onion Soup please make sure to ask for it when you travel to France

spotted in averiecooks


Travel Talks Platform

More about our Facebook Group

Join our Facebook Group

Travel platform to expand your travel knowledge, follow the latest destination news and participate in daily questions, like “Travel Trivia”, “Where in the World” and “Amazing Travel Facts”.

cooking in Thailand

What’s cooking in Thailand – Thai Chicken Coconut Curry

cooking in Thailand - Thai Chicken Coconut Curry

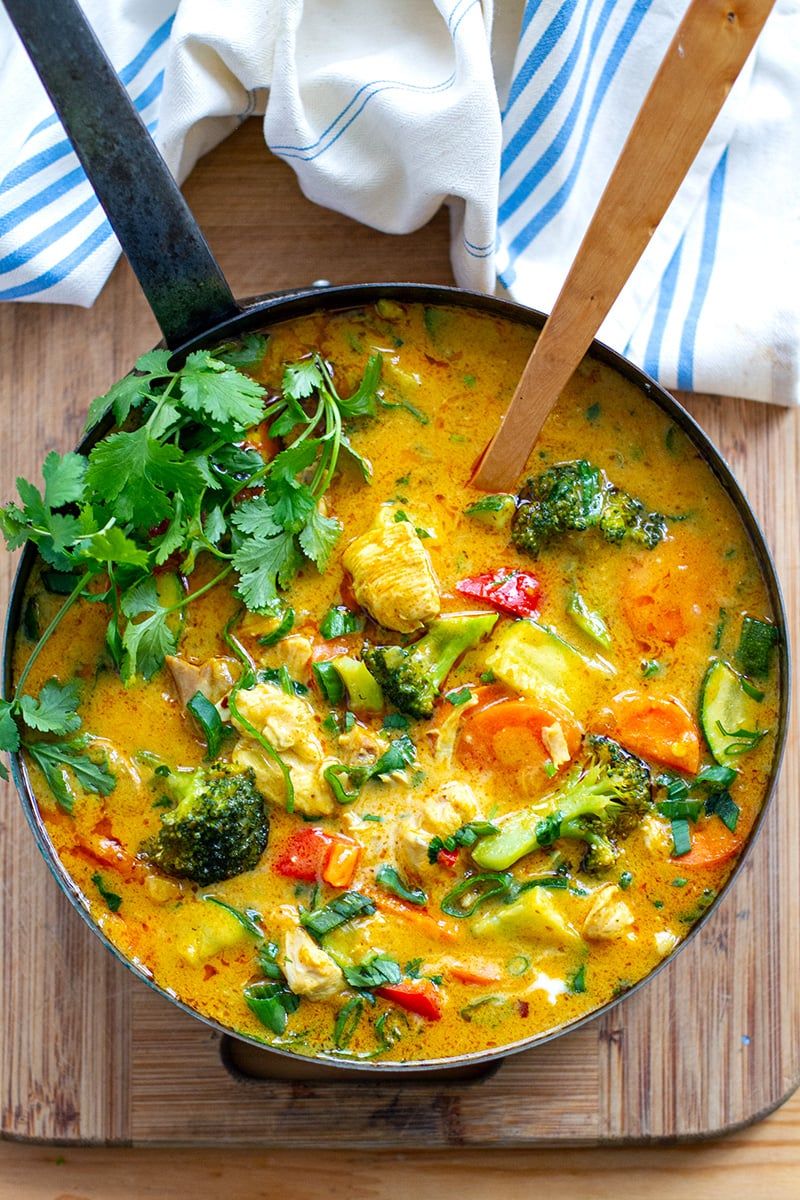
What’s cooking in Thailand – Thai Chicken Coconut Curry

Thai cooking places emphasis on lightly prepared dishes with strong aromatic components and a spicy edge.

Traditional Thai cuisine loosely falls into four categories: tom (boiled dishes), yam (spicy salads), tam (pounded foods), and gaeng (curries). Deep-fries, stir-fries, and steamed dishes derive from Chinese cuisine.

Cooking in Thailand – Thai Chicken Coconut Curry

This is an easy Thai chicken curry that’s made in one skillet, ready in 20 minutes, and is naturally gluten-free. With cold weather upon us, nothing is better than diving into a bowl of this hearty yet healthy comfort food that’s layered with flavors. I could just drink the coconut milk-based sauce.

To make the red curry recipe, you’ll need:

Coconut oil
Sweet Vidalia onion

Chicken breasts
Garlic
Ground or fresh ginger
Ground coriander
Canned coconut milk
Shredded carrots

Thai red curry paste
Fresh spinach
Lime juice
Brown sugar
Fresh cilantro

Can Curry Powder Be Used Instead of Curry Paste?

Thai red curry paste adds a richer and smoother flavor profile than curry powder (Indian) does, but if all you have is curry powder, go for it knowing that the flavor of Thai versus Indian curry products is vastly different.

How to Make Thai Red Curry

This is a very easy curry recipe to make! Here’s how the Thai curry recipe comes together:

1- Add the oil and chopped onion to a large skillet and sauté until softened.
2 – Add the diced chicken and cook until done, then add the garlic, ginger, and coriander.

3- Coconut milk, carrots, Thai curry paste, salt, and pepper are stirred in next, and then the mixture should be left to bubble away for about 5 minutes.
4- Stir in the spinach, lime juice, and optional brown sugar last.

serve this coconut milk curry with a sprinkle of fresh cilantro to make the flavors pop. 

cooking in Thailand

If you’ve never tried Chicken Coconut Curry, please make sure to ask for it when you travel to Thailand

spotted in averiecooks


Travel Talks Platform

More about our Facebook Group

Join our Facebook Group

Travel platform to expand your travel knowledge, follow the latest destination news and participate in daily questions, like “Travel Trivia”, “Where in the World” and “Amazing Travel Facts”.

Best Tiramisu

What’s cooking in Italy – Best Tiramisu

Best Tiramisu

What’s cooking in Italy – Best Tiramisu

Tiramisu is a coffee-flavoured Italian dessert. It is made of ladyfingers (savoiardi) dipped in coffee, layered with a whipped mixture of eggs, sugar, and mascarpone cheese, flavoured with cocoa. The recipe has been adapted into many varieties of cakes and other desserts. Its origins are often disputed among Italian regions Veneto and Friuli Venezia Giulia.

Best Tiramisu

The recipe for tiramisu is not found in cookbooks before the 1960s. It is also not mentioned in encyclopedias and dictionaries of the 1970s, making its first appearance in print in Italian in 1980, and in English in 1982. It is mentioned in a 1983 cookbook devoted to cooking of the Veneto. This suggests that it is a recent invention.

Obituaries for the restaurateur Ado Campeol (1928–2021) reported that it was invented at his restaurant Le Beccherie in Treviso on 24 December 1969 by his wife Alba di Pillo (1929–2021) and the pastry chef Roberto Linguanotto. The dish was added to its menu in 1972.

It has been claimed that tiramisu has aphrodisiac effects and was concocted by a 19th-century Treviso brothel madam, as the Accademia Del Tiramisù explains, to “solve the problems they may have had with their conjugal duties on their return to their wives”.

There is evidence of a “Tiremesù” semi-frozen dessert served by the Vetturino restaurant in Pieris, in the Friuli Venezia Giulia, since 1938. This may be the name’s origin, while the recipe for Tiramisu may have originated as a variation of another layered dessert, Zuppa Inglese. Others claim it was created towards the end of the 17th century in Siena in honour of Grand Duke Cosimo III.

On July 29, 2017, Tiramisu was entered by the Ministry of Agricultural, Food and Forestry Policies on the list of traditional Friulian and Giulian agri-food products in the Friuli Venezia Giulia region. In 2013, Luca Zaia, governor of Veneto sought European Union Protected Status certification for the dessert, based on the ingredients used in 1970, so substitute ingredients, such as strawberrries, could not be used in a dish called tiramisu.

Original ingredients

Traditional tiramisu contains a short list of ingredients: ladyfingers (savoiardi), egg yolks, sugar, coffee, mascarpone cheese, and cocoa powder. A common variant involves soaking the savoiardi in alcohol, such as Marsala wine, amaretto or a coffee-based liqueur, but this is not mentioned in the original recipe. “The original shape of Tiramesù at Le Beccherie was circular.”

INGREDIENTS

FOR THE CREAM:

  • 4 large egg yolks
  • ½ cup/100 grams granulated sugar, divided
  • ¾ cup heavy cream
  • 1 cup/227 grams mascarpone (8 ounces)

FOR THE ASSEMBLY:

  • 1 ¾ cups good espresso or very strong coffee
  • 2 tablespoons rum or cognac
  • 2 tablespoons unsweetened cocoa powder
  •  About 24 ladyfingers (from one 7-ounce/200-gram package)
  • 1 to 2 ounces bittersweet chocolate, for shaving (optional)

PREPARATION

  1. Using an electric mixer in a medium bowl, whip together egg yolks and 1/4 cup/50 grams sugar until very pale yellow and about tripled in volume. A slight ribbon should fall from the beaters (or whisk attachment) when lifted from the bowl. Transfer mixture to a large bowl, wiping out the medium bowl used to whip the yolks and set aside.
  2. In the medium bowl, whip cream and remaining 1/4 cup/50 grams sugar until it creates soft-medium peaks. Add mascarpone and continue to whip until it creates a soft, spreadable mixture with medium peaks. Gently fold the mascarpone mixture into the sweetened egg yolks until combined.
  3. Combine espresso and rum in a shallow bowl and set aside.
  4. Using a sifter, dust the bottom of a 2-quart baking dish (an 8×8-inch dish, or a 9-inch round cake pan would also work here) with 1 tablespoon cocoa powder.
  5. Working one at a time, quickly dip each ladyfinger into the espresso mixture — they are quite porous and will fall apart if left in the liquid too long — and place them rounded side up at the bottom of the baking dish. Repeat, using half the ladyfingers, until you’ve got an even layer, breaking the ladyfingers in half as needed to fill in any obvious gaps (a little space in between is O.K.). Spread half the mascarpone mixture onto the ladyfingers in one even layer. Repeat with remaining espresso-dipped ladyfingers and mascarpone mixture.
  6. Dust top layer with remaining tablespoon of cocoa powder. Top with shaved or finely grated chocolate, if desired.
  7. Cover with plastic wrap and let chill in the refrigerator for at least 4 hours (if you can wait 24 hours, all the better) before slicing or scooping to serve.

If you’ve never tried Tiguadege Na, please make sure to ask for it when you travel to Italy

spotted in wikipedia


Travel Talks Platform

More about our Facebook Group

Join our Facebook Group

Travel platform to expand your travel knowledge, follow the latest destination news and participate in daily questions, like “Travel Trivia”, “Where in the World” and “Amazing Travel Facts”.

Explore the street food markets in Marrakesh

Explore the street food markets in Marrakesh

Explore the street food markets in Marrakesh

You can find all kinds of street food day and night across Morocco – and Marrakech is no exception. Here, we explore the best street food in the city, from sandwiches and pastries to freshly squeezed juice and more exotic dishes.

It’s time to venture off in to the square, stopping at four food stalls, all personally tested and recommended by the team.

Depending on guests’ dietary preferences, they may have the opportunity to sample a traditional Marrakchi dish cooked underground on the coals that heat the hammam.

Or tuck in to a sweet-savoury dish typically consumed during Ramadan.

Try the hundred kinds of olives, taste the Marrakchi olive oil, honey…

And of course for the more daring, sheep’s tongue or cheek. If a must-try list includes snails, take a pit stop at the snail stalls and slurp back the flavourful broth.

Explore the street food markets in Marrakesh

Particularly popular in Marrakech, snails can be found everywhere in the square and marketplace Jemaa El-Fnaa. This flavoursome broth is supposed to have restorative and digestive benefits. This is almost reason enough to try it. If that weren’t tempting enough, however, these distinctive chocolate-brown snails are tender with a delicious savoury taste. What’s more, they are served in a broth bursting with flavours and spices.

The oranges found in Morocco are famous worldwide, so it’s no surprise that you can find some of the best orange juice on the streets of Marrakech. They are sourced from the countless orange trees in the limitless alleys and courtyards in the city.

You can get a full glass of this refreshing, tangy juice, perfect for recovering after a long day of exploring in the sun. Also, it’s a must when wandering through Jemaa El-Fnaa.

Originating in Fez, but also plentiful on the streets of Marrakech, b’stilla is a special pie with layers of paper-thin pastry. It is traditionally stuffed with pigeon meat, almonds, eggs and lots of fresh spices. Nowadays, you can also find this pastry stuffed with fillings such as chicken or fish.

Often eaten as a starter, b’stilla offers a combination of sweet and salty and a crisp but doughy texture. For a taste of authentic Morocco, be sure to pick up one or two of these little pastries from a street seller.

This traditional Moroccan soup can be found all year round, but it’s particularly popular during Ramadan and one of the first things eaten to break the fast. This flavoursome, golden-coloured soup is rich with tomatoes, lentils, chickpeas and sometimes noodles, with meat an occasional addition.

You can find this served in little cups or bowls out on the street, and it’s a popular option sure to please even the fussiest eaters.

Although many people may be a little repulsed by this at first, try to be open-minded and sample a popular delicacy on the streets of Marrakech. Try a mixed plate of offal, tongue, head scrapings and a bit of the rest of the sheep. The whole head costs a little bit more but makes quite a meal. While it’s not a roadside snack you’d find in Western countries, you’ll find more than one stall in Marrakech offering this delicacy.

Unusual yet delicious, sheep’s head is a definite recommendation for the more adventurous foodie.

Chebakia is a Moroccan sesame cookie, moulded into a flower-like shape and fried before it is coated with masses of syrup or honey. Extremely sweet and addictive, these delicious sugary delights are a must-try.

It’s a favourite during Ramadan, and households often produce buckets full of these treats each year. Buying some from the streets is recommended – the factory-made versions simply don’t compare.

Book your travel to Morocco

Latest posts

blank

blank

blank

Travel Talks Platform

More about our Facebook Group

Click if you want to join

Travel platform to expand your travel knowledge, follow the latest destination news and participate in daily questions, like “Travel Trivia”, “Where in the World” and “Amazing Travel Facts”.

What's cooking in Italy - Carbonara

What’s cooking in Italy – Carbonara

blank

What’s cooking? World recipes

What's cooking in Italy - Carbonara

What’s cooking in Italy – Carbonara

Carbonara is an Italian pasta dish from Rome made with egg, hard cheese, cured pork, and black pepper. The dish arrived at its modern form, with its current name, in the middle of the 20th century.
 
The cheese is usually Pecorino Romano, Parmigiano-Reggiano, or a combination of the two. Spaghetti is the most common pasta, but fettuccine, rigatoni, linguine, or bucatini are also used. Normally guanciale or pancetta are used for the meat component, but lardons of smoked bacon are a common substitute outside Italy
 
As with many recipes, the origins of the dish and its name are obscure; however, most sources trace its origin to the region of Lazio.
 
The dish forms part of a family of dishes involving pasta with bacon, cheese and pepper, one of which is pasta alla gricia. Indeed, it is very similar to pasta cacio e uova, a dish dressed with melted lard and a mixture of eggs and cheese, which is documented as long ago as 1839, and, according to some researchers and older Italians, may have been the pre-Second World War name of carbonara.
 
There are many theories for the origin of the name carbonara, which is likely more recent than the dish itself. Since the name is derived from carbonaro (the Italian word for ‘charcoal burner’), some believe the dish was first made as a hearty meal for Italian charcoal workers.
 
Ingredients
100g pancetta
50g pecorino cheese
50g parmesan
3 large eggs
350g spaghetti
2 plump garlic cloves, peeled and left whole
50g unsalted butter
sea salt and freshly ground black pepper
 
Method
STEP 1
Put a large saucepan of water on to boil.
 
STEP 2
Finely chop the 100g pancetta, having first removed any rind. Finely grate 50g pecorino cheese and 50g parmesan and mix them together.
 
STEP 3
Beat the 3 large eggs in a medium bowl and season with a little freshly grated black pepper. Set everything aside.
 
STEP 4
Add 1 tsp salt to the boiling water, add 350g spaghetti and when the water comes back to the boil, cook at a constant simmer, covered, for 10 minutes or until al dente (just cooked).
 
STEP 5
Squash 2 peeled plump garlic cloves with the blade of a knife, just to bruise it.
 
STEP 6
While the spaghetti is cooking, fry the pancetta with the garlic. Drop 50g unsalted butter into a large frying pan or wok and, as soon as the butter has melted, tip in the pancetta and garlic.
 
STEP 7
Leave to cook on a medium heat for about 5 minutes, stirring often, until the pancetta is golden and crisp. The garlic has now imparted its flavour, so take it out with a slotted spoon and discard.
 
STEP 8
Keep the heat under the pancetta on low. When the pasta is ready, lift it from the water with a pasta fork or tongs and put it in the frying pan with the pancetta. Don’t worry if a little water drops in the pan as well (you want this to happen) and don’t throw the pasta water away yet.
 
STEP 9
Mix most of the cheese in with the eggs, keeping a small handful back for sprinkling over later.
 
STEP 10
Take the pan of spaghetti and pancetta off the heat. Now quickly pour in the eggs and cheese. Using the tongs or a long fork, lift up the spaghetti so it mixes easily with the egg mixture, which thickens but doesn’t scramble, and everything is coated.
 
STEP 11
Add extra pasta cooking water to keep it saucy (several tablespoons should do it). You don’t want it wet, just moist. Season with a little salt, if needed.
 
STEP 12
Use a long-pronged fork to twist the pasta on to the serving plate or bowl. Serve immediately with a little sprinkling of the remaining cheese and a grating of black pepper. If the dish does get a little dry before serving, splash in some more hot pasta water and the glossy sauciness will be revived.
 
Interested in cooking classes in Italy to taste this dish?


Travel Talks Platform

More about our Facebook Group

Join our Facebook Group

Travel platform to expand your travel knowledge, follow the latest destination news and participate in daily questions, like “Travel Trivia”, “Where in the World” and “Amazing Travel Facts”.

Exciting Rum making in Costa Rica

blank

Exciting rum making in Costa Rica

Exciting rum making in Costa Rica

This is the first Costa Rican Rum Experience created by Sabandi, a company that is totally focused on delivering the best rum to locals and foreigners, but specially to sharing with visitors how sugar cane and the rum production are an important part of the local culture.

For many years, Costa Rican economy was completely based on agriculture, and sugar cane was one of the most important crops. The farmers used to cut the sugar cane from their land and transport it by an oxcart, the main form of transportation during those years.

Participants will feel the contact with Costa Rican roots, and they will use all their senses, as they experience the whole process of producing high quality Rum.

The activity allows people to observe the extracting and cooking of the sugar cane juice in an artisanal way,
until they reach the distiller, where liquors with the highest purity are produced. The “Casa de los Barriles”
(barrel house), known as Rickhouse, will await participant’s taste buds, as rum stocked in the Oak barrels there, ages and improves its flavors every single day.

Make your own Rum in Costa Rica

The aged Sabandí Rum, distilled on premises, boasts its characteristics and differences with each sip.

Participants will finish their guided visit with a delicious cocktail made with Sabandi Rum and the stunning views of the lagoon.

Book your travel to Costa Rica


Latest posts

Travel Talks Platform

More about our Facebook Group

Click if you want to join

Travel platform to expand your travel knowledge, follow the latest destination news and participate in daily questions, like “Travel Trivia”, “Where in the World” and “Amazing Travel Facts”.

Who would like some South African Milktart

blank

What’s cooking? World recipes

Who would like some South African Milktart

Who would like some South African Milktart

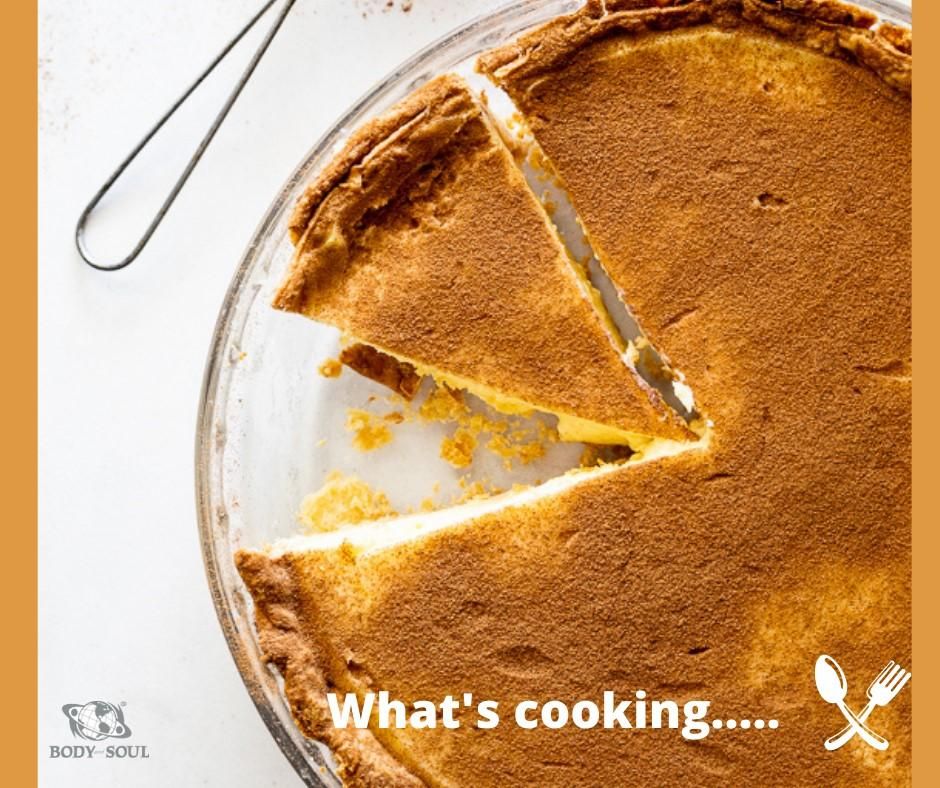
Good ol’ melktert; the Afrikaans name for ‘milk tart’; the classic, South African dessert consisting of a sweet pastry crust, filled with a mild, creamy custard of milk, flour, sugar and eggs, baked in a round pie tin and dusted with cinnamon after baking.
 
Milk tart is omnipresent in South Africa; it appears at every church bazaar, bake sale, home industry, supermarket, or bakery, and has surely featured on every South African food blogger’s blog.
Melktert stems from the Dutch settlers in the Cape in the 1600s.
 
Traditionally, the crust consisted of short-crust pastry. These days, many use ready-made puff pastry dough instead. Ancestors would turn in their graves hearing that crustless melktart has become a thing.
 
The large proportion of milk in the filling is evidence that melktert was introduced to us by the Dutch dairy farmers who settled the Cape of Good Hope in the middle of the century.
 
Cinnamon, introduced to us by Javanese slaves, is often sprinkled over the surface.
 
Who’d like some South African Milktart?
 
Ingredients
For the crust
• Follow the directions for my easy no-roll crust
For the filling
• 2 cups milk
• ½ cup heavy / whipping cream
• 5 egg yolks
• ¾ cup sugar
• 2½ tbsp cornstarch / cornflour
• 2 tbsp flour
• 2 tbsp salted butter (alternatively use unsalted butter and 1/2 tsp salt)
• ½ tsp almond extract
• ½ tsp vanilla extract
• pinch of nutmeg
• 2 tsp cinnamon
 
Instructions
1. Make the pastry according to recipe instructions then blind bake until golden brown and crisp. Remove from the oven and allow to cool.
2. To make the filling, heat the milk, cream, vanilla, almond extract and nutmeg in a saucepan over medium heat.
3. In a mixing bowl, whisk together the egg yolk, sugar, flours and salt.
4. Once the milk is hot, whisk two ladles full of the milk into the egg mixture to temper the eggs.
5. Pour the egg mixture back into the saucepan and cook until thickened, whisking continuously. Cook the custard for 2-3 minutes until thick and smooth.
6. Pass the custard through a fine-mesh sieve. Beat in the butter.
7. Pour the custard into the prepared crust. Spray a piece of parchment paper with cooking spray then press onto the surface of the custard to avoid a skin from forming.
8. Place the milk tart in the fridge and allow to set for at least 4 hours but ideally overnight.
9. Before serving, dust the cinnamon over the milk tart. Slice and serve.
 
Interested in cooking classes in South Africa to taste this dish?


Travel Talks Platform

More about our Facebook Group

Join our Facebook Group

Travel platform to expand your travel knowledge, follow the latest destination news and participate in daily questions, like “Travel Trivia”, “Where in the World” and “Amazing Travel Facts”.

cooking Germany

Whats cooking in Germany – Knödel

cooking Germany

What’s cooking in Germany – Knödel 

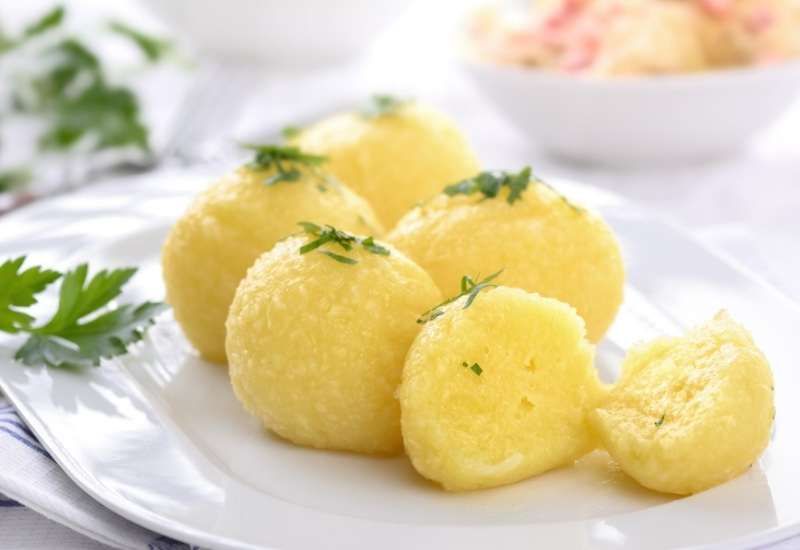
A unique use for old bread, knödel are tender German bread dumplings reminiscent of moist, savory bread pudding. When rolled into balls, they’re an airy accompaniment to braised meat such as rouladen and sauerbraten. Formed as a log and then sliced and pan-fried, they’re a tasty snack on their own.

What Is Knödel?

Knödel is the German word for dumpling, and as such there are dozens of varieties. The most popular, however, are probably semmelknödel, which are made from day-old bread rolls (semmeln) soaked in warm milk and seasoned with onion, parsley, and a pinch of nutmeg.

There are two basic ways to form bread-based knödel.

  1. The simplest method involves rolling the bread dough into balls, which are then dropped directly into boiling water.
  2. Serviettenknödel (“napkin” dumplings) are made by rolling the dough into logs and then steaming them whole, traditionally in a tied-up cloth but now more often in plastic wrap and foil. After steaming, serviettenknödel are cooled and sliced.

4 Varieties of Knödel

Knödel of all kinds are enjoyed throughout Germany, from Bavaria and the Black Forest in the south to Thuringia—where knödel are called klöße—in the north, as well as in Austria and the Czech Republic.

  • Brezelknödel: Dumplings made with pretzels in place of bread rolls.
  • Speckknödel: Knödel that has pieces of bacon in the dumpling mixture.
  • Kartoffelknödel: Potato dumplings made with mashed potatoes and enriched with potato starch instead of bread.
  • Germknödel: Sweet Austrian knödel made with a yeasted dough and filled with plum jam.

3 Tips for Making Perfect Knödel

  • If you don’t have stale bread, thinly slice fresh bread and toast in a moderately heated oven (around 325°F) until slightly dry, about 10-15 minutes.
  • You can use any type of bread for knödel, simply adjust the amount of milk and eggs depending on how the specific bread absorbs the liquid. White bread, brioche, and other soft, porous breads will quickly soak up moisture, whereas bread cubes made from pretzels, bagels, or kaiser rolls will maintain their shape better and require more liquid to achieve the same level of moistness.
  • If your dough ends up a too wet, don’t worry—add a little flour or breadcrumbs to soak up the extra moisture.

How to Serve Knödel

In Germany, freshly boiled knödel are served as a side dish to accompany hearty fare like braised meat, gravy, roast pork, and lentils. For added flavor and texture, try pan-frying your boiled serviettenknödel in melted butter. Serve pan-fried knödel as an appetizer with ham, sauerkraut, and mustard. Pan-frying works best for knödel made using the log method, since they have a flat surface area that yields even browning.

Ingredients

  1. In a large bowl, combine the bread with enough warm milk to saturate. (You may not need all of the milk.) Let soak for 30 minutes.
  2. In a medium skillet, heat the butter over medium heat. Add the onions and sauté until soft and translucent, about 5-10 minutes. Season with a few pinches of salt, a few turns of freshly ground black pepper, nutmeg, and parsley. Transfer the onion mixture to the bread mixture.
  3. Add half the beaten eggs to the bread mixture and mix with your hands. Continue adding egg and lightly kneading until a wet dough forms. If the dough is too sticky, add a little flour or breadcrumbs. Set aside to rest at room temperature for 10 minutes.
  4. Bring a large pot of salted water to a boil over high heat. Use damp hands to form 2-inch balls with the bread mixture. Working in batches, lower the knödel into the boiling water and cook until firm, about 15 minutes. Using a slotted spoon, transfer to a plate lined with a clean towel to drain.


Interested in cooking classes in Germany to taste this dish?
 

Travel Talks Platform

More about our Facebook Group

Join our Facebook Group

Travel platform to expand your travel knowledge, follow the latest destination news and participate in daily questions, like “Travel Trivia”, “Where in the World” and “Amazing Travel Facts”.

stroopwafel-netherlands

Whats cooking in Netherlands – Stroopwafel

blank

What’s cooking? World recipes

stroopwafel-netherlands

What’s cooking in Netherlands -Stroopwafels


stroopwafel is a circular waffle-type pastry from the Netherlands. The iconic Dutch waffle consists of two pieces of cookies between which a caramel syrup made from molasses is inserted. Over the years, this caramel cookie waffle has become a staple of Dutch street food and has become very popular in the world.

WHAT IS A STROOPWAFEL?

A stroopwafel is a wafer-type cookie from the Netherlands. Etymologically, stroopwafel means “waffle in syrup” in Dutch.

The waffle is baked in a special appliance, called a pizzelle maker or stroopwafel iron, which differs from the traditional Belgian waffle maker. Indeed, this one has shallower plates than a traditional waffle maker and produces much thinner waffles than Belgian waffles.

Thus, the wafers made in this appliance are more crunchy than Belgian waffles. The cookie looks like a sandwich topped with a layer of sticky caramel syrup.

This Dutch waffle is a circular waffle that consists of two layers of cookies 2 to 3 inches (6 to 8 centimeters) in diameter and about 1/6 inch (four millimeters) thick. It is cut in half right out of the pizzelle maker, then garnished with dark brown caramel syrup, obtained from molasses and brown sugar.

The stroopwafel is also very popular in Belgium. It is part of the tradition of Dutch and Belgian street food. They are found in kiosks at fairs.

Also, stroopwafels are particularly widespread in Flanders. They are sold at the October fair in the province of Liège.

Served hot, the stroopwafel is known in Wallonia under the name of lacquemant (lackmans). The syrup used to fill the lacquemant is a syrup flavored with orange blossom. Also, the recipe for this syrup does not include molasses.

WHAT IS THE ORIGIN OF STROOPWAFEL?

The origin of stroopwafels dates back to 1784. At the time, a baker from Gouda (a town also famous for its cheese) tried to make a waffle from leftover baked goods, more specifically crumbs and stale bread.

He pressed the crumbs flat with a waffle iron. According to the story, the first attempt was unsuccessful. The waffles were too dry and crumbled. However, to remedy this problem, the baker stuck two layers of sandwiched waffles with a sticky caramel syrup. The stroopwafel as we know it was born.

Over time, the recipe for stroopwafel has evolved. Today it contains flour, butter, sugar, yeast, eggs, milk and cinnamon. The Dutch pastry became popular in the Netherlands and more particularly with street vendors. They hastened to sell them as snacks.

However, it took more time for stroopwafel to be exported to the other side of the world. It was only when United Airlines introduced them on their morning flights that the stroopwafels entered American territory.

THE TRADITIONAL WAY TO EAT THE DUTCH WAFERS

In the Netherlands, people don’t eat stroopwafels in any fashion. Tasting the stroopwafels is the subject of a very specific ritual.

Indeed, the Dutch place their stroopwafel just above their cup of coffee so that it is perfectly balanced. Thus, the steam of the hot drink (tea or coffee) infiltrates the wafer and slightly softens the underside of the cookie. The wafer sandwich therefore offers several textures when biting into it: melting on one side and crispy on the other.

HOW TO MAKE STROOPWAFEL

To make the best stroopwafels, watch how the wafers cook. In fact, the cooking time varies from one appliance to another. Some prefer them softer and others more crunchy. It is then necessary to adapt the cooking time to taste.

In the stroopwafel recipe presented here, the cookies were baked for 1 minute and 45 seconds, and have a crunchy consistency. Be careful not to overcook the waffles, otherwise they will break as soon as the caramel filling is placed.

The caramel should also be allowed to cool slightly before spreading it over the wafers. If it is still too hot, it will leak on the sides. The original stroopwafel recipe barely shows the syrup between the layers of wafers. Indeed, one should not put too much caramel when filling the cookies because it is very sweet and very sticky.

Ingredients

For the dough

  • 2 cups flour , sifted
  • ½ cup butter (soft)
  •  cup caster sugar
  • 1 egg (at room temperature), beaten
  • 1 tablespoon milk (at 97 F / 36°C)
  • 1 tablespoon active dry yeast
  • ¼ teaspoon salt

For the syrup

  • ½ cup molasses (or cane sugar syrup)
  •  cup brown sugar
  • ½ cup butter , diced
  • ½ teaspoon ground cinnamon

Equipment

  • Stand mixer
  • Baking sheet
  • Pizzelle maker
 

Instructions

Dough

  • In the bowl of a stand mixer, beat the butter, sugar, egg, milk and yeast. Finally add the flour and salt and, using the dough hook, knead until obtaining a homogeneous and fairly firm dough.
  • Cover the dough with a cloth and let it rise for 1 hour in a warm place, away from drafts.
  • Place the dough on a floured work surface and knead it lightly.
  • Divide it into 6 to 8 pieces and form balls about 2 inches (5 cm) in diameter.
  • Place the dough balls gradually on a baking sheet with enough space between them.
  • Cover them with a damp cloth and let them rise for 15 minutes in a warm place, away from drafts.

Baking

  • Bake the stroopwafels in a pizzelle maker, with a shallow rack. The stroopwafels must be flat and thin.
  • As soon as the appliance stops releasing steam, open it and check for doneness. They must be nicely golden.
  • Using a sharp knife, cut each stroopwafel in half horizontally while still warm.

Syrup

  • Combine molasses, brown sugar, butter, and ground cinnamon in a saucepan.
  • Heat and stir until well combined.
  • Let cool.

Assembly

  • In the center of each half of stroopwafel, spread about a tablespoon of syrup and place the second half on top.


Interested in cooking classes in Netherlands to taste this dish?


Travel Talks Platform

More about our Facebook Group

Join our Facebook Group

Travel platform to expand your travel knowledge, follow the latest destination news and participate in daily questions, like “Travel Trivia”, “Where in the World” and “Amazing Travel Facts”.

Gnocchi-Italy

Whats cooking in Italy – Potato Gnocchi

blank

What’s cooking? World recipes

Potato Gnocchi: Recipe, Tips and Tricks

What’s cooking in Italy – Potato Gnocchi: Recipe, Tips and Tricks

Potato gnocchi are apparently easy to make, but they hide a series of small pitfalls that can determine the outcome of a bad dish.

What are the secrets to make potato gnocchi that do not lose shape when cooked, that maintain a smooth texture, soft and palatable, and that have the slight taste of potato and not the annoying flavor of flour?

In this recipe we’ll show you a series of small tricks and tips necessary for those who are recently approaching potato gnocchi recipe and want a safe and satisfactory result on the first try.

Ingredients

  • 500 g (about 1 lb) of Russet potatoes or Yukon Gold Potatoes
  • 150 g (5,3 oz) of “oo” flour
  • 2 tablespoons of 1 beaten egg (about half egg)
  • fine salt

Directions

Step 1) – Wash the potatoes with their skin under fresh water. Then cook them in a large pot with plenty of water. Occasionally, feel with a fork to check the cooking (from 20 to 40 minutes, depending on the size of the potatoes). When they are cooked, drain and peel them.

Step 2) – Place the flour on your work surface and make a well in the center then put the potatoes in a potato masher and mash-up, slowly at the beginning, to let out the excess water. Repeat this until all the excess water will be output from the holes. This way the potato masher have to release only the puree.

All this operation is worth to prevent the dough to soften too much: if this is your case, don’t make the error of compacting it by adding more flour. The best flavored potato gnocchi are those with less flour as possible. If the dough is still too soft, add a teaspoon of starch, but NOT flour.

Step 3) – In a plate beat the egg with a fork. Then add a pinch of fine salt and 2 tablespoons of the beaten egg (this way yolk and egg white are portioned in equal amounts).

 
Step 4) – Mix the ingredients with your hands, quickly and for a short time. A long process would make the dough sticky. Potato gnocchi dough has to be mixed very little and possibly when the potatoes are still warm because the heat favors the assembly.
 
Step 5) – Quickly make a ball and absolutely do not add flour. If you have followed the instructions on how to boil and then drain the potatoes, you will see that it will not be necessary. You will get a soft ball but compact. Now you can work on a wooden surface, if you like. Cut a piece of dough and place it on the floured surface.
 
Step 6) – With your hand make a long roll of dough as thick as a finger. Slice the roll every 2 cm (about 1 inch), so as to obtain small cylinders.
 
Step 7) – Now you have to use agnocchi board previously floured: slide your little gnocchi over the gnocchi board by pressing lightly with your thumb in the middle. Proceed to make potato gnocchi until all the dough is finished. Let rest gnocchi at room temperature for about 20/30 minutes before cooking.
Why potato gnocchi have to rest before cooking?

Resting time is important for many reasons: they completely cool and slightly dry out on the surface. This step is necessary so that gnocchi can retain their shape even after cooking.

In fact, if you put immediately potato gnocchi into the boiling water, they can glue to each other.

On the contrary, if you leave gnocchi rest more then half an hour, they may dry out and become dark and hard. The ideal resting time is around 20 minutes, maximum 30.

How to cook potato gnocchi

Gnocchi cooking should be made in a large pot with plenty of salted water. Gnocchi are dipped into boiling water after being slightly shaken by the flour. Do not stir too much during cooking and especially do not do it quickly. Potato gnocchi are ready when they come fully to the surface.

So drain them few at a time, with a perforated ladle (not with the colander!). Place them into a bowl with the seasoning you prefer (eg: melted butter, sage and lots of parmesan or pesto alla genovese or bolognese sauce or fresh tomato sauce). Stir slightly and serve.


Interested in cooking classes in Italy to taste this dish?

Travel Talks Platform

More about our Facebook Group

Join our Facebook Group

Travel platform to expand your travel knowledge, follow the latest destination news and participate in daily questions, like “Travel Trivia”, “Where in the World” and “Amazing Travel Facts”.

“Colours by Europe, Tastes of excellence.”

blank

What’s cooking? 

“Colours by Europe. tastes of Excellence.”

“Colours by Europe. tastes of excellence.”

BANGKOK, THAILAND – Colours by Europe. Tastes of Excellence campaign, which presents and promotes European Union (EU) agricultural food and beverages products, launched its first in a series of retail activations in Thailand on 15th October, 2021.

The EU is well known for their safe and quality food. The upcoming retail events and promotions will highlight tasty, quality, safe, authentic, and sustainable EU food and beverage products ranging from meat and dairy products, fruits and vegetables to pasta, cereals, oils, sweets, wines, beer, spirits, and more at Central Food Hall.

You can buy and enjoy them with peace of mind because stringent production standards and quality controls are guaranteed for the products through the whole production chain, from farm to fork and at the same time to ensure environmental, social and economic sustainability.

Discover the 300 EU food products on promotion starting this October at Central Food Hall! with exclusive promotions on the featured products. Consumer will receive a limited-edition cotton shopping bag with a minimum spending of 500 Baht and above on the featured EU products on promotion. Consumers can also participate to our lucky draw and stand a chance to win EU food prizes.

You can also visit the campaign’s online sales channel to access all the featured delicious and high-quality EU food products in our exclusive promotions during the campaign period at LINK, Grab application, and Personal Shopper service on LINE @TopsThailand. The series of 4 retail activations will be promoted via in-store displays and promotions, social media, PR and KOLs. Explore the tastes of excellence by visiting our physical booth, or spot our food truck, or visit our online sales channel from now till January 2022. 

Source

Travel to Thailand


Travel Talks Platform

More about our Facebook Group

Join our Facebook Group

Travel platform to expand your travel knowledge, follow the latest destination news and participate in daily questions, like “Travel Trivia”, “Where in the World” and “Amazing Travel Facts”.

'Home' cooking at Martha Stewart's first restaurant

‘Home’ cooking at Martha Stewart’s first restaurant

blank

What’s cooking? 

blank

‘Home’ cooking a key ingredient at Martha Stewart’s first restaurant

For her first restaurant, set to open at Paris Las Vegas this spring, lifestyle maven Martha Stewart will evoke her own country farmhouse.

The Bedford by Martha Stewart, with 194 seats, will be designed with the aesthetic of the brand she has cultivated for decades in broadcasting, publishing and merchandising.

Seasonal, farm-to-table ingredients will be emphasized on dinner, weekend brunch and holiday menus. Purveyors will include Las Vegas Farmers Market, D’Artagnan Foods, Urbani Truffles, Roe Caviar, Frog Hollow Farm, Jasper Hill Farm and Vermont Creamery.

“Our menu will be delicious, depicting the very same kinds of foods I serve my friends and family,” Stewart said. “The architecture and decoration of the spaces cleverly exemplify the beauty and atmosphere you might find at my beautiful farm in Bedford, N.Y. Dining at the Bedford will be immersive, fun, unexpected and utterly delectable.”

Stewart’s well-known functional and practical lifestyle will be found in the decor with a bring-nature-indoors concept. A neutral palette will act as a backdrop to seasonal colors.

“Martha Stewart is one of the most celebrated voices in hospitality, and we are truly honored that she’s chosen Paris Las Vegas as the home for her very first restaurant,” said Jason Gregorec, senior vice president and general manager of Paris Las Vegas. “When we open the doors, the Bedford by Martha Stewart will be a dining experience you simply can’t get elsewhere.”

Paris Las Vegas is also the home of Chef Joho’s Eiffel Tower Restaurant, French-bistro Mon Ami Gabi and Gordon Ramsay Steak. It includes quick-service options such as Brioche by Guy Savoy and, soon, Bobby’s Burgers by Bobby Flay. Lisa Vanderpump’s second Las Vegas venue, Vanderpump a Paris, and a new Nobu restaurant and lounge are also planned.

Source

Travel to Las Vegas


Travel Talks Platform

More about our Facebook Group

Join our Facebook Group

Travel platform to expand your travel knowledge, follow the latest destination news and participate in daily questions, like “Travel Trivia”, “Where in the World” and “Amazing Travel Facts”.

pasteis-de-belem

What’s cooking in Portugal – Pastéis de Nata – Portuguese Custard Tarts

blank

What’s cooking? World recipes

what is cooking - recipe Israel Shakshuka


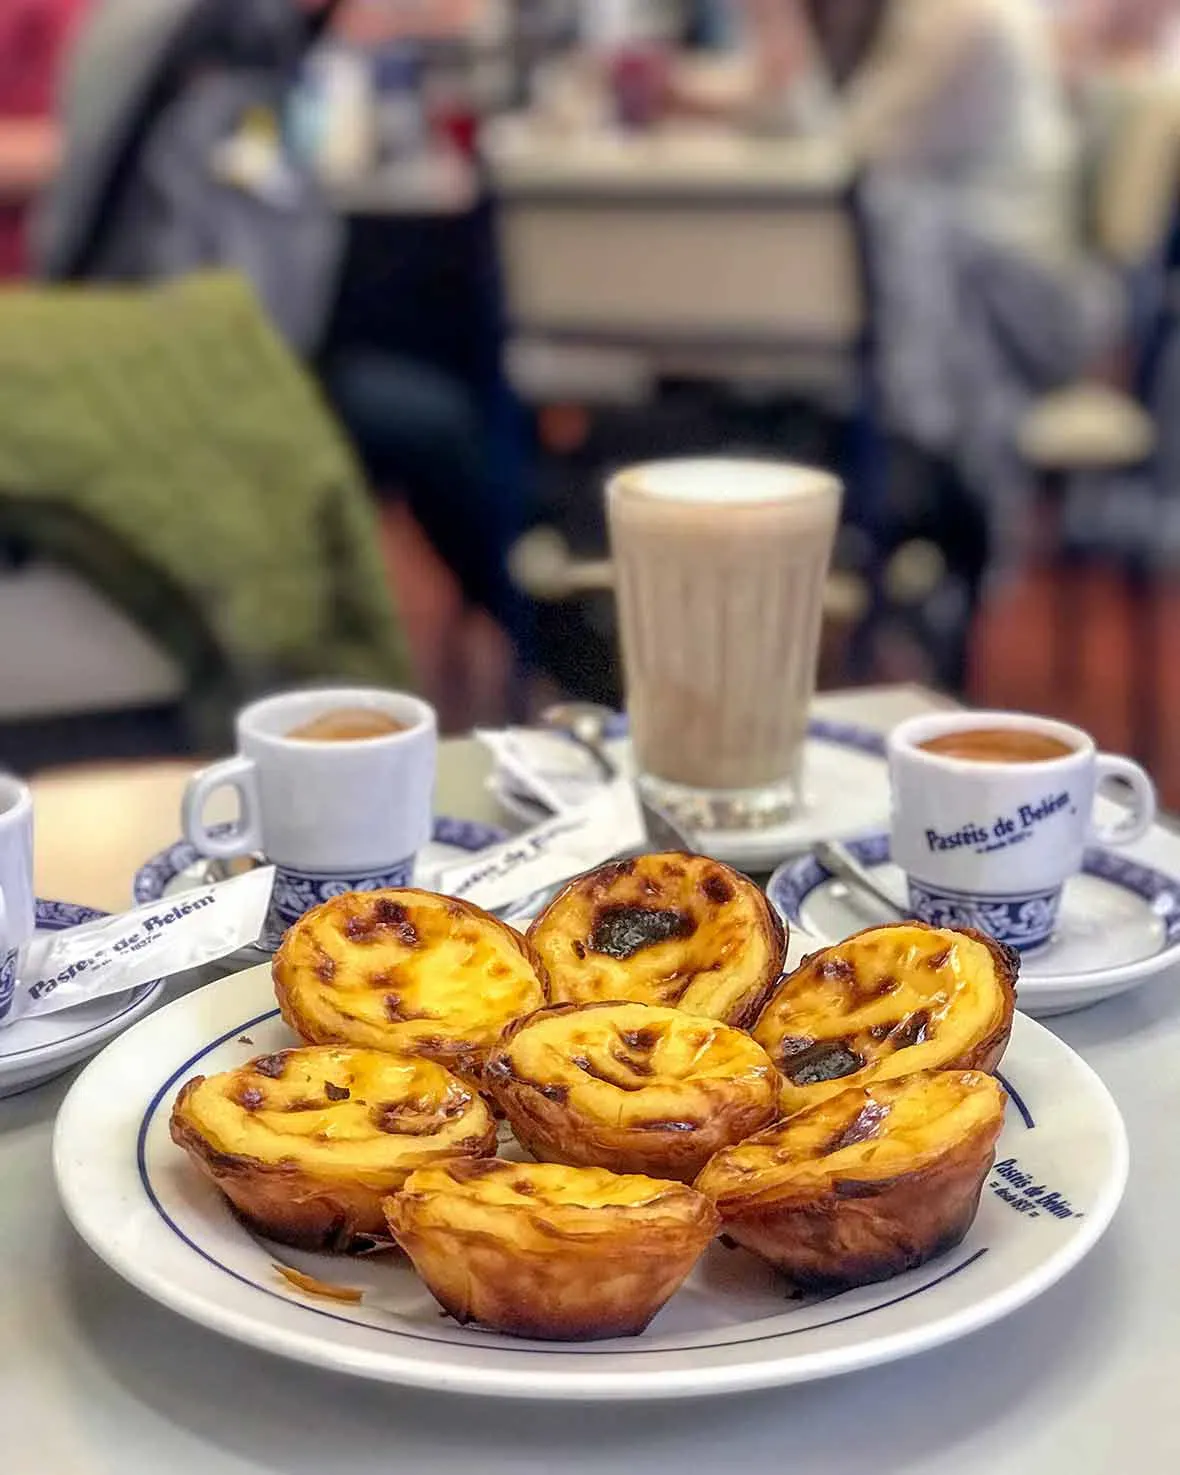
This pastéis de nata recipe makes as-close-to-authentic Portuguese custard tarts with a rich egg custard nestled in shatteringly crisp pastry. Tastes like home, even if you’re not from Portugal.

These Portuguese custard tarts are facsimiles of the true pastéis de Belém pastries from the Antiga Confeitaria de Belém (below), where they churn out more than 22,000 pastries each day. When you make that many a day, you get damn good at it. There are all kinds of reasons why the original pastéis de nata from this pastry shop are so freaking good. Secret recipes, teams of folks who do nothing but make the pastry dough or whip up the filling.

In order to translate the pastéis to the home kitchen and to ovens that that hit 500°F if you’re lucky, these pastéis are smaller than the original. and the tops may not brown quite as much as the authentic pastéis in the picture, which are from the confeitaria. Still, that hasn’t stopped the flood of rave reviews below. The secrets to making spectacular authentic Portuguese custard tarts at home are few and simple.

When making the pastry, make sure the butter is evenly layered, all excess flour is removed, and the dough is rolled very thin and folded neatly. As for the custard, you’ll need a thermometer to accurately gauge the custard. These are best eaten warm the day they’re made. Originally published June 26, 2004.–David Leite.

For the Dough:
For the Sugar Syrup:
For the Custard Base:

Directions

Instructions Checklist
  • Combine flour, salt, and cold water in a bowl. Mix with a wooden spoon until dough just comes together and pulls away from the sides of the bowl. Dough should be sticky; adjust with more flour or water to achieve what’s shown in the video.

  • Transfer dough onto a well floured surface. Dust a little more flour over the top. Knead for a minute or two to form a round. Cover and let rest for 15 to 20 minutes.

  • Roll dough into a square about 1/8 inch thick, dusting with flour as necessary; dough should still be sticky.

  • Spread 1/3 of the butter over 2/3 of the square using a silicone spatula, leaving a 1/2 inch border. Flip the unbuttered side over the middle of the square and fold the opposite end over it like a letter. Straighten the edges as needed.

  • Turn dough with a bench scraper to unstick it from the counter; dust with flour. Flip and sprinkle more flour on top. Roll dough into a 1/8-inch-thick rectangle, carefully stretching edges as needed. Spread another 1/3 of the butter over 2/3 of the dough. Fold into thirds. Transfer onto a lined baking sheet and freeze until butter is slightly chilled, about 10 minutes.

  • Sprinkle dough with flour and roll into a square a little over 1/8 inch thick. Spread remaining butter over the dough, leaving a 1- to 1 1/2-inch border on the top edge. Dip your finger in water and lightly moisten the unbuttered edge. Roll dough into a log starting from the bottom edge. Dust with more flour and polish the ends as needed. Seal with plastic wrap and refrigerate at least 2 hours, preferably overnight.

  • Combine sugar, 1/4 cup plus 1 tablespoon water, cinnamon, and lemon zest in a pot. Boil over medium heat, without stirring, until syrup reaches 210 to 215 degrees F (100 degrees C). Remove from heat.

  • Preheat oven 550 degrees F (288 degrees C). Grease a 12-cup muffin tin.

  • Whisk flour, salt, and cold milk together very thoroughly in a cold pot. Cook over medium heat, whisking constantly, until milk thickens, about 5 minutes. Remove from heat and let cool for at least 10 minutes.

  • Whisk egg yolks into the cooled milk. Add the sugar syrup and vanilla extract. Mix until combined. Strain custard into a glass measuring cup.

  • Unwrap the dough and trim any uneven bits on the ends. Score log into 12 even pieces using a knife; cut through.

  • Place a piece of dough in each muffin cup. Dip your thumb lightly in some cold water. Press thumb into the center of the swirl; push dough against the bottom and up the sides of the cup until it reaches least 1/8 inch past the top. Fill each cup 3/4 of the way with custard.

  • Bake in the preheated oven until the pastry is browned and bubbly, and the tops start to blister and caramelize, about 12 minutes. Cool tarts briefly and serve warm.

spotted in bbcgoodfood

for more information about Israel

Travel Talks Platform

More about our Facebook Group

Join our Facebook Group

Travel platform to expand your travel knowledge, follow the latest destination news and participate in daily questions, like “Travel Trivia”, “Where in the World” and “Amazing Travel Facts”.

shakshuka israel recipe

What’s cooking in Israel – Shakshuka

blank

What’s cooking? World recipes

what is cooking - recipe Israel Shakshuka

Shakshuka is an easy, healthy breakfast in Israel

(or any time of day)  and other parts of the Middle East and North Africa. It’s a simple combination of simmering tomatoes, onions, garlic, spices and gently poached eggs. It’s nourishing, filling and one recipe I guarantee you’ll make time and again.

Make our easy shakshuka for a comforting brunch. Vary this dish by flavouring the simple tomato sauce with whatever you have to hand – curry powder, pesto or fresh herbs

Ingredients

  • 1 tbsp olive oil
  • 2 red onions, chopped
  • 1 red chilli, deseeded and finely chopped
  • 1 garlic clove, sliced
  • small bunch coriander stalks and leaves chopped separately
  • 2 cans cherry tomatoes
  • 1 tsp caster sugar
  • 4 eggs

Method

  • STEP 1

    Heat the oil in a frying pan that has a lid, then soften the onions, chilli, garlic and coriander stalks for 5 mins until soft. Stir in the tomatoes and sugar, then bubble for 8-10 mins until thick. Can be frozen for 1 month.

  • STEP 2

    Using the back of a large spoon, make 4 dips in the sauce, then crack an egg into each one. Put a lid on the pan, then cook over a low heat for 6-8 mins, until the eggs are done to your liking. Scatter with the coriander leaves and serve with crusty bread.

spotted in bbcgoodfood

for more information about Israel

Travel Talks Platform

More about our Facebook Group

Join our Facebook Group

Travel platform to expand your travel knowledge, follow the latest destination news and participate in daily questions, like “Travel Trivia”, “Where in the World” and “Amazing Travel Facts”.

blank


Private Facebook group
for the travel industry

Travel Talks Platform Group


5.8k members

Travel Talks Platform for the travel industry

Follow the travel news – Traveltalksplatform is the number 1 news site to stay updated on amazing travel facts, the latest news, events, incentive ideas, MICE news, job opportunities and shows.

Specially composed for the travel industry, you will find the latest travel facts at your fingertips.

Submit


Subscribe

Stay updated about the latest travel news worldwide

blank

The latest airline news, hotel news, cruise news and MICE news in your inbox:
Stay updated about
the latest travel news worldwide


Copyright © 2021 e-motions international

disclaimer:

We assume no responsibility or liability for any errors or omissions in the content of this site. The information contained in this site is provided on an "as is" basis with no guarantees of completeness, accuracy, usefulness or timeliness.